You can create a tiling pattern from a surface, DMT file or symbol on your target object. Tiling creates copies of the original tile in rows and columns. The rows are separated by vertical spacing and the columns by horizontal spacing.
To create a tiling pattern:
- Specify the start position for the first tile in the tiling pattern on the target object, using the layout controls on the Wrapper Layout page of the Wrap Wizard.
- Select the option next to
Tile Setting
to activate the tiling functionality:
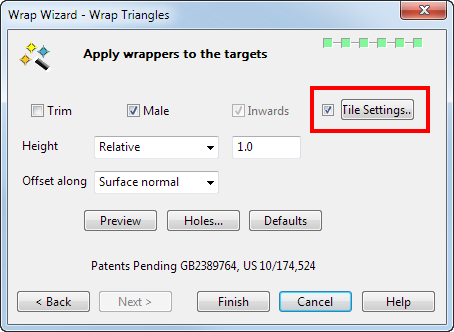
- Click the
Tile Settings button.
The Tile Settings dialog is displayed, containing four tiling controls for creating a tiling pattern using the wrapper item:
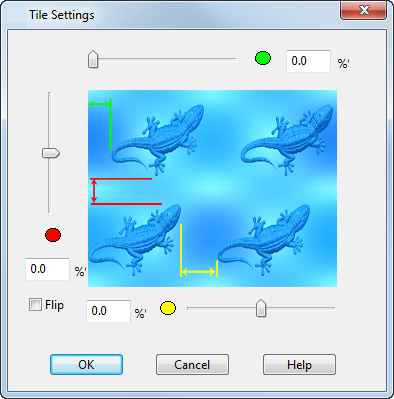
You can use a combination of the four tiling controls to create the desired tiling effect, or leave the values at zero to create tiling with the default values. You can enter the values directly or use the sliders to set the values.
-
 Tile with offset — Enter a percentage of the corresponding dimension of a tile to offset each row to the right. This results in a stretcher-like pattern similar to that of a brick wall.
-
 Tile with vertical spacing — Use the slider to increase or decrease the vertical spacing between the tiles, or enter a value to specify the percentage of the total spacing in the vertical direction.
-
 Tile with horizontal spacing — Use the slider to increase or decrease the horizontal spacing between the tiles, or enter a value to specify the percentage of the total spacing in the horizontal direction.
- Flip — Select this option to flip the alternate tiles. This option is unavailable when wrapping a surface.
-
- Click OK to create a tile using the values displayed on the dialog or accept the default zero values. Tiling is created when you select Finish on the Wrap Selection page of the Wrap Wizard.