Use the Wrap Triangles page to wrap the relief onto the surfaces and solids.
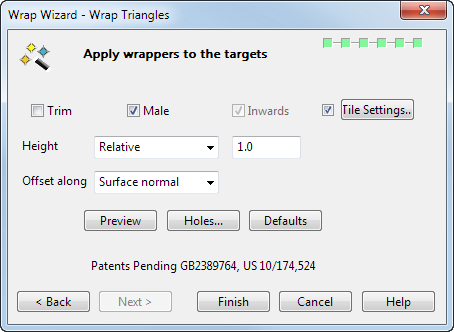
If the selected wrapper is a solid or one or more surfaces, then the result of wrapping the selection onto the target is also a solid or one or more surfaces.
-
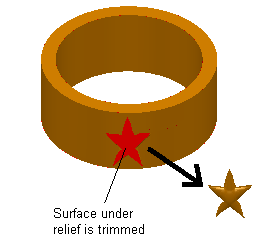
Trim — Select this option to trim the objects to the outer boundary of the relief.
-
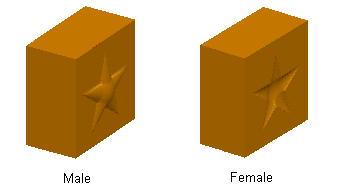
Male — Select this option to offset along the normal or workplane vector, and create a male wrap. Deselect this option to offset in the opposite direction, and create a female wrap.
-
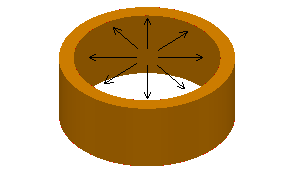
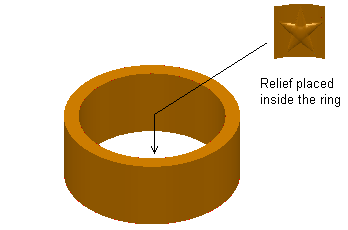
Inwards — This option is most likely needed when using cylindrical projections. Select this option to project the relief from outside the model, inwards towards the centre of the cylinder.
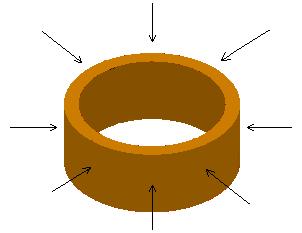
A relief node is placed on the first surface it encounters.
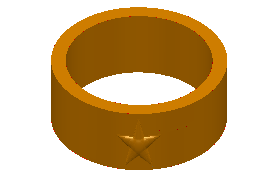
Deselect this option to project the relief outwards from the centre of the cylinder.
The relief is placed inside the ring.
- Tile Settings — This creates a tiling pattern on the target using the selected wrapper. Select this option to activate the Tile Settings button. Click the Tile Settings button to display the Tile dialog.
-
Height — This controls the height of the wrap. There are three options:
- Relative — Enter a value in the text box to multiply the "natural" height for the relief.
- Preserve — The height of each node is as given in the dmt file.
- Maximum — Enter a value to specify the maximum height of the highest node. The heights of all the other nodes are set proportionally to preserve the appearance of the relief.
-
Offset along — This controls the offset direction of the wrap. Select:
- Surface normal to offset each node of the wrapper triangles in the direction of the surface normal by the height specified in the Height box.
-
Fixed direction
to offset each node of the wrapper triangles in the fixed direction, entered in the
X,
Y,
Z boxes, to the height specified in the
Height box.

- Preview — This previews the wrapping of the triangles from the dmt file onto the objects.
-
Holes — This displays the
Hole Filling dialog, which sets options for filling holes caused by gaps in the model.
Note: This option is not available when creating solid wrap features, or if Globally is selected as the method to minimise distortion. The resulting wrap goes around the holes without distortion and the holes remain unfilled.
- Defaults — This changes the settings on the dialog back to their default values.
-
Finish
— This wraps the surfaces, solids or triangles from the dmt file onto the objects and the
Wrap Wizard completes.
If you create a wrap using the Surface tab > Create panel > Wrap option, the wrapper has no dependencies on the target surface and the two objects are unconnected.
If you create a wrap using the Solid tab > Feature panel > Wrap option, dependencies are created between the wrapper and the target object and a wrap feature
 is created in the Solid Feature Tree. This allows the wrap feature to be modified.