A Trimming Line is a curve which represents the flattened volume of a flange part before it is formed. The part is unfolded, bend-by-bend, to produce a flat pattern defining its perimeter. The curve is then projected on to an addendum surface. This is useful when cutting flange parts from sheet metal, which will then be bent into a final shape or orientation.
Note: To access the Trimming Line module, turn on Toolmaker by selecting Wizard tab > Toolmaker On.
To create a Trimming Line:
- Create an
addendum surface.
Note: See Surface Modelling section for more information.
- Click Wireframe tab > From Selection panel > Wrap > Trimming Line.
The Trimming Line Creation dialog is displayed:
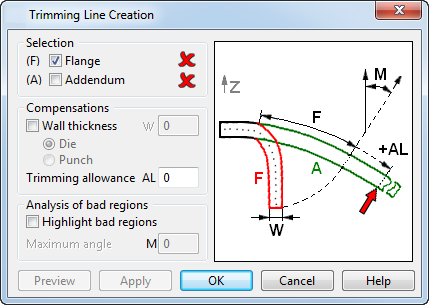
- Use the options in the dialog to create the trimming line:
Selection
-
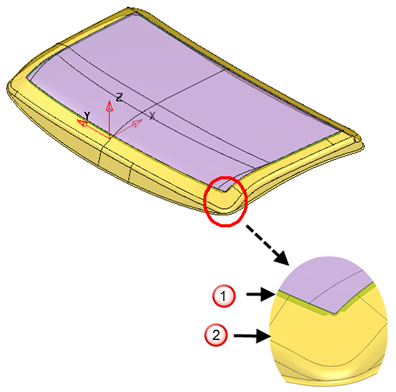
Flange
— Select the flange surface (F). On the model below, this surface is indicated by
 . If the flange surface contains holes, the trimming lines of these holes are created as composite curves.
-
Addendum
— Select the addendum surface (A). On the model below, this surface is indicated by
 .
.
Compensations
The values set in this section are incorporated into the calculation of the Trimline:
- Wall thickness — Specifies the thickness of the flange. Select this option to use the thickness (W) when calculating the Trimline.
- Die — Select this option to apply the wall thickness when creating a die.
- Punch — Select this option to apply the wall thickness when creating a punch.
- Trimming Allowance — Additional allowance to ensure that there is sufficient metal to create the required flange surface.
Analysis of bad regions
- Highlight bad regions — Select this option to highlight trim lines that are on a slope that is too steep. The slope of the addendum surface where the Trimline is created should be as gentle as possible.
- Maximum of good angle — If Highlight bad region is selected, you can enter an angle. Any Trimline on a slope steeper than this angle is highlighted.
-
Flange
— Select the flange surface (F). On the model below, this surface is indicated by
- Click OK to create the trimming line and close the dialog.