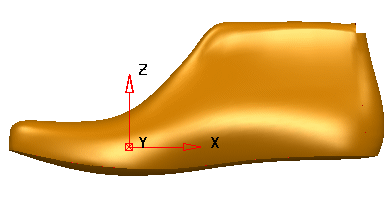
Use this morphing method to bend a portion of a model, such as when altering the toe-spring of a shoe.
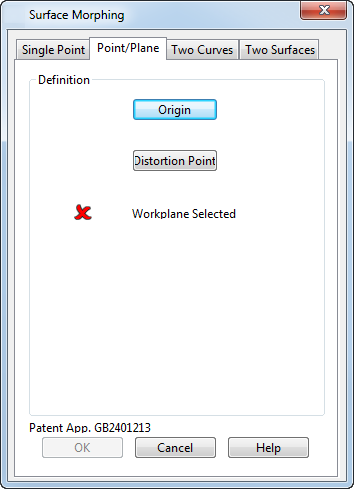
This morphing method uses two points:
- Origin. —This usually lies on the surface.
- Distortion point — This can lie anywhere in space.
The origin point moves to distortion point.
When this page on the dialog is displayed, a point is marked on the objects to show where the origin and distortion points lie. Both points initially lie in the same position
 until one of them is redefined.
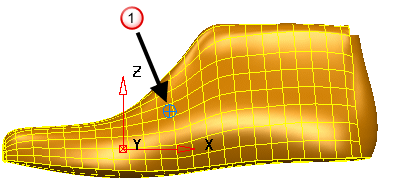
- Click
Origin to display the
Position
dialog. Use this to enter a new origin by selecting a point on the surface or solid. When you enter a new origin, the mark moves to the new position
 . You can also drag the origin point to move it.
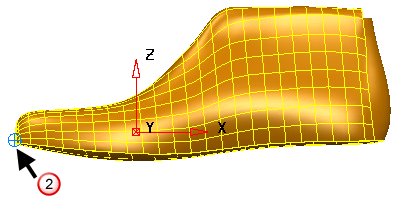
- Click
Distortion Point to display the
Position
dialog. Use this to enter the new position of the origin point. A point is drawn to mark where the distortion point lies
 and a line is drawn from the point to the origin. You can also drag the distortion point to move it
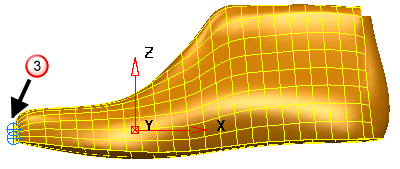
- Create and select a workplane on the surface. The icon changes from
 to
to
 . This selectiondetermines the region of the objects to alter. If a region of the object lies on the same side of the plane as the origin point, its points are moved
 , otherwise, the region remains unchanged
 . If no workplanes exist in the model, the world workspace is automatically used.
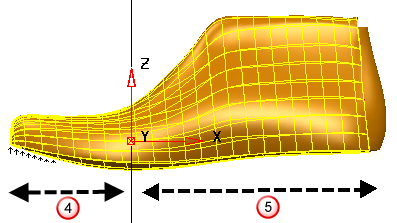
Points are moved in the same direction by an amount depending on their distance from the plane to keep a smooth shape. All points that are the same distance from the plane are moved by the same amount.
- Click OK to create the morph.
Tip: The principal plane is selected by choosing one of the buttons
 from the
Status
bar. For example, to select the YZ principal plane, select the
X button.
from the
Status
bar. For example, to select the YZ principal plane, select the
X button.
from the
Status
bar. For example, to select the YZ principal plane, select the
X button.