The Define corner types page lets you specify the type of corner for each corner of the die block.
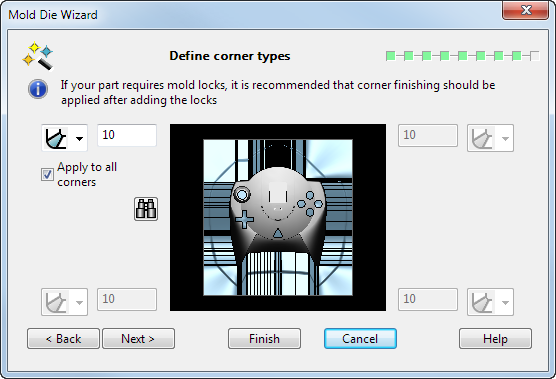
- Use the drop-down list to select the type of corner you want to add to the die inserts and enter the value for the corner finish.
The default value for the value is 10mm, but if the block is so small that this may cause problems, a smaller default value may be used.
- Select
Apply to all corners if you want all four corners to be the type and size selected. If this option is selected, the other three sets of options become active and the user can then choose a different corner finishing for each corner.
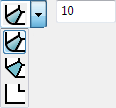
 — Adds fillets. Input the corner radius value.

 — Adds chamfers. Input the distance value.
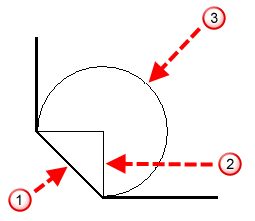
The distance used to create the chamfer is determined as follows:
 Chamfer
 Distance
 Arc with radius equal to distance
 — Adds no corner finish.

The Corner Type options are not available when creating non-inserted plates.
- Use
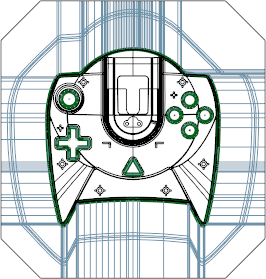
Preview
 to view the block with the selected corner finishes applied. If the settings cause a problem (for example, the product sticks out of the block), an
Error dialog will be displayed. Click
OK and adjust the settings to correct the problem.
to view the block with the selected corner finishes applied. If the settings cause a problem (for example, the product sticks out of the block), an
Error dialog will be displayed. Click
OK and adjust the settings to correct the problem.
- Click Next to display the Simulate core/cavity split page of the Mold Die Wizard, or Finish to complete the wizard operation using default values where necessary.
Note: When you select
Next or
Finish, the wizard will only proceed if the selected corner settings do not cause a problem. If the settings cause a problem (for example, the product sticks out of the block), the wizard will display the
Error dialog and remain on the current page so that you can see the problem and adjust the corner type or value accordingly.