Use the Region feature to extrude multiple nested regions, and create a single primitive solid:
- Select the wireframe or text objects that make up the regions you want to extrude.
- Click Solid tab > Create panel > Region.
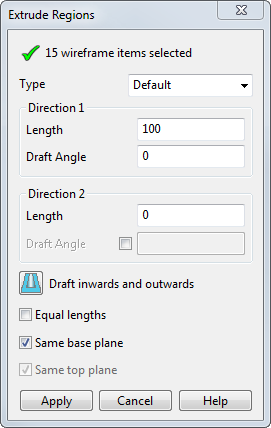
The Extrude Regions dialog is displayed:
- Select the type of extrusion from the
Type
drop-down list.
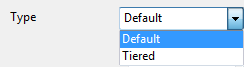
Default creates extrusions from the wireframe or text items.
Tiered uses the height of the wireframe or text items to define the height of the extrusions. A modified dialog is displayed.
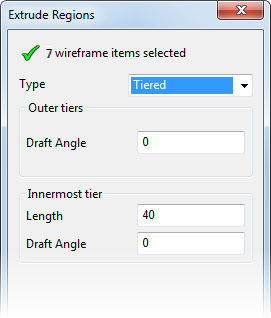
The Innermost tier can be:
- positive, to define a boss-like tier.
- negative, to define a cut-like tier.
- zero, if you want a neutral tier.
- Enter the Length (Direction 1) of the extrusion. The length of the extrusion can be zero if the length specified in Direction 2 is non-zero.
- Enter the
Draft Angle (Direction 1). This is the draft angle between the base curve of the extruded surface and the curve at the other end. The angle is measured from the axis normal to the principal plane.
- Enter the Length of the extrusion (Direction 2).
- Enter the Draft Angle (Direction 2).
- Click
 or
or
 to specify if the draft angle is to go in or out. If selected, in/out draft is added to each region alternately.
- Select Equal lengths to set the same Length for Direction 1 and Direction 2. If this option is selected, updating one length changes the other length.
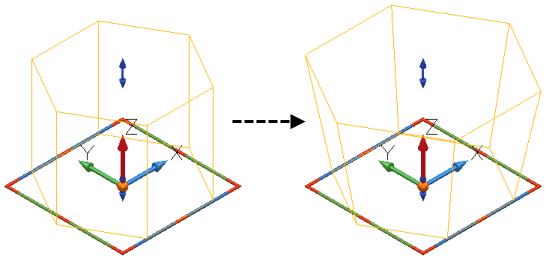
- Define the extrusion plane:
- If Same base plane is selected, the inner and outer wireframe or text are extruded from the same plane. This option is selected by default.
- If Same top plane is selected, each region of the solid is extruded up to the height of the outer wireframe or text.
- Click Apply to extrude the regions and create the primitive solid.