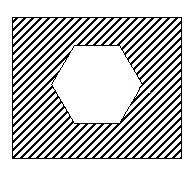
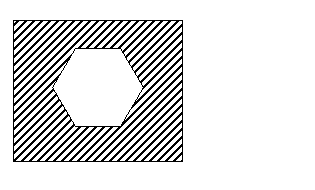
When an outer region contains smaller inner regions or islands, you can hatch the outer region without hatching the inner ones. Island regions are those which do not touch the outer one, as shown on the right:

To hatch an outer region:
- Click Annotation tab > Hatch panel > Pattern.
- Select a hatch pattern from the split button menu.
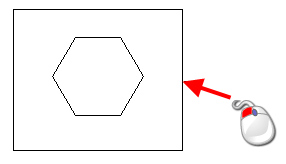
- Select an object of the outer boundary:
The Create Hatch toolbar is displayed:

- Use the toolbar to select the outer hatch boundary. This control panel is used in the same way as the Composite curve toolbar.
- Click the Save
 button. The selected hatch pattern is added to the selected region:
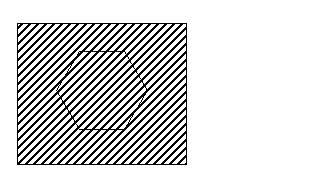
-
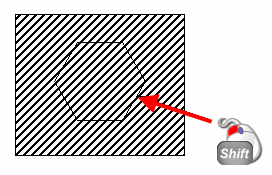
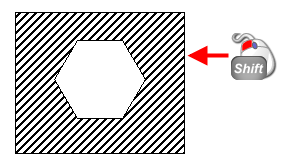
Shift+Click an object in the inner boundary to display the Create Hatch toolbar:
- Use the Create Hatch toolbar to select the objects in the inner boundary.
- Click the Save button. The hatch pattern of the outer region is removed from the inner the region:
To toggle the hatching to hatch an inner region:
-
Shift+Click the outer boundary. This displays the Create Hatch toolbar.
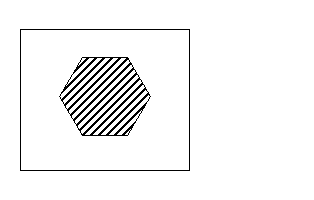
- Click the Save button . The hatch pattern is toggled:
To hatch an inner island:
- Use Shift +Click to select one of the objects of the inner island. This displays the Create Hatch toolbar.
- Use the Create Hatch toolbar to create the hatch boundary from the inner island.
- Click the Save button to create the hatch:
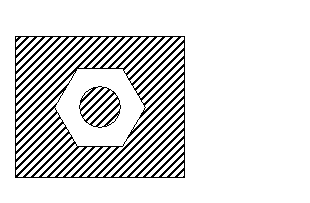
Both the outer region and inner island are part of a single hatch object. If you edit one, the other is edited too.
Note: If a composite curve is selected, the Create Hatch toolbar is not displayed and the hatch is automatically created.