You can create a copy of a material and customize it to create your own material shading effects.
To create a customizable material:
- Select Visualisation tab > Format panel > Materials to display the Material Selection dialog.
- Select the material you want to customize.
- Click
Custom to display the
Material Editor dialog:
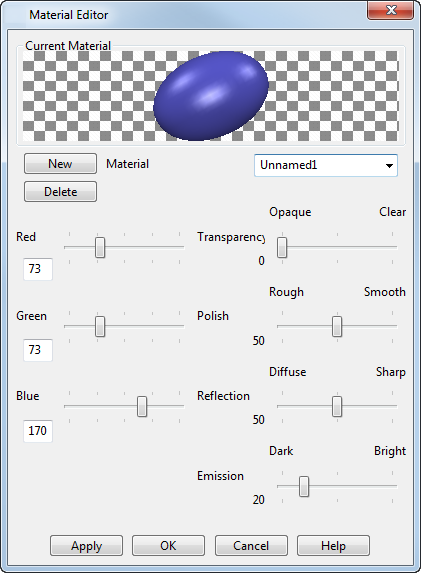
- Use the options on the dialog to create a new material, as follows:
- New — Creates a new material as defined by the current slider settings. A default name is given to the material, which is displayed in the Material text box. You can use the Material text box to edit the name.
- Delete — If a user-defined material is selected, the material is deleted. You cannot delete a standard material.
-
Sliders — If a user-defined material is selected, adjust the sliders to change the
Transparency,
Polish,
Reflection and
Emission until the effect you want is displayed. You can also adjust the colour using the
Red,
Blue and
Green
sliders or by entering values in the text boxes.
The shading effects from the changes you make on this dialog depend on the original material. For example: if you started with a metal, only the colour changes will take effect in shaded images.
- Apply — Saves the changes. The dialog remains open so you can continue making changes.
Note: You can't change any properties for the wood materials. You can change properties for most of the simple materials such as Satin and Autumn. - Click OK to save the changes and close the dialog.
If a surface or a solid is selected when you create the new material, the material is automatically assigned to the object. You can assign the material to other objects too by selecting it from the drop-down list on the Material Editor dialog.