You can transform one or more regions of the mesh model. The regions are defined by planes.
To morph a mesh using planes:
- Select the mesh.
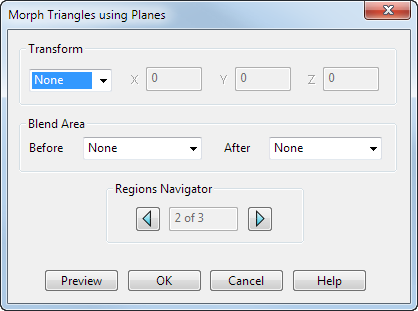
- Click Mesh Tools tab > Triangles panel > Morph using Planes to display the
Morph Triangles using Planes dialog. The options displayed on the dialog reflect the selected region:
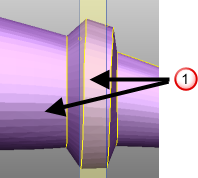
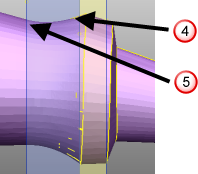
Two planes are used to define the regions of the model:

- Adjust the position of a plane by double-clicking the plane and modifying the coordinates using the Plane dialog.
- Choose a
Transform option. Select:
- None to have no blending between the central region and the outer regions.
- Move to move the region between the two planes. Enter X, Y, and Z values to indicate the amount to move along the axes.
-
Rotate to rotate the region between the two planes. Enter a rotation
Angle. Click the
Reposition
 button to define a new rotation origin.
-
Scale to increase or decrease the size of the region by entering a scale
Factor. For example, to increase the size of the region by 20% enter a
Factor
of
1.2. By default,
Factor is applied in all directions. Use the
Lock
 buttons to suppress scaling in a specific axis.
Click the Reposition
 to define a new position for the scale origin.
- Offset to define the offset for the region. Enter an offset Distance.
- Specify the
Blend Area to be used
Before
and
After
the transform region. Additional planes are added to the model to define the blend region.
The following blend types are available:
-
None
does not create a blend between the transformed region and the adjoining regions
 :
:
-
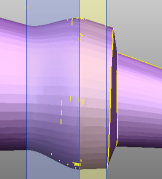
Smooth creates a smooth curve between adjoining transform regions. The curve is tangential at both edges of the blend region:
-
Linear creates a straight-line blend between the two transform regions:

-
Smooth to Sharp creates a smooth to sharp blend between the previous region and the current region. This creates a transition that uses a tangential curve next to the first transform region
 , and a linear blend next to the second transform region
 :
:
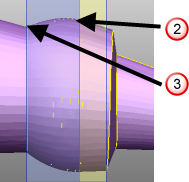
-
Sharp to Smooth
creates a sharp to smooth blend between the previous region and the current region. This creates a transition that uses a linear blend next to the first transform region
 , and a tangential curve next to the second transform region
 :
:
-
None
does not create a blend between the transformed region and the adjoining regions
- Use the buttons on the Regions Navigator to specify the region to be morphed.
- Click Preview to view the morph.
- Adjust the options if necessary.
- Click OK to morph the region.