Note: Before you begin, make sure the project and all drawings are closed.
When you open a project created in an earlier version, the Project Migration wizard starts. It displays the Project Migration Launch dialog box. During the migration process, you can backup the project and associated drawings. A backup ensures that the project still opens in the earlier version. If you cancel the migration process, the project and its related files return to their original state.
- In the Project Manager drop-down list, click Open.
- In the Open dialog box, navigate to the folder that contains the project you want to migrate.
- Click the project.xml file. Click Open.
The Project Migration wizard starts.
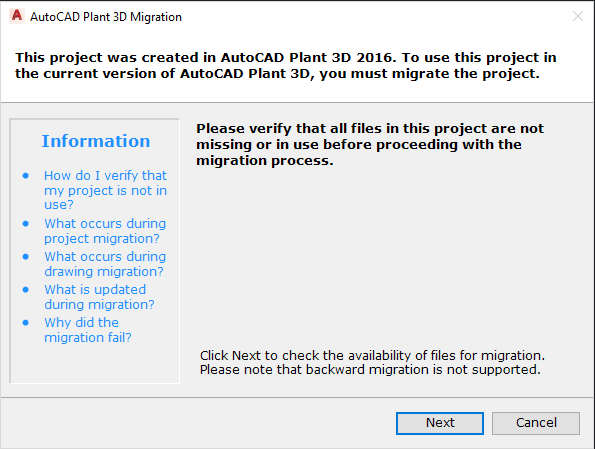
- Verify that the project and its related drawing files are closed. On the Project Migration Launch page, click Next.
- If the File Unavailable page is displayed, your project has files that are missing
 or currently in use
  . Find and close all project files. On the File Unavailable page, click Exit and repeat steps 1-5.
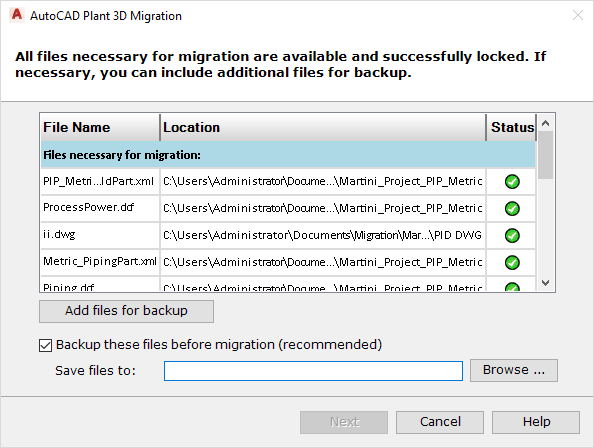
- To back up the files, on the File Available page, select Backup These Files Before Migration (Recommended), if it is not already selected. To add other files to the backup, click Add Files For Backup, find and select the files you want to add, and click Open. (To remove an added file, click Remove.) Note:
It is recommended that you back up your files in case they require further work in an earlier version.
- Click Browse and specify a location to store the backup files.
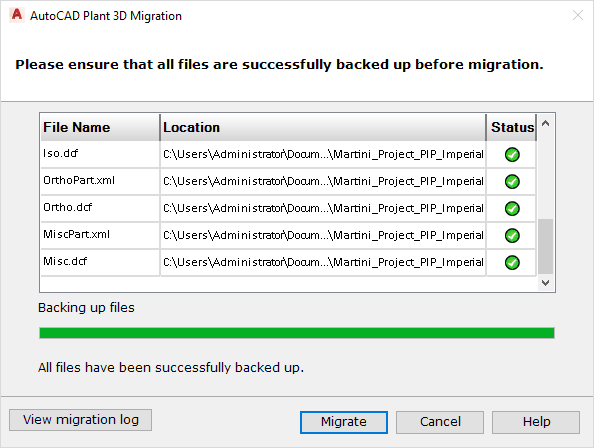
- Click Next. The Project Migration Backup page shows the progress of the backup and indicates whether it successfully backs up each file.

- Click Migrate. The Project Migration Progress page indicates the progress of the migration.
- Click Finish. The project opens.