In this exercise, you work in elevation and plan views to add windows to the model. You use alignment and dimension tools to more precisely position the windows.
|
Before you begin, download the GSG_07_place_windows.rvt file. Download this zip file (if you have not already downloaded the exercise files for the tutorials.)
Objectives
- Place windows.
- Duplicate and modify a window type to create a different window size.
- Use the Aligned dimension tool to reposition windows to be equidistant from each other.
- Use the Align tool to position windows.
 Watch the video
Add Windows
- Place windows:
- Open project GSG_07_place_windows.rvt.
- In the Project Browser, under Floor Plans, double-click 01- Store Floor.
- Click Architecture tab
 Build panel
 (Window).
- In the Type Selector, verify that M_FIXED 0610 x 1220mm is selected.
- Click to place a window in the Office (104) and place 3 windows, as shown, in the break room (105).
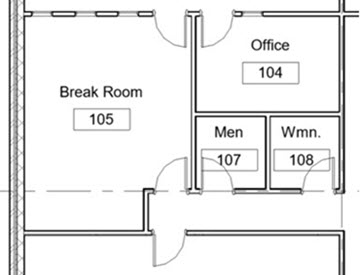
- Place 4 windows in the exterior wall at the Break room (105) as shown.
- Press Esc twice to exit the Window tool.
- Create a window type:
- In the drawing area, select a window in the exterior wall, and on the Properties palette, click
 (Edit Type).
- In the Type Properties dialog, click Duplicate.
- In the Name dialog, enter 610 x 610 mm, and click OK.
- Under Dimensions, for Height and Width, enter 610, and click OK.
- Select the other windows in the exterior wall, and in the Type Selector, select M_Fixed 610 x 610 mm.
- In the drawing area, select a window in the exterior wall, and on the Properties palette, click
Dimension Windows For Equal Spacing
- Open the 01 - Store floor plan.
- Click Annotate tabDimension panel
 (Aligned).
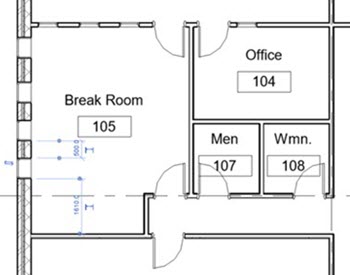
- Select the north wall of the Break Room (105), select each of the window centerlines, and then select the south wall of the break room.
- Click to the left of the west wall to place the dimension line.
Note that each of the 4 dimensions is different.
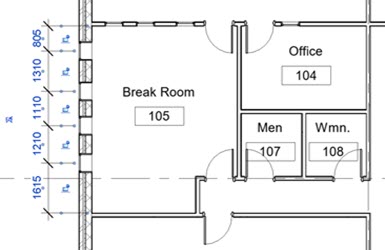
- Click the equality symbol (EQ), and then press Esc twice.
The windows are moved so that all of the dimensions are equal.

- Select the interior wall to the north side of the break room; position the cursor over the wall, and when you see the move icon
 , drag the wall up or down to see how the design intent is maintained.
Align Windows
- Open the west elevation.
- Click Modify tabModify panel
 (Align).
- Click the top of the reveal in the wall, and click the bottom edge of the trim of the far right window.

- Repeat the same steps to align the other windows with the reveal in the wall.

- Click
 (Modify).