Use the Gutter tool to add gutters to roofs, soffits, model lines, and fascia.
- Click Architecture tab
 Build panelRoof drop-down
 (Roof: Gutter).
 - Highlight horizontal edges of roofs, soffits, fascias, or model lines, and click to place the gutter. Watch the status bar for information about valid references.
As you click edges, Revit LT treats this as one continuous gutter.
- Click Modify | Place Gutter tabPlacement panel
 (Restart Gutter) to finish the current gutter and start a different gutter.
 - Move the cursor to a new edge, and click to place.
- To finish placing gutters, click on white space in the view.
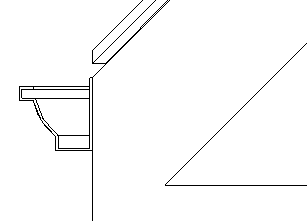
Gutter in section