Learn about SQL Administration tasks that apply to Autodesk Vault.
Default SQL Server Administrator Account and Password
Microsoft SQL Server creates a default administrator account named SA. This account has full administrative privileges as well as ownership of system tables. When Vault installs SQL Server, it will configure the SA account with this default password. As long as you do not change the sa account password, the ADMS Console will not require you to enter it for commands that require a password.
If the sa account password is changed, you must enter the new password when you perform certain administrative commands which require it, such as attaching vaults.
SA Account Password Default
- The default password for the SA account is AutodeskVault@26200.
A system administrator can change the default SA password for security reasons. After the password has been changed, some ADMS Console commands will require the administrator to type in the new password each time these commands are executed. The new password needs to be stored in a secure location for this reason.
Autodesk Vault also creates the Vaultsys SQL user account for SQL transactions. This password can be changed using the SQL Server Management Studio. If a system administrator does change the Vaultsys password, he or she must update the password stored in the ADMS Console.
If you plan on deploying replication, create a "replication user" on the domain. This is a designated account used to handle replication between workgroups. Autodesk recommends that you use a strong password for this account, one that ideally never expires.
Note: if you are adding Vault Server (ADMS) sites to a Subscriber/Publisher, the ADMS Installation will reset the Vaultsys password in the SQL Server with the default. It will have to be changed back to your custom password immediately after the installation otherwise user will not be able to access Vault.
For each ADMS Console installed, there is a SQL Login user created ADMS-[Servername] in the SQL Server.
Microsoft SQL Requirements
Single Site Requirements andReplication Requirements see Vault System Requirements.
Log into SQL Server
If the default sa password for the SQL server has been changed, you must log into the SQL server using the new sa password. If you do not know the sa password, contact your SQL server administrator.
- Enter the user name for the sa account. The default is sa.
- Enter the password for the SQL sa account.
- Click OK.
Install Microsoft SQL Server Prior to Installing Autodesk Vault Server
Install Microsoft SQL Server Prior to Vault Server.
Install SQL 2019 Server
- Start the installation process by selecting New SQL Server stand-alone installation or add features to an existing installation from the installation menu.
- The installation process installs any necessary prerequisites and begins running the pre-installation checks.
Note: If there are any errors, take the necessary corrective actions before continuing.
- During Setup Role, select SQL Server Feature Installation and click Next.
- In the Feature Selection window, select Database Engine Services and any roles required by the environment. You can also specify the installation location at this point.
Important: Under Database Engine Services, Autodesk recommends that you enable SQL Server Replication, even if you do not immediately plan on deploying a replication environment. Enabling this does not impact a single site installation, and makes it easier to move to a replicated deployment later on if you choose to. Autodesk also recommends enabling Management Tools and the SQL Client Connectivity SDK.Note: Management Tools-Basic is available in the Express version of SQL Server.
- Click Next.
- In the Instance Configuration window, select Named instance and enter the name. You can use "AutodeskVault", for example, or specify your own instance name.
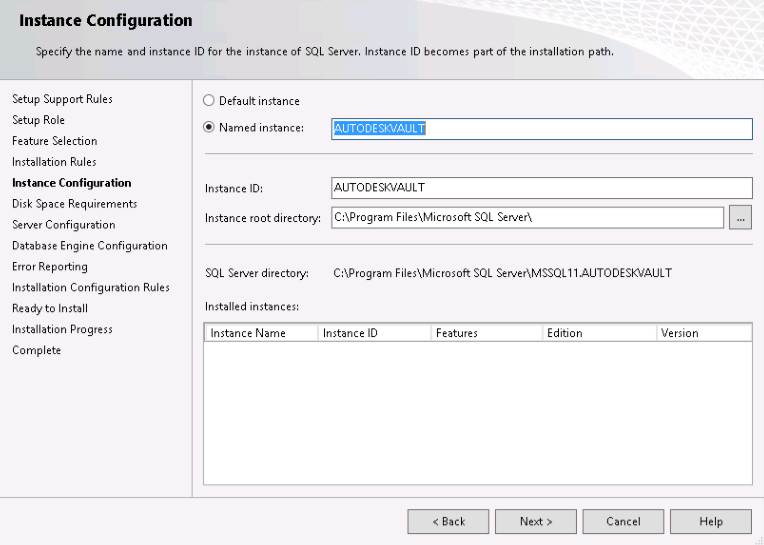
- Click Next.
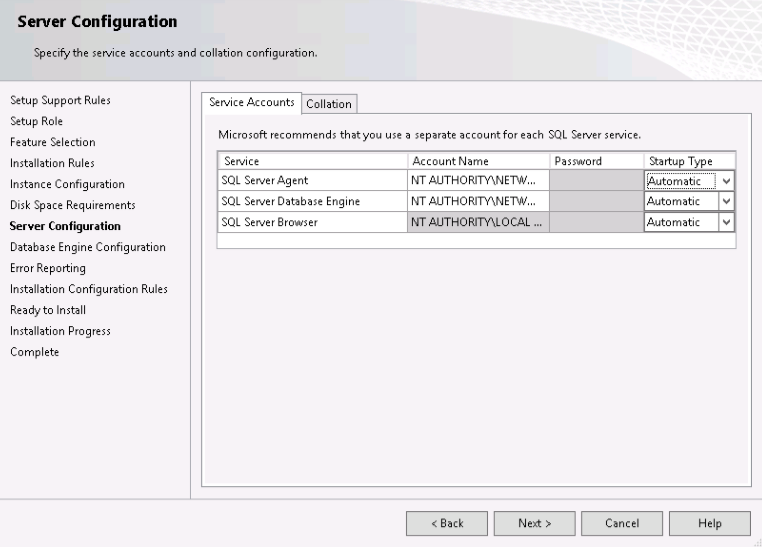
- In the Server Configuration window, select the Service Accounts tab.
- Specify the NT AUTHORITY\NETWORK SERVICE account for the SQL Server Database Engine. The local system account is also acceptable to use. If you plan to perform backups and restores to remote locations, specify a Domain User account. Set the Startup Type to Automatic.
- Specify the NT AUTHORITY\NETWORK SERVICE account for the SQL Server Database Engine. The local system account is also acceptable to use. If you plan to perform backups and restores to remote locations, specify a Domain User account. Set the Startup Type to Automatic.
- Click Next.
- In the Database Engine Configuration window, select the Server Configuration Tab and perform the following steps:
- Select Mixed Mode authentication and set the SA password. The default password used during a default installation for the SA account is AutodeskVault@26200.
- Add the local administrator account (or desired account) as a SQL Server administrator. Only Windows users entered in this dialog have full rights when logging into the SQL server. All other Windows logins are treated as guest accounts.
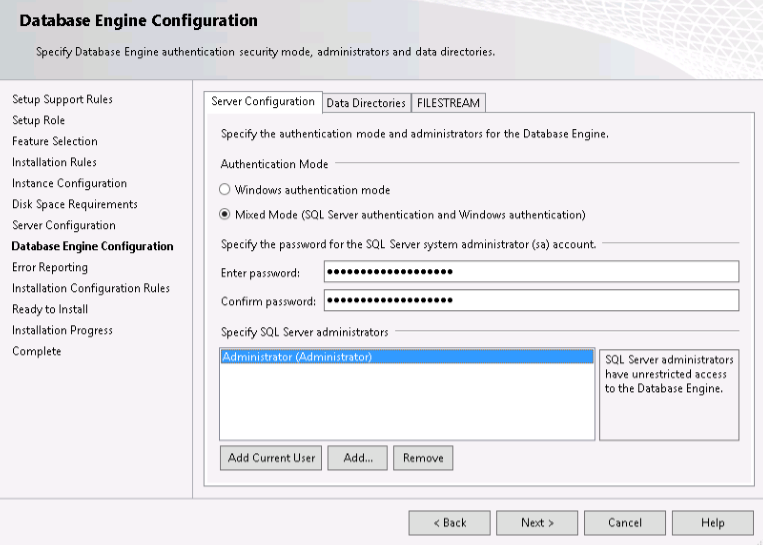
- Click Next.
- Verify the installation options chosen and Install. Once the installer is finished, it can be closed.
- Download and install applicable service packs and hot fixes from Microsoft's web site if needed.
Reconfigure SQL Logins
If you don't have a domain password policy, you can skip this section. If your domain has a password policy configured, use a password that complies with the policy. After the installation is complete, reset the sa password to AutodeskVault@26200 and uncheck the Enforce password policy check box. It is also necessary to create a SQL login account named VaultSys.
Create a SQL login account
- Open the Microsoft SQL Server Management Studio.
- Expand the Security -> Logins folder.
- Right-click on the Logins folder and select New Login.
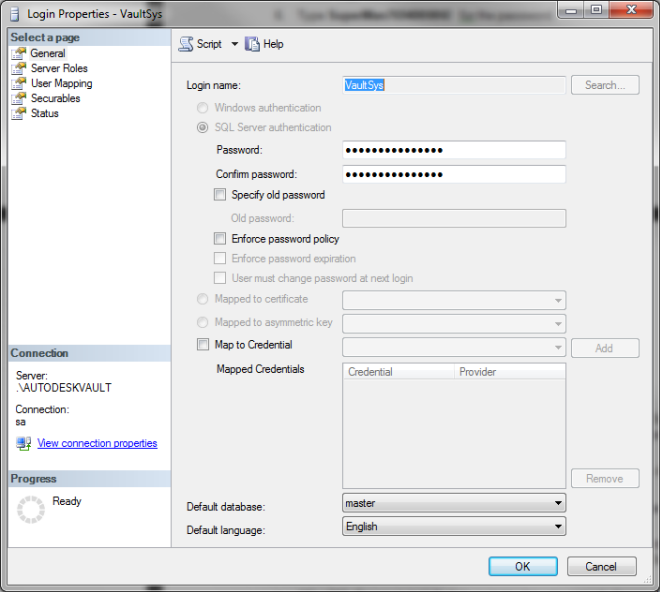
- Type VaultSys for the login name.
- Select SQL Server Authentication.
- Type SuperMan769400006! as the password.
- Uncheck the box for Enforce password policy.
- Select the Server Roles page.
- Check the boxes next to the following roles:
- dbcreator
- public
- setupadmin
- Click OK to create the account.
Enable Full Text Search
You can enable to include the full text search during the SQL Server 2019 installation:
- In the Installation Type tab, select Add features to an existing instance of SQL Server 2019, and click Next.
- In the Feature Selection tab, select Full-text and Semantic Extractions for Search. Click Next.
Configure Microsoft SQL Server for Multi-Site Support (Vault Professional Only)
If the installation is unable to find an installed version of Microsoft SQL, Autodesk Vault Server installs Microsoft SQL 2019 Express. You can install Microsoft SQL 2019 Standard or Enterprise Edition before installing the Vault server so that you do not have to perform the upgrade at a later time.
Configure Remote SQL
Vault Professional allows the Vault environment to be configured to use a remote SQL database. This database resides on a dedicated server which a single site can use to increase performance. Alternatively, it can be used for a multi-site replicated Vault environment.
- On the computer on which SQL is installed, click Start ►Programs►Microsoft® SQL Server [year]►Configuration Tools►SQL Server Configuration Manager.
- In the SQL Server Configuration Manager dialog box, expand SQL Server Network Configuration and then select Protocols for AUTODESKVAULT.
- Right-click TCP/IP in the protocols list and then select Enable.
- Close SQL Server Configuration Manager.
- From the Windows® Start menu, select Settings►Control Panel.
- In the Control Panel, double-click Administrative Tools.
- In the Administrative Tools window, double-click Computer Management.
- In the Computer Management window, expand Services and Applications and then select Services.
- Locate the SQL Server (AUTODESKVAULT) service. Right-click the service and then select Restart.
- Locate the SQL Server Browser service. Right-click the service and then select Properties.
- In the SQL Server Browser Properties (Local Computer) dialog box, change the startup type to be Automatic and then click OK.
- Right-click SQL Server Browser and then select Start.
Create Shared Network Folders
In a multi-site environment, one site can host the AUTODESKVAULT SQL instance. The additional sites access that SQL instance remotely, or all sites can access the same SQL instance remotely. Before configuring the additional sites to access the SQL instance, a shared network folder must be created.
The shared network folder is required as a transition area between the SQL instance and the Autodesk Vault server. The shared network folder can be located on any computer that is accessible by both the data management server and SQL. The space requirement for the shared folder is equal to the total of all database files.
If you are planning on using replication, create a shared folder for database replication and another for file store replication. Give them descriptive names such as ReplicationShare and MultisiteShare.
Give full access to shared folders for these user accounts:
- The account under which the Autodesk Vault server runs
- The account under which the SQL instance operates
- The SQL Server Agent
- Choose a network location and create a folder.
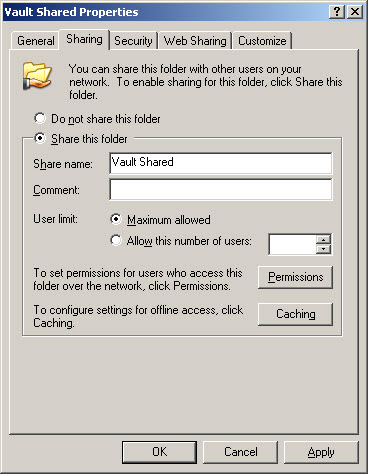
- Right-click the new folder and then select Sharing and Security.
- In the Properties dialog box, click Share this folder.
- Enter a name for the shared folder.
- In the Comment field, enter Shared network folder for Autodesk Vault.
- Click Permissions.
- In the Permissions dialog box, click Add. Add the user account under which ADMS is running. By default, this account is a local administrator account on the ADMS server called Autodesk Vault.
- Add the Windows account under which the SQL Server service is running. The default is Network Service.
- Give both accounts Full Control.
- In the Permissions dialog box, click OK.
- In the Properties dialog box, click OK.