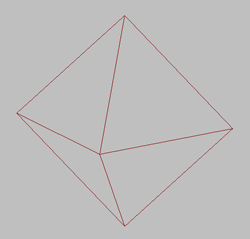
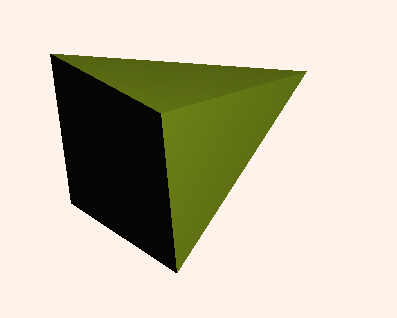
The crowd system in character studio uses two different helper objects: Crowd and Delegate. The first step in building a crowd simulation is the creation of these helpers. The Crowd helper serves as the command center for setting up and solving crowd simulations, while the Delegate provides a stand-in for each animated object in the crowd. You use the Crowd helper controls to animate the delegates, and then later you link objects to delegates to create the finished animation.
Crowd Helper
A Crowd helper object appears in viewports as blue tetrahedron. The location and size of the Crowd helper does not affect the simulation. For the easiest workflow, create the helper with a relatively large size, and place it where you can easily select it. You'll rarely need more than one Crowd helper object per scene.

After you create delegates, you use the Crowd helper to clone delegates and distribute the clones, add behaviors, apply behaviors to delegates, link delegates to animated objects, and much more.
Delegate Helpers

The Crowd system in character studio uses Delegate helper objects as intermediaries between the crowd simulation and the influenced objects. A delegate is a non-rendering pyramid-shaped object. Its apex points in the direction the Crowd system uses as “forward” when it moves the delegate around.
Use one delegate per object to be animated by the Crowd system. You can add delegates one by one, or use any of the standard 3ds Max methods for cloning objects, including Shift+clone and the Array function. However, the Crowd object offers a convenient Scatter Objects function that lets you clone delegates and distribute the clones over a surface or within a volume, with options for orientation and scaling.
Procedures
To create a Crowd helper object:
- On the
 Create panel, click
  (Helpers).
 - Click Crowd, and drag the helper object to a convenient size. Tip: Make the crowd helper object large enough so you can easily select it in two or more viewports. The size of the helper does not affect the crowd simulation in any way.
To create a Delegate helper object:
- On the
 Create panel, click
  (Helpers).
 - Click Delegate. Drag in a viewport to set the delegate’s position and its size. Tip: The delegate always points "up" in the viewport where you create it. So if you want it to point "forward," that is, toward the positive Y direction in the World coordinate system, you should create it in the Top viewport.
To clone and scatter delegates:
- Create a Crowd helper and a Delegate helper.
- Decide how to distribute the delegate clones, and create an object to define how the clones are to be positioned: a grid object, a primitive box or sphere, a shape, or any object to serve as a surface. Alternatively, you can choose to distribute clones in a circular area without the use of a distribution object.
 Select the Crowd object and go to the
  Modify panel.
 - Click
 (Scatter Objects) to open the Scatter Objects dialog.
 - On the Clone tab, set the number of clones to create, and select the object to clone.
- Click Generate Clones.
This produces the specified number of clones in the same location. To vary positions, orientations, and/or sizes, proceed with the following steps.
- On the Position tab
 Placement Relative To Object group, choose a distribution option. Click the None button, and then select the distribution object you created earlier.
 Alternatively, to distribute delegates in a circular area, choose Placement In Area group
 In Radial Area and set a center and radius.
 - Click Generate Locations.
This distributes the clones.
- On the Rotation tab, choose which of the cloned object's local axes are to look forward and up. Optionally, specify source and target objects for the clones' orientations, as well as limits for randomized deviations from the calculated orientation.
- Click Generate Orientations.
- On the Scale tab, for each axis, specify Average, Deviation, and, optionally, Same As settings and a random seed.
- Click Generate Scales.
At this point, you're basically finished. However, to create a series of randomized positions, orientations, and/or sizes for clones, follow the next two steps and repeat as necessary.
- On the All Ops, turn on Positions, Rotations, and/or Scales. To vary the randomized positions, rotations, and/or scales, turn on the corresponding Inc Seed checkboxes.
- Click the Scatter button.
You can combine the cloning, position, rotation, and scale functions in one operation by setting the options on their respective tabs without clicking the Generate buttons, and then using the All Ops tab to apply any or all scatter operations simultaneously. Also, you can use the All Ops tab
 Select Objects To Transform to specify any objects to scatter; not just clones.