After adding objects to your scene from the Create panel, you often move to the Modify panel to change an object’s original creation parameters and to apply modifiers. Modifiers are the basic tools for reshaping and adjusting primitive geometry.
The Modify panel stays in view until you click another command panel tab. The panel updates to show the options and controls that are available for the currently selected object or modifier.
Using Modifiers
Once you’ve applied modifiers to an object, you can use the Modifier Stack to find a particular modifier, change its parameters, edit its sequence in the modifier stack, copy its settings to another object, or delete it entirely.
You can find alphabetical lists of modifiers in Object-Space Modifiers and World-Space Modifiers.
General Guidelines
You can generally do the following with the Modify panel:
- Modify anything you can select. This includes any object or set of objects, or any part of an object down to the sub-object level. For example, you can use the Mesh Select modifier to select a single face, then apply a Taper modifier to it.
- Apply an unlimited number of modifiers to an object or part of an object.
The order or sequence in which you make modifications is important. Each modification affects those that come after it. See Using the Modifier Stack.
Note: Some modifiers can be applied only to certain types of objects.
Modifier Sub-Object Levels
In addition to its own set of parameters, a modifier typically has one or more sub-object levels that you access through the modifier stack. The most common of these are a gizmo and a center.
- Gizmo
-
Displays in viewports as a wireframe that initially surrounds the selected object. A gizmo acts like a mechanical apparatus that transfers its modification to the object it’s attached to. To alter the effect of the modifier on the object, you can move, scale, and rotate the gizmo as you would any object.
- Center
-
The center is the modifier's pivot point. You can move a modifier’s center, which alters the effect of the modifier on the object.
Parametric Deformations and Other Modifier Types
One set of object-space modifiers is known as parametric deformations (“Parametric Deformers” on the Modifiers menu). Twist and Bend are examples of parametric deformers, which alter the selection passed to them without explicitly depending on topology.
Many other types of modifiers, however, perform operations on the explicit topology of sub-object selections. The Edit modifiers and Select modifiers are examples. When a topology-dependent modifier is present on the stack, you can affect its results adversely if you visit previous stack operations and change the number or order of sub-objects (such as faces or vertices) in the selection. If you attempt this, a warning alerts you to the situation:
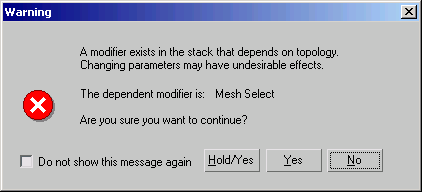
You can safely edit the stack beneath the topology-dependent modifier, as long as you do not add or remove sub-objects from the selection on which it operates.
Procedures
To use the Modify panel:
-
 Select an object in your scene.
 - Click
 (the Modify tab) to display the Modify panel.
 The name of the selected object appears at the top of the Modify panel, and fields change to match this object.
The object’s creation parameters appear in rollouts on the Modify panel, below the modifier stack display. You can use these rollouts to change the creation parameters for an object. As you change them, the object updates in the viewports.
- Apply a modifier to an object (described in the next procedure).
After you apply a modifier, it becomes active, and rollouts below the modifier stack display settings specific to the active modifier.
To apply a modifier to an object:
- Select the object.
- Do one of the following:
- Choose a modifier from the Modifier List. This is a drop-down list at the top of the Modify panel. Tip: You can use the mouse or keyboard to choose a modifier from the Modifier List. To use the keyboard, first open the list with the mouse, and then type the first letter in the modifier's name. From there you can use the arrow keys or the method described in the following paragraph to highlight the desired modifier, and then press Enter to assign the modifier.
In many cases, several modifier names start with the same letter. You can go directly to a particular modifier if you type the first few letters (enough for a unique combination) in the desired modifier's name quickly. For example, say you want to assign the Mirror modifier to an object. Typing M goes to Mesh Select, which isn't anywhere near Mirror in the Modifier list, but typing MI goes directly to Mirror.
- Choose a modifier from the Modifiers menu. This menu is organized into sets by functionality.
Not all modifiers appear on the Modifiers menu.
- If the modifier buttons are visible on the Modify panel and the modifier you want is one of them, click the button.
If the buttons are not visible but you want to use them, click
 (Configure Modifier Sets), below the modifier stack display, and choose Show Buttons. A set of buttons with the names of modifiers appears between the modifier list and the stack display. Click Configure Modifier Sets again, choose the set of modifiers you want to use (for example, Free-Form Deformations), and then click the button for the modifier you want to apply.
 Rollouts are now displayed below the modifier stack display, showing settings for the modifier. As you change these settings, the object updates in viewports.
- Choose a modifier from the Modifier List. This is a drop-down list at the top of the
To drag a modifier to an object:
- Select an object that already has a modifier you would like to use on another object.
- To copy the modifier without instancing it, drag the modifier's name from the stack display to the object in a viewport that you want to use the same modifier. To move the modifier, use Shift+drag; this removes it from the original object and applying it to the new one. To instance the modifier, use Ctrl+drag; this creates an instanced modifier applied to both the original object and the new one. Note: Instancing a modifier causes its name to be displayed in italics in the modifier stack. This indicates that the modifier is instanced, meaning that a change to the modifier parameters of one object will affect the other.