Switch between shading assignments using switch shaders
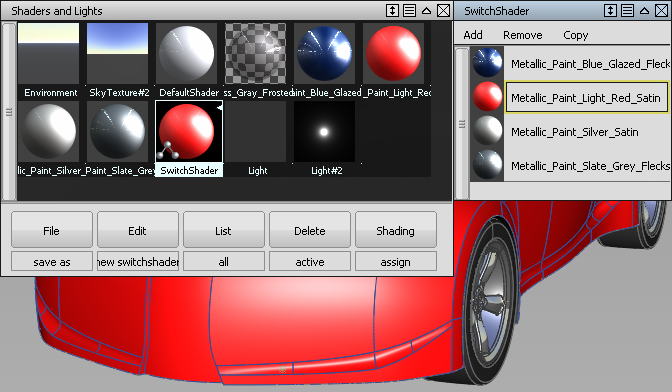
A switch shader contains a list of shaders. The selected shader in the list is the active shader, which is assigned to the objects the switch shader is assigned to. The other shaders in the list are alternatives. Select an alternative shader in the list to assign it to the objects.
Use switch shaders to quickly create variants with shading assignments.
Create a switch shader
Select a shader that you want to switch between and in Multi-Lister, choose Edit > New Switch Shader. The Switch Shader is created with the selected shader.
Double-click the Switch Shader. The Switch Shader window appears with the selected shader listed.
Select another shader that you want to switch between and in the Switch Shader window, click Add. The Shader's name is listed in the window.
Continue adding shaders to the Switch Shader list.
To remove a shader from the list, select it then click Remove.
To copy a shader on the list, select it then click Copy.
To move a shader in the list, drag it to its new position with the middle mouse button.
Switch between shaders
- Assign the Switch Shader to objects.
- In the Switch Shader window, double-click the name of the shader you want to assign to the objects.