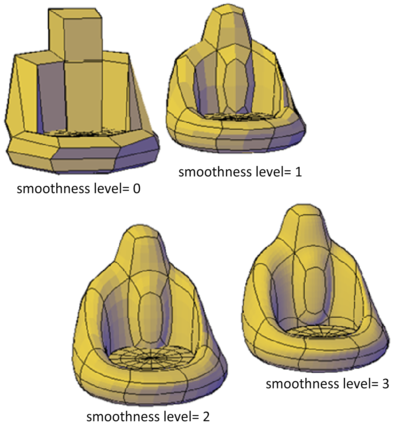
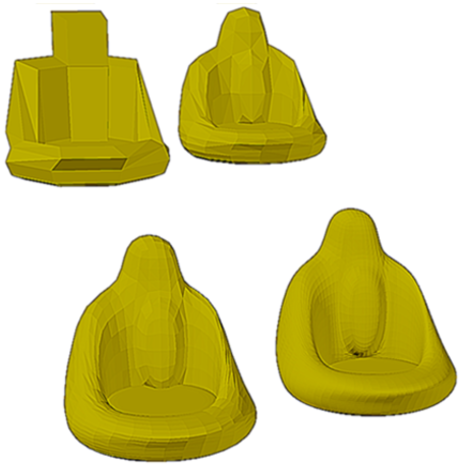
Increase the roundness of mesh objects by increasing the smoothness levels.
Mesh objects are made up of multiple subdivisions, or tessellations, which define the editable faces. Each face consists of underlying facets. When you increase smoothness, you increase the number of facets to provide a smoother, more rounded look.

Increase or Decrease Smoothness
As you work, you can increase and decrease the level of smoothness. The differences are apparent both in the wireframe and conceptual visual styles and in the rendered output.

The lowest level of smoothness, or baseline, is 0. By default, Level 0 has no smoothness. You can increase the smoothness of any mesh object up to the current limits. However, you cannot decrease the smoothness of a mesh object whose level of smoothness is zero.
If you have added creases to a mesh object, the effect of smoothing differs, depending on the crease setting. The effect of creases added to mesh that has no smoothness (Level 0) is not apparent until the mesh is smoothed.
As you edit an object using gizmos or grips, you might create gaps in the mesh object. One way to close the gap is to smooth the object or refine individual subobjects.
Limit Mesh Density
A mesh is created at the level of smoothness that you specify. The smoothness can range from None (0), to the default maximum (6), or to a level that you specify. As an object is smoothed, the density of the mesh facet grid also increases. For best results, create mesh objects at lower smoothness levels and increase the smoothness only after modeling is complete.
Dense meshes can result in subobjects that are difficult to select and edit. They can also affect performance. Therefore you might want to set limits that prevent the mesh from becoming too dense.
- Maximum level of smoothness at which a grid is displayed (SMOOTHMESHGRID). Displays the effects of modeling without the complexity of the underlying facet grid. The default smoothness level is 3. The tessellation display becomes increasingly dense until the maximum level is exceeded. Beyond that level, the display reverts to the most basic level, even though the smoothing level can continue to increase.
- Maximum number of faces in a drawing (SMOOTHMESHMAXFACE). Sets the maximum number of mesh faces that are permitted in mesh objects.
- Maximum level of smoothness (SMOOTHMESHMAXLEV). Sets the maximum smoothness level permitted for mesh objects.