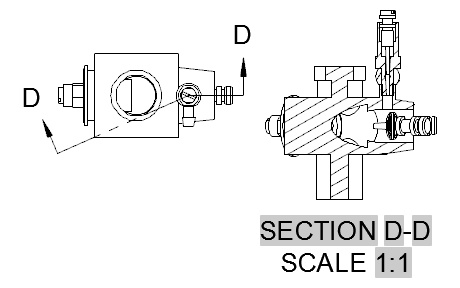
An aligned section view is generated by cutting through the entire object along two non parallel work planes, such that they pass through specific objects.

- Click


 .
. 
- Click the view you want to use as the parent view. The start direction arrow appears at the cursor.
- Click in the drawing area to indicate the start point of the section line. The end direction arrow appears at the cursor. Tip:
- Use object snaps, object snap tracking, ortho and polar tracking to specify the location of the section line precisely.
- If the CONSTRAINTINFER system variable is 1, the section line is automatically constrained to the parent view.
- Click in the drawing area to indicate end point of the first segment of the section line.
- Click in the drawing area to indicate the end point of the section line and press ENTER. A preview of the section view appears at the cursor. Tip: You can modify the properties of the section view using the Section View Creation ribbon contextual tab.
- Move the preview to the desired location and click to place the view. Tip: The preview is constrained to move only in a direction perpendicular to a section line segment. To relax the constraint, tap SHIFT. To restore the constraint, tap SHIFT again.
- Click


 .
.