Use the Add/Modify Association dialog box to assign terminals to specific levels of a multi-level terminal.
Modify multi-level terminal associations
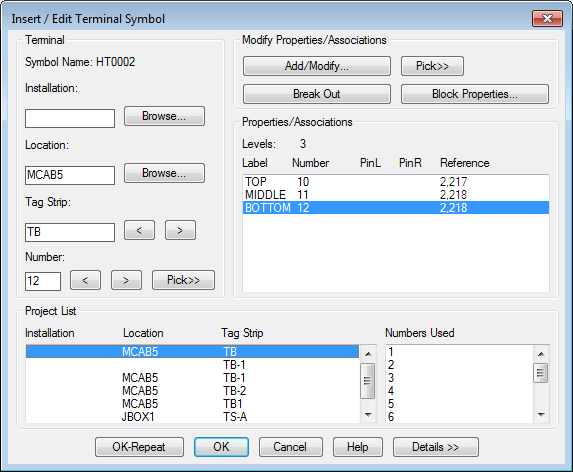
- On the Insert/Edit Terminal Symbol dialog box, Modify Properties/Associations section, click Add/Modify.
- On the Add/Modify Association dialog box, Select Association section, expand the active project node. The active node is bold in the list.
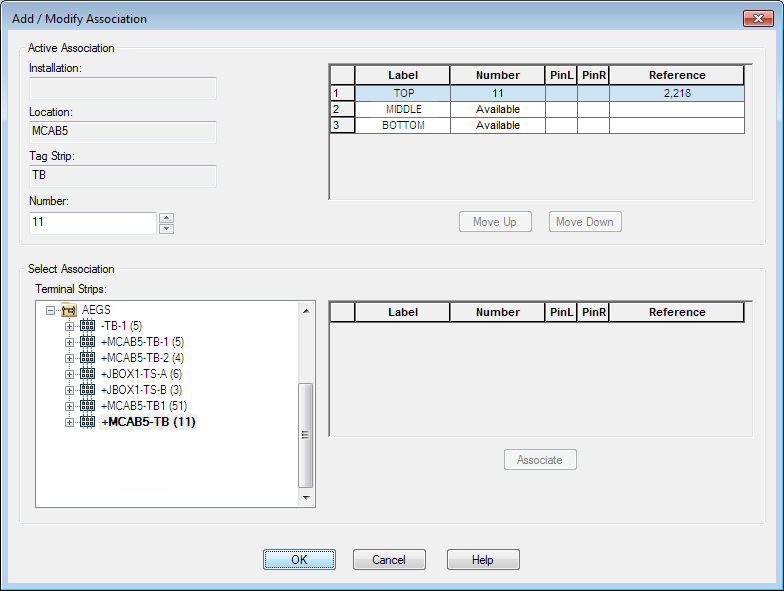
- Select the terminal block node you inserted on line reference 217 (10, , (3)).
The terminal numbers defined on the block are listed, separated by commas. The number of levels defined in the block properties displays at the end of the node string in parenthesis. For example, 1,21,GND (3). An empty space represents a level not represented on the schematic: 1, , GND (3). A ‘???’ represents a terminal assigned to the level, but the terminal does not have a number assignment: 1,???,GND (3).
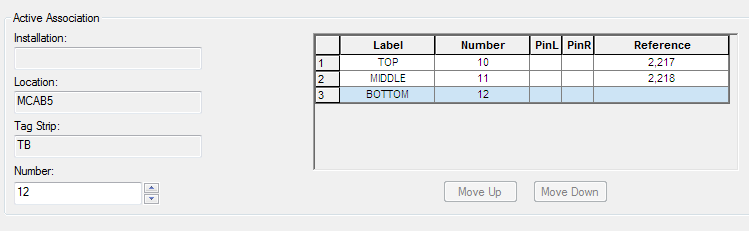
Note: The grid to the right populates with the definition for the selected terminal: Level 1 has Label = TOP, Number = 10, Reference = 2,217. - Select Level 2 in the grid and click Associate.
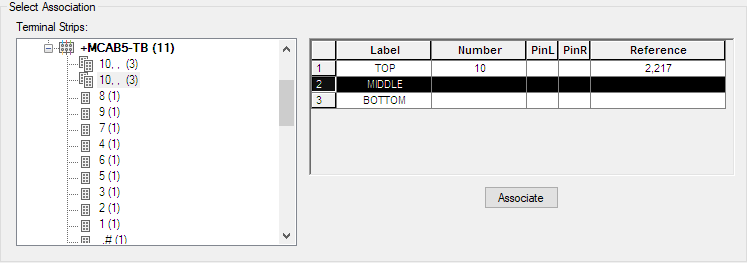
Once you click Associate, the middle level updates with the terminal number in the grid in the Active Association section of the dialog box.
- Click OK.
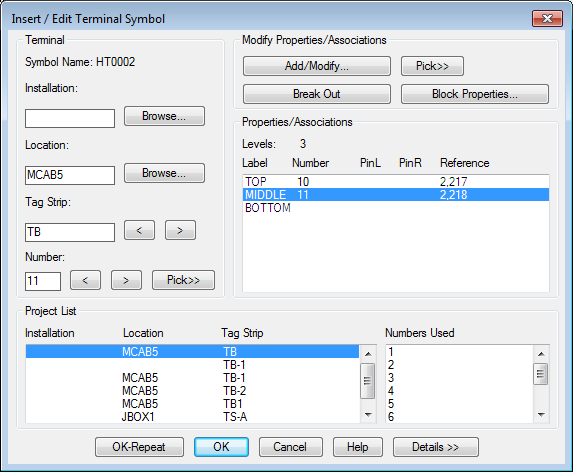
The level assignments display in the Properties/Associations section of the Insert/Edit Terminal Symbol dialog box. Notice that the terminal is three levels and levels 1 and 2 are now assigned.
- On the Insert/Edit Terminal Symbol dialog box, click OK.
- Click
 . Find
- Select the bottom terminal on rung 218. The Insert/Edit Terminal Symbol dialog box displays.
- In the Insert/Edit Terminal Symbol dialog box, Project List section, select Tag Strip TB.
- Enter Location: MCAB5 and Number: 12.
- On the Insert/Edit Terminal Symbol dialog box, Modify Properties/Associations section, click Add/Modify.
- On the Add/Modify Association dialog box, Select Association section, expand the active project node.
- Select the terminal block node you inserted on line reference 217 (10,11, (3)). Notice that the node properties updated to reflect that levels 1 and 2 are assigned and that level 3 is still blank/available.
- Select Level 3 in the grid and click Associate.
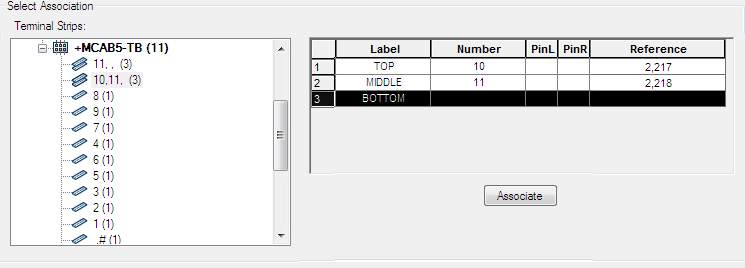
Once you click Associate, the bottom level updates with the terminal number in the grid in the Active Association section of the dialog box. You can rearrange the levels by selecting a level and clicking Move Up or Move Down.
- Click OK.
The level assignments display in the Properties/Associations section of the Insert/Edit Terminal Symbol dialog box. Notice that levels 1, 2, and 3 are now assigned.
- On the Insert/Edit Terminal Symbol dialog box, click OK.
