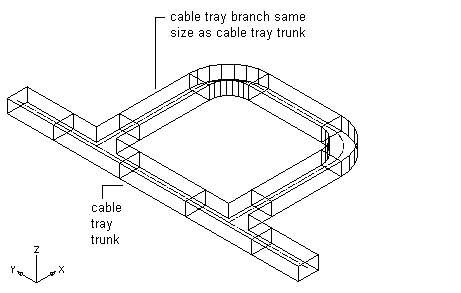
After you draw your cable tray or conduit runs, you can add branches to connect the runs to form a complete network. You can use AutoCAD MEP 2023 toolset snaps to help locate valid connection points on the objects in your drawing.
When you start a run at the end of a segment, the nearest valid connection point is not always the endpoint of a segment. You can form a valid connection at any point along the path of another run. In this case, the software inserts an appropriate fitting to connect the 2 runs.

Drawing a branch

Connecting a cable tray run to a cable tray trunk that is the same size
To add a cable tray or conduit branch
- Turn on the Wire Ways Curve or Wire Ways Connector snaps.
- In the Electrical workspace, click Home tab


 or .
or .
- Using the Wire Ways Connector or Wire Ways Curve snap, select the first segment to connect, and then select the second segment.
You can modify properties on the command line.
- Click Close or press Enter to end the command.
Once you complete your connections, you can use Solution Tips to test whether your connections are valid.