Channels in a multi-channel clip are now easier to access and manage.
 Indicates a feature suggested and voted up by users on the
Flame Feedback portal.
Importing a Multi-Channel Clip
When you import a multi-channel clip, its channels are now assigned a channel type. The assigned type is based on the name of the channel.
| Channel Name | Channel Type |
|---|---|
| ABGR, beauty, BGR | Beauty |
| 3d_motion | 3D-Motion |
| ambient_occlusion, AO | AO |
| ABGR_alpha, MatteID | Matte |
| motion_vector, motionvector | Motion |
| N, normal, normals | Normals |
| P, Position | Position |
| roughness | Roughness |
| shadow | Shadows |
| uv | UV |
| depth, Z | Z-Depth |
The channel types map to the types used in the Action node, except for ID and Selective, which are not defined.
 Changing the Assignment of Multi-Channel Types
How channel names are mapped to channel types is described in .
Use the to map a channel type to a channel name. A channel name comes from the clips that you import. This name is given to the channel when that channel is created in another application such as Autodesk Maya. The default preferences contain standard channel names, but you can add or remove channel names from the list.
A channel type describes the purpose of the channel. It corresponds to Action outputs, like Beauty or Motion. This list is finite: you cannot add channel types.
To change the mapping of multi-channel type to channel names:
- Open
.
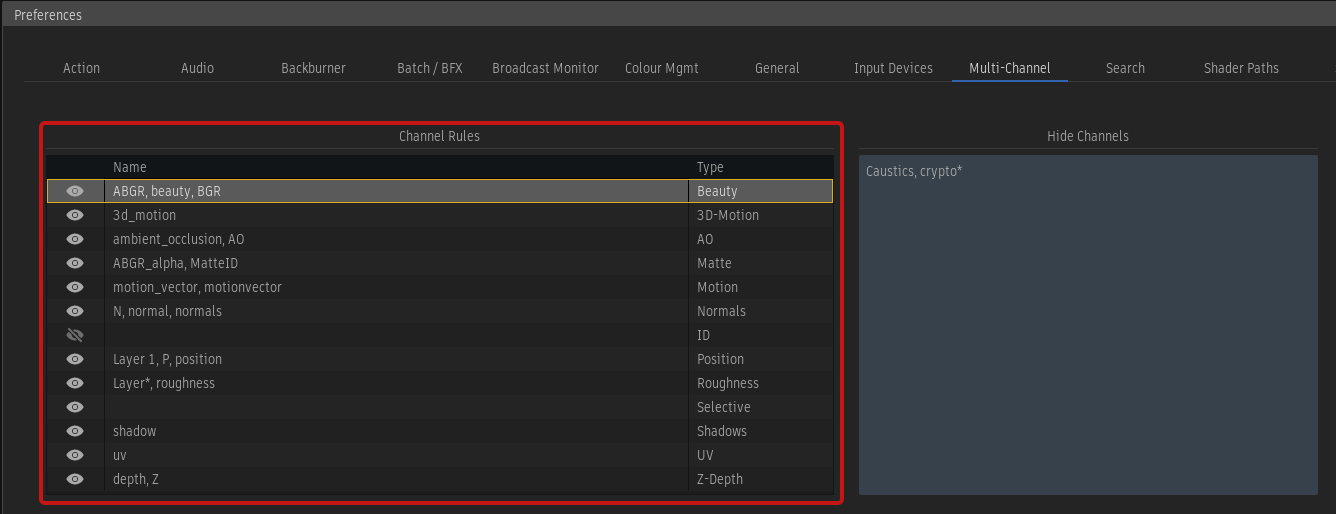
- In the Channel Rules table, locate line with the type you need to reassign.
- In the Name column, double-click the field.
- Add or remove a channel name from the list.
Use wildcards * (any number of characters) and ? (any one character) to complete a name or replace a specific character. For example: lay* for layer, layers, and layout, layer? for layers and layer1 but not layers1.
- Close the Preferences panel.
Changes to the types in Channel Rules are applied immediately to all imported clips. This only changes the type of the channel, and channel types are only informative, so it will not break links in Batch.
Unknown Channel Type
When you import a multi-channel, its channels are assigned a type. What type is assigned to what channel is defined in .
Channels that are not listed in Channel Rules are assigned the Unknown type.
While you cannot change an assigned channel type in a segment or clip node, you can assign a type to a channel flagged Unknown.
To change a channel type from Unknown:
-
- In Timeline:
Open
.

- In Batch, Batch FX, and Modular Keyer:Select the clip and open the
Extended menu.

- In Timeline:
Open
.
- Find the channel in the list.
- In the Type column, click
Unknown and select channel type from the list.

- In the Add Channel Rule dialog box, confirm the channel type to be assigned.
This dialog box actually adds the rule to the table in . And because edits to Channel Rules are immediately applied to all imported clips, every channel with this name is assigned this channel type when you click Add.
 Hiding Channels
Hidden channels do not appear in the clip node in Batch, Batch FX, and Modular Keyer. This simplifies the schematic, allowing you to ignore those channels that are not required for your work. In a Timeline, hidden channels are not available from the channel selection drop-down menu at the segment level.
Use to hide channels when you import clips. In this case, you can hide channels based on the channel type or channel name.
You can also hide individual channels in a segment or Clip node.
In Batch, Batch FX, and Modular Keyer when you cycle through the channels of a clip using F4, the hidden channels are not shown.
Hiding Channels On Import
You can set the preferences so that specific channels are hidden in clips when you import them.
You can hide channels in a multi-channel clip based on the type of channel. Or you can hide channels based on the name of the channel.
To hide channels on import based on the channel type:
- Open
.

- In
Channel Rules, click
 .
.
- Close the Preferences panel.
To hide channels on import based on the channel name:
- Open
.
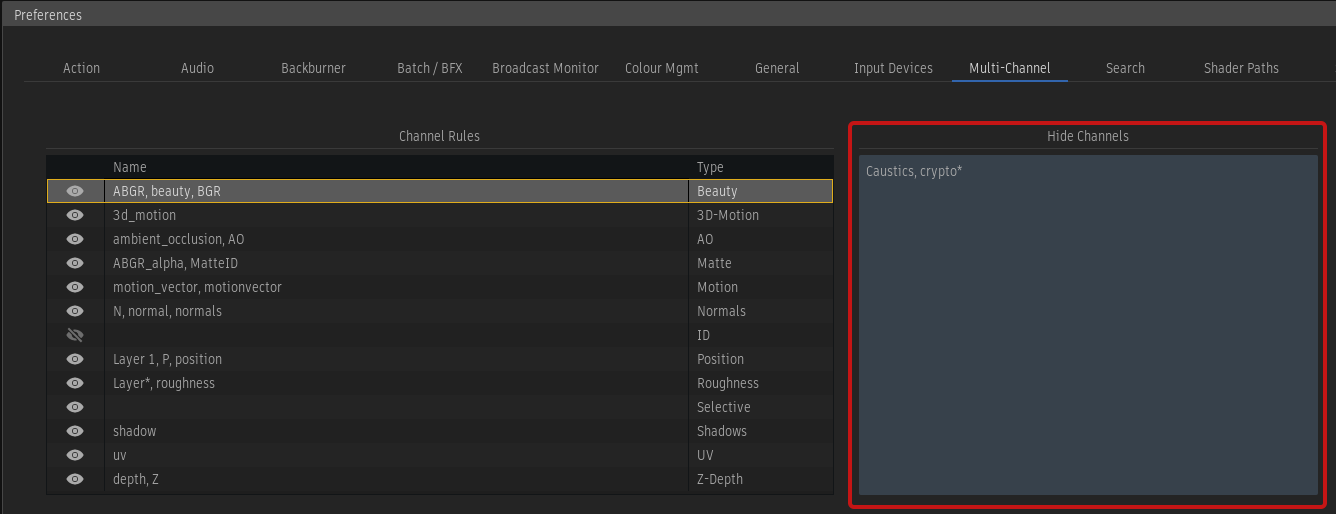
- In
Hide Channels, enter the channel name.
Use wildcards * (any number of characters) and ? (any one character) to complete a name or replace a specific character. For example: lay* for layer, layers, and layout, layer? for layers and layer1 but not layers1.
- Close the Preferences panel.
Hiding Individual Channels
You can also hide individual channels after importing a clip.
- In Timeline:
- Open
.

- Click
 to hide the channel.
- Open
.
- In Batch, Batch FX, and Modular Keyer:
- Select the Clip node and open the
Extended menu.

- Click
 to hide the channel.
Tip: You cannot hide a channel if the channel has an outgoing connection to another node.
- Select the Clip node and open the
Extended menu.
Revealing a Hidden Channel
You can always reveal (unhide) a hidden channel.
- In Timeline:
- Open
.

- Click
 to reveal the channel.
- Open
.
- In Batch, Batch FX, and Modular Keyer:
- Select the Clip node and open the
Extended menu.

- Click
 to reveal the channel.
- Select the Clip node and open the
Extended menu.
To reveal all hidden channels in a Clip node in Batch, Batch FX, and Modular Keyer:
- Right-click the node.
- Select .
 About Hidden Channels and Media Cache
Hidden channels are not cached. The media for a clip's hidden channels is not cached.
Use to flush the media of channels hidden. Use this option if you hide channels after importing the clip.
Use (any variant) to cache the media of channels you change from hidden to visible.
You can always check if a channel is cached or not.
To view the cache status of a channel:
- In Timeline:
- Open .
- Find the channel and look at the Cached column.

- In Batch, Batch FX, and Modular Keyer:
- Select the Clip node and open the Extended menu.
- Find the channel and look at the Cached column.

About channelrules.cfg
is a GUI editor for /opt/Autodesk/cfg/channelrules.cfg. If you're used to editing channelrules.cfg directly, consider using the preferences panel as it should reduce errors made when manually editing the file.
Channels in Render and Write File Nodes
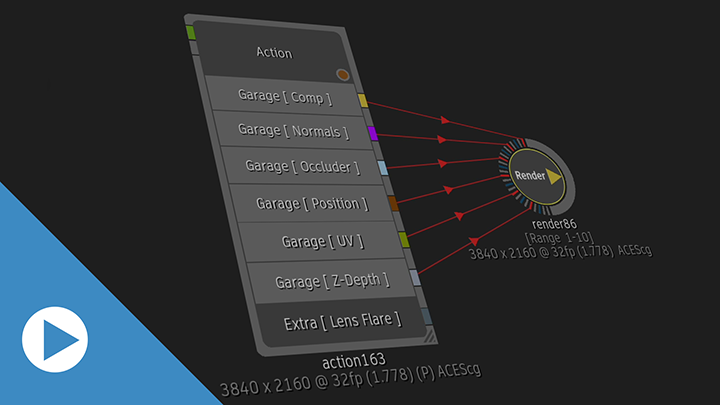
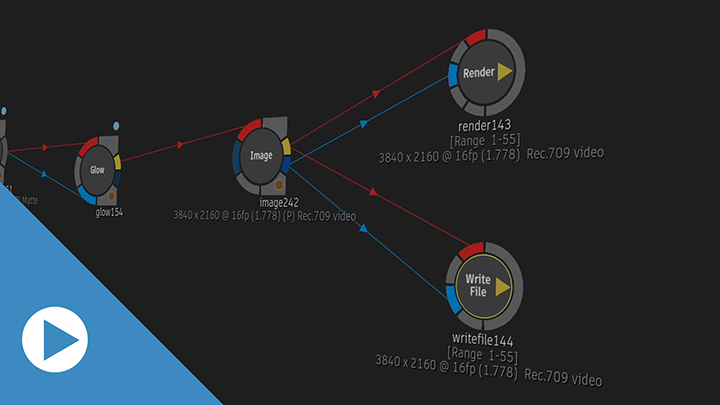
You can now use the contextual menu to quickly add a Render node or a Write File node to the Schematic with their inputs connected to a Clip or node.
This option is great to connect multi-channel Clip or an Action node to an output node without having to manually connect each output socket to its matching input socket.
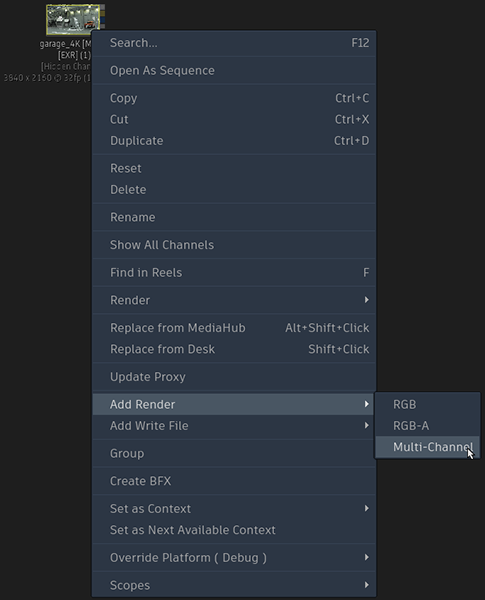
To add an output node with inputs already connected:
- Right-click the node to output.
- From a node contextual menu, select:
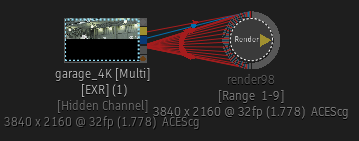
When you use the contextual menu, the names of the output sockets are used to name the channels in the Render or Write File nodes.
 Rename Channels in Render and Write File
In the Render and Write File nodes, you can now have access to the channels of a multi-channel output.

The channels that make up a multi-channel output are displayed in the new Channels menu.
In the Channels list, every channel appears with its Front and its Matte.
When you add a Render or Write File node using the Multi-Channel option in the contextual menu, the channels are created using the names of the Outputs from the original node. But you can edit these names.
To edit the channel names, you can:
- Edit the name directly in the Channels list. If there is a check mark in the Sync column, you can only rename the Front of the channel: the Matte uses the same name but is appended _alpha.
- T+click another node to use the names of its Outputs to rename the channels.
- Click to replace the channel names in the Channels list with the names of the Outputs from the parent node.
The Sync option keeps the name of the channels connected to the Front input and its corresponding Matte input the same. In this scenario, "_alpha" is append to the name of the matte channel.
More Improvements to Channels in Clip Nodes
 Action colours.
The colours used for the output sockets of render passes of the Action node are now used to colour the output sockets of a Clip node.
 Expanded channels names. An expanded node automatically adjusts it width to display the full name of its channels or outputs.
Highlight the selected channel. Selecting a channel in the Channels Rules table or in the viewport now highlights the matching channel in the Clip node.
Reorder Channels in Clips.You can now reordered channels of a Batch Schematic Clip. By using the arrows next to the Channels list in the Clip's Extended menu, you can move channels up or down the list.
Updated Channels table. In addition to the new Type and Cached columns, the Channels table in the Extended menu of a Clip node contains the following improvements.
- The Proxy column is now named Thumbnail.
- The icon to select which thumbnail to show on a Clip node changes from a square to a check mark.
MediaHub
The tiles for channels that are set as hidden in are now displayed in a darker color when you double-click the clip Multi icon to display its channels.
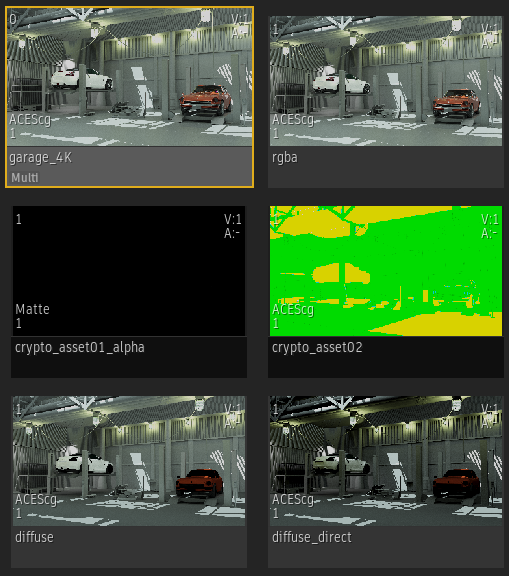
In , crypto* has been added to the Hide Channels table. In MediaHub, the channels crypto_asset01_alpha and crypto_asset02 have a darker border to indicate that they are hidden.
