Combine Solid Bodies
Note: The Combine command is available in multi-body part files only.

- Click
3D Model tab
 Modify panel
Combine
Modify panel
Combine
 .
.
- The Basebody selector is active by default. Select the base solid body in the graphics window. When the selected bodies have different appearances, the Basebody appearance is used for the result of the combine task.
Note: When a selection is satisfied, a colored dot displays. The dot corresponds to the selection highlight in the graphics display.

- The Toolbodies selector activates automatically, select one or more solid bodies to combine with the base. The number of toolbodies displays in the selector. Use window select to expedite selecting multiple bodies.
- (Optional) Select Keep Toolbody.
Keep Toolbody retains the toolbody used in the operation as an independent body. The visibility is turned off after the operation. If not selected, the toolbody is consumed and can’t be used for more operations.
Note: Deleting a Combine command restores the consumed toolbody. The visibility of a retained toolbody is turned off by default. - Choose an Output operation for the combination:
 Join. Adds the volume of the base and the selected toolbodies together.
-
 Cut. Subtracts the volume of the selected toolbodies from the base body.
 Intersect. Modifies the base solid from the shared volume of the base body and the selected toolbodies.
- Click OK or Apply
 to continue to use the Combine command.
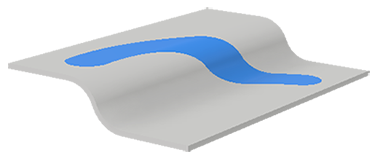
Split the Face of a Solid or Surface Body
- Click
3D Model tab
Modify panel
Split
 .
.
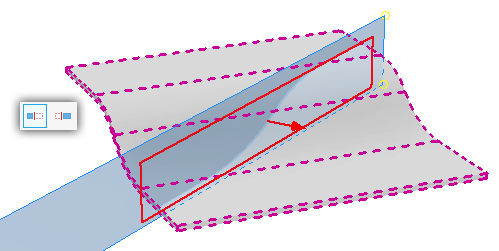
- In the Split property panel, the Tool selector is active. Select a 2D sketch, 3D sketch, work plane, or surface to use to split the face.
Note: 3D sketches must lie on and fully intersect the faces to be split.Note: To keep the sketch visible after clicking Apply, check the Advanced Settings menu and confirm the option Keep sketch visible on (+) is selected.
- The Faces selector is active, do one of the following:
- In the graphics window, select one or more faces of the part or surface body to split.
- Click All Faces and, in the graphics window, select the part or surface body to split all its faces.
- Click OK.
Tip: After part faces are split, you can use Face Draft to apply draft.
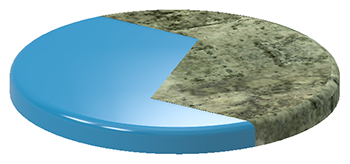
Remove One Side of a Solid Body
- Click
3D Model tab
Modify panel
Split
.
- In the Split property panel, click
 to start the solid selector.
- Using the Tool selector, click a work plane, 2D sketch, or surface body to use to trim the solid.
- Under Behavior, select the Keep Side option. The preview arrow points toward the side that will be removed.
 - keep Default side
 - keep Flip side
- Click OK.
Split One Solid Body into Two Solid Bodies
- Click
3D Model tab
Modify panel
Split
.
- In the Split property panel, click
to turn on solid selection.
- Using the Tool selector, click a work plane, 2D sketch, or surface body to use to split the solid.
- If there is only one solid in the part file, the solid is automatically selected. If there are multiple solid bodies present, select the Solid to be split.
- In Behavior, specify the
 keep both sides option.
- Click OK.
Note: You can export solid bodies in a multi-body part file as individual part files by using the Make Part or Make Components command. Files created using these commands are associative to the parent part file.
Create Two Parts from a Split Part
Files created with this workflow are not associative to each other, or to the original source file. If associativity is required, use the Split Solid method in a multi-body part.
- Sketch a parting line on a part face.
- Click File Save As Save Copy As to save the part with the parting line and both halves intact.
- Use Split and the appropriate Behavior to split the part and remove one side.
- Use Save Copy As to save the first side of the part.
- Open the original file, then use Split and reverse the Behavior method to remove the other side of the part.
- Use Save Copy As to save the second side of the part.
Both halves of the part are now saved in separate, unique files.