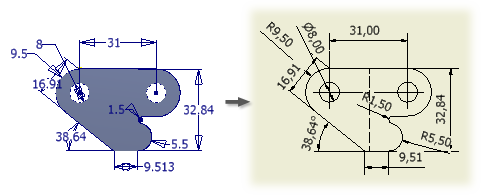
Model dimensions are created during sketching or the creation of features in a model.

Use the Retrieve command to display model feature and sketch dimensions and tolerances on a drawing view. In orthographic views, only those dimensions that are on a plane parallel to the view are displayed. In isometric views, all dimensions are available for selection.
Model dimensions can be used only once on a sheet. When you place a view, you can specify whether to display the model dimensions that are planar to the view. You usually include the model dimensions on the first (base) view in the drawing. Subsequent projected views display only those model dimensions that did not display in the base view.
To show a model dimension in another view, remove the dimension from the first view, and retrieve it in the second view. Or, add a drawing dimension to the second view.
Editing model dimensions
You can make minor changes to a part by editing the model dimensions and tolerances in the drawing. When you edit a model dimension, the part file is updated immediately.
Notes:
- Set the option to edit model dimensions from a drawing when you install Autodesk Inventor.
- Reserve changes in the drawing for minor changes to individual dimensions. If significant changes or changes involving dependent features are required, make the changes in the model.
- If you change the size of a part that has multiple occurrences in an assembly or is used in multiple assemblies, all occurrences of the part change.