Note: The following workflow demonstrates the steps used to create a family mold.
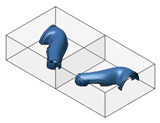
Create a family mold using two plastic parts
- In the
Mold Layout tab, click
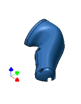
Plastic Part to place the
Housing Complete Left.ipt part. Click
Adjust Orientation to change the orientation of the part. The center point for the first plastic part is automatically placed in the same position as the top assembly center point in the mold design.


- In the
Mold Layout tab, click
Plastic Part to place the
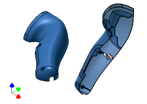
Housing Complete Right.ipt part. In the graphics window, click the part to place an occurrence of the component. Click
Adjust Orientation to change the orientation of the part.
- In the
Mold Layout tab, click
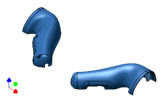
Adjust Position.
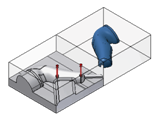
Adjust the position of the two plastic parts so that they are balanced in the assembly center point of the mold design.
- In the Mold Design browser, double-click the Housing Complete Left node.
- In the Core/Cavity tab, click Define Workpiece, and then define the workpiece dimensions for the first plastic part.
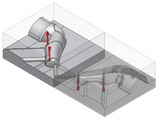
- In the Mold Design browser, double-click the Housing Complete Right node.
- In the
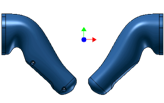
Core/Cavity tab, click
Define Workpiece, and then define the workpiece dimensions for the second plastic part. These two workpieces stand side by side.
- In the
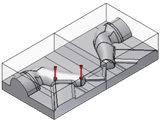
Mold Design browser, double-click the
Housing Complete Left
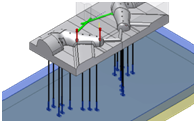
node and finish the parting design including the patching surfaces, runoff surface, core, cavity, and inserts.
- In the
Mold Design browser, double-click the
Housing Complete Right
node and finish the parting design including the patching surfaces, runoff surface, core, cavity, and inserts.
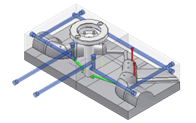
- In the
Core/Cavity tab, click
Finish Core/Cavity to exit the core and cavity design environment. Click the
Mold Layout tab to define runners, gates, and cold wells.

- Click the
Mold Assembly tab and place mold base components, such as the mold base, sprue bushing, locating ring, and ejector pin. If necessary, add a lifter assembly and a slider assembly.
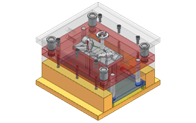
- Click the
Mold Layout tab, and design cooling channels for the family mold.
- Click the
Mold Assembly tab and place the cooling components and the side lock to complete this simple family mold design.
- In the Mold Assembly tab, click 2-D Drawing. Create drawings for the components that you have selected.