Rendering Shots as You Work
You can render shots as you work on them using Lustre ShotReactor locally or remotely. As you move from shot to shot in the timeline, the previous shot is rendered using the ShotReactor, making the rendering process invisible and hence does not interrupt your work. If several shots are changed before Lustre has had time to render the last one, the changed shots are sent to a job queue.
By default, ShotReactor is installed locally on your Lustre station.
To install ShotReactor on a remote server, see Installing and Configuring Lustre Shot Reactor.
- When rendering a multi-layer timeline, ShotReactor renders the shots that are visible from a flattened timeline, or the shots from the active layer in the multi-layer timeline, depending on the mode you are working in. For Solo mode, see Multi-Layer Timeline and for Mute mode, see Top Vertical Priority.
- Running a rendering service like ShotReactor on the creative workstation as a background task may impact interaction and playback performance, based on the resolution of your project, the configuration of the workstation, etc.
Files rendered with the ShotReactor are stored in the same directories as those used for renders created using the Render / Local menu. Directories are specified when you first create the project. To view the renders, use P (Print) view mode. See Setting the View Mode.
To render shots with the ShotReactor:
Do one of the following:
To use ShotReactor locally, make sure the IP address is set to
, in the init.config file. This is the default setting. To use ShotReactor on a remote machine, make sure the IP address field is set to the ShotReactor machine's IP address set to
, in the init.config file. Note:To render at full resolution, enable Renders Full Res in the Network Rendering page of the project configuration. See Network Rendering Settings.Start Lustre.
Access the Render / ShotReactor menu.
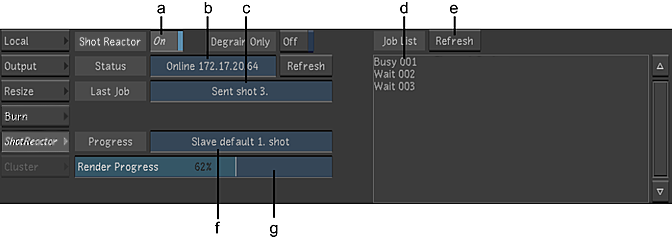
(a) ShotReactor On/Off button (b) Status field (c) Last Job field (d) Job List (e) Job List Refresh button (f) Progress field (g) Render progress bar
In the Status field, the status and IP address of the ShotReactor machine are displayed. If you are using ShotReactor locally,
is displayed in the Status field. This is the default setting. Tip:Click Refresh to update the Status field.Set the ShotReactor On/Off button to On.
The letters BR in the upper-left corner of the screen indicate that ShotReactor is activated.

In the Render / Local menu, specify the region to render. See Specifying the Shots to Render.
When you want to render a shot with ShotReactor, modify a parameter and then move to the next shot.
Tip:You can change the order of your shots in the Job List directly from the Job List.To view the render status, display the ShotReactor menu.
The last job sent to the ShotReactor is displayed in the Last Job field. The last job sent is also the shot currently being rendered, and its name is displayed in the Progress field. The shot's render progress is indicated by the Render progress bar.
Tip:The Render progress bar shows the shot's render progress as a percentage and updates every second. You can change the update interval using the Refresh in Seconds slider in the Network Rendering tab of the project configuration. See Network Rendering Settings.When you have finished, you can turn off rendering with ShotReactor by setting the ShotReactor On/Off button to Off.
Any jobs remaining in the job queue are cancelled.
To play shots rendered by ShotReactor:
Navigate to a shot that has been rendered.
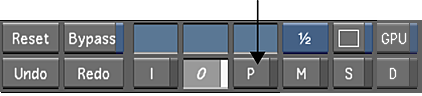
Enable P (Print) view mode.
Use the playback controls to play the shot.
Note:If you have rendered files on the filesystem but Lustre does not “see” them, you can force a refresh by pressing Shift while enabling P in the user interface. The force refresh function is especially useful when background rendering processes are involved.