Aerial and satellite photographs often contain information about their location and scale. This information makes the images “georeferenced.” AutoCAD cannot use this georeferencing information, so it cannot properly position the imagery, but AutoCAD Map 3D toolset can.
In this exercise, you insert a digital raster graphic (DRG) of Redding, California, into a drawing of the same city. The information in the associated TIFF world file (TWF) allows you to locate and scale the image correctly.
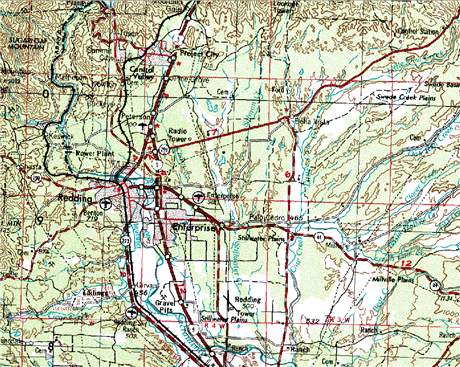
Raster images provide context for drawing objects, like roads.
To insert a raster image
- If you have not already done so, see Lesson 1: Get Ready to Use the Tutorials.
- Open the tutorial sample file CITY.dwg.
- Click
 . Find
- In the Insert Image dialog box, do the following:
- Navigate to the location where you stored your tutorial sample files.
- In the Files Of Type box, select Tagged Image File Format (*.tif,*.tiff).
- In the list of images, select REDDING_DRG.tif.
- Click Information to display the file size, creation date, and other information, as well as a preview of the image.
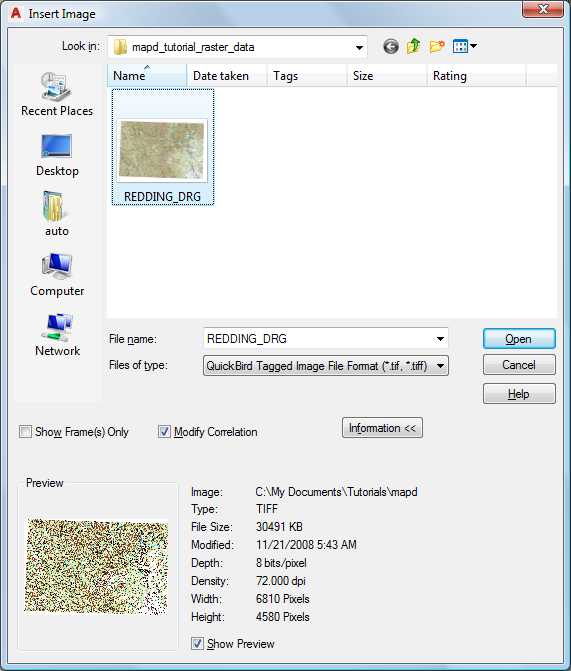
Information displays a preview and image statistics.
- Select Modify Correlation.
- Click Open.
- In the Image Correlation dialog box, do the following:
- Click the Source tab if it is not already current.
The Correlation Source is a World File. The actual file is called REDDING_DRG.tfw. It is stored in the location where you copied your tutorial sample files.
The data in the world file determines the Insertion Point X and Y values under Insertion Values. These values georeference the image, so it is correctly positioned in the drawing.
Note: You can manually adjust the insertion values as needed. - Click OK.
The image is correctly placed in the drawing.
- Click the Source tab if it is not already current.
- Save the file.
- Click
 Save AsAutoCAD Drawing.
- In the Save As dialog box, navigate to the folder you created for your tutorial maps.
- Click Save.
- Click
To continue this tutorial, go to Exercise 2: View image information.