After you bind skin using interactive bind, you can adjust the volume manipulators interactively in the viewport, or by adjusting the parameters in the Channel Box or Attribute Editor.
To view and select interactive bind manipulators
- Open the Interactive Skin Binding Tool. (Select Skin > Edit Smooth Skin > Interactive Skin Bind Tool from the main menu bar, or double-click
 in the Maya Tool Box.)
 - Click to select an influence in the viewport, or select from the Influences list in the Interactive Skin Binding Tool.
A volume manipulator appears around the influence in the viewport. By default, volume manipulators display on one active influence at a time, but you can set other Display options.
For example, to have the manipulators display even when their associated joint is not selected, set the Display option to All. When this option is on, all inactive manipulators display as wireframes, and you can use the pickwalk hotkeys to move between manipulators.
To adjust interactive bind manipulators
To adjust manipulators in the viewport, drag and ![]() -drag the manipulator edges to change its shape and size. You can also use the manipulator translate and rotate controls to adjust its position.
-drag the manipulator edges to change its shape and size. You can also use the manipulator translate and rotate controls to adjust its position.
The following table summarizes the ways you can manipulate volumes. (These descriptions assume the default capsule volume type.)
The region you affect highlights in yellow as you manipulate it.
| Region | Drag | Shift-drag |
|---|---|---|
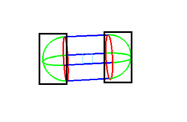 Green (tips) |
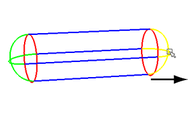 Shortens or lengthens entire capsule. |
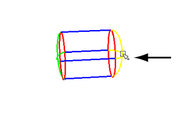 Flattens capsule tips. |
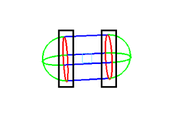 Red (ends) |
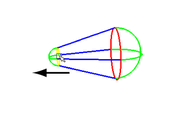 Drag left to shrink one end. Drag right to expand. |
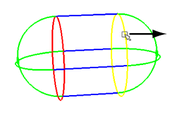 Uniformly expands or shrinks both ends. |
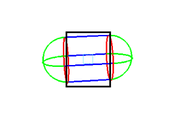 Blue (middle) |
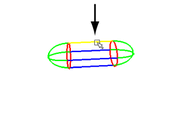 Uniformly shrink or expand height and width. |
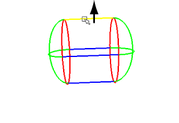 Non-uniformly shrink or expand top, bottom, and sides. |
The images above do not show the manipulator rotate and move controls. To shrink the rotation rings and move arrows in your scene, use the + and - hotkeys.
As you adjust the manipulator to include or exclude vertices, Maya updates the weight color feedback for the associated influence in real time.
You can adjust the Falloff curve or select a different color ramp preset in the Skin Binding Settings of the Interactive Skin Binding Tool.