For a description of the Double Switch utility, see Double Switch.
Switches double float attributes on a 2D texture, like Repeat UV or Translate Frame of a 2D texture placement.
For convenience, before starting this tutorial, select Window > Viewport and Window > Outliner from the Hypershade menu and dock these panels into your Hypershade. See Customize your layout in the Hypershade.
To use the Double Switch utility
- Create a material and assign it to the objects.
- Map a 2D texture to one of the material’s attributes, such as Color. Adjust the texture’s attributes if necessary.
- A place2dTexture node is created when you map a 2D texture. Select the texture’s place2dTexture swatch in Hypershade to see its attributes in the Property Editor.
- Place the cursor over the Repeat UV attribute, and right-click Create New Texture from the pop-up menu.
- Select the
Double Switch utility from
Maya > Utilities in the
Create Render Node window. Notice that the spheres seem to have lost their textures.
This is when you can apply a Default setting in the doubleShadingSwitch Property Editor. You can either map a new texture, or change the values for U and V. In the following the Default value is changed to 1.5 for both U and V.

- In the
Outliner, use the middle mouse button to select the spheres for which you want to adjust the UV texture placement and drag them to the
In Shape column of the
Switch Attributes section of the
doubleShadingSwitch
Property Editor.
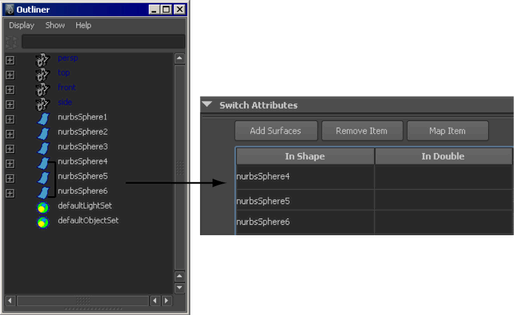
Notice only the spheres you move into the In Shape column lose their textures. These are the spheres you want to change.

- Shift-select all the rows in the
inShape column, and then right-click and select Map.

- Select the
2d Placement utility from
Maya > Utilities in the
Create Render Node window. The
Connection Editor appears. Click the
Repeat UV
Output attribute (in the left column), then, in the right column, expand input[0] and select input[0].in Double. Select also input[1].inDouble, input[2].inDouble, and so forth depending on the number of spheres you are mapping.

Only the spheres you mapped in the Double Shading Switch’s Property Editor update. Click the place2dTexture swatch in Hypershade to open its Property Editor and adjust the Repeat UV values if necessary. A higher Repeat UV value makes the grid pattern more dense.
