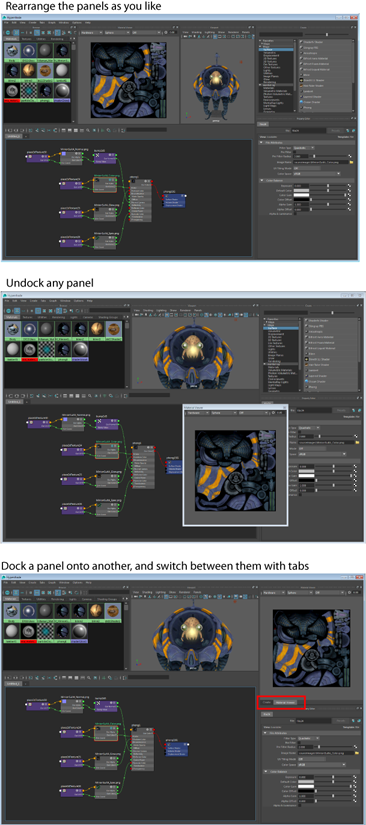
Create the Hypershade layout best suited for your workflow by docking, undocking, and rearranging panels.
You can dock and undock any of the Browser, Material Viewer, Property Editor, Create and Bins panels. These panels appear by default when you open the Hypershade.
You can undock the panels so that they become standalone windows; or, undock and redock them to another location in the Hypershade window.
In addition, you can open any of these panels (Viewport, Render View, Outliner, UV Editor, Graph Editor, and Attribute Spread Sheet) from the Window menu and dock that panel to the Hypershade.
You can dock a panel onto another panel, and tabs are created that allow you to switch between the panels in the same area of the Hypershade.
Your docking and layout preferences are saved with your preferences; that is, they are retained when you start a new scene and when you restart Maya.
| To... | Do this... |
|---|---|
| Undock a panel | Drag the double-dotted edge ( |
| Redock a panel | Drag the panel to the location in the Hypershade where you want it to be docked to. |
| Re-open a standalone, floating window that you closed | Select the appropriate option from the Window menu, for example, Window > Browser. |
| Dock a panel into another panel |
Drag the floating (or undocked) panel into a currently docked panel. While dragging, a tab appears for the currently docked panel and a second tab will be created for the floating panel when it is also docked. 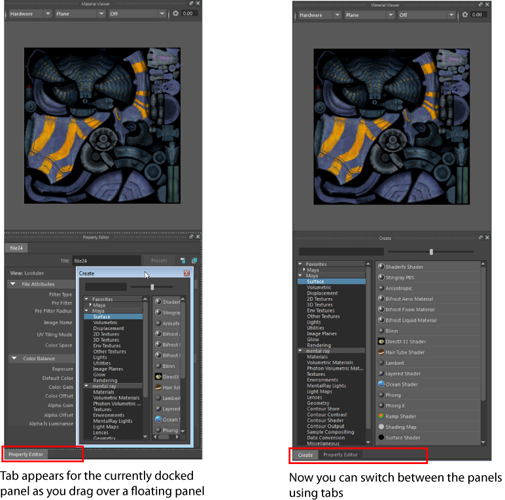 |
| Obtaining more than one floating Property Editor | You can obtain the
Property Editor in a separate floating window by clicking
 on the
Property Editor. This way, you can obtain more than one floating
Property Editor window. on the
Property Editor. This way, you can obtain more than one floating
Property Editor window.
|
| Add other panels, such as a Render View, to your layout. |
Select Window > Render View to open a Render View panel, then dock it into the Hypershade. |