You can easily create a reflective material such as metal or a refractive material such as glass using the Standard Surface shader. The following sections describe the set of key attributes you can adjust to quickly arrive at the results you want.
As you adjust your shader, you can preview your results in the Hypershade Material Viewer or in the Arnold Render View.
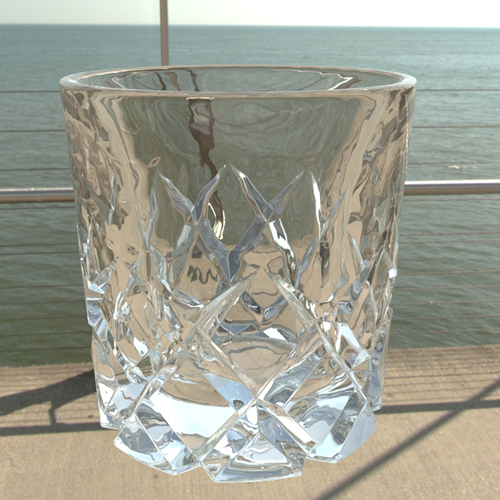
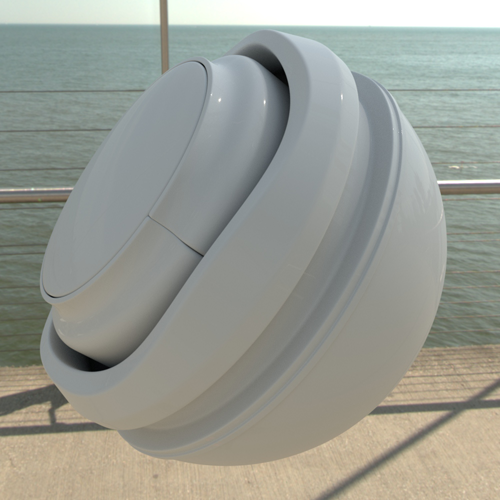
Create a glass material
In this scene, an Arnold Skydome light is mapped to an .hdr image to provide image-based environment lighting. For more information about the Skydome light, see Ai Skydome Light.
The key attributes that you need to adjust are in the Base, Specular, and Transmission section of the Standard Surface Attribute Editor.
-
Select your model, then right click and select Assign Favorite Material > Standard Surface. A standardSurface2 shader is now assigned to your glass model.

-
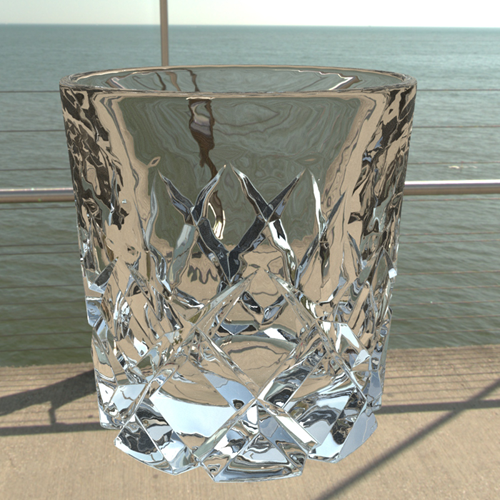
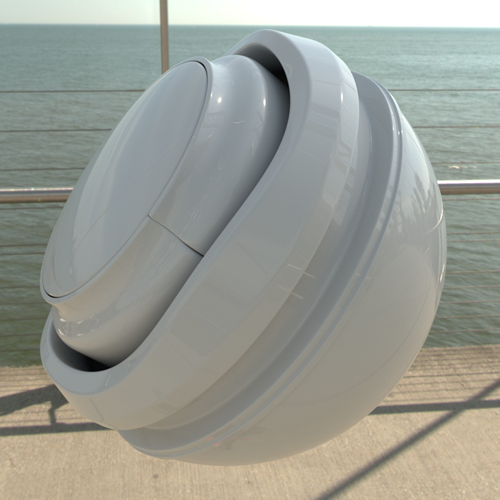
In the Standard Surface Attribute Editor, lower the Specular > Roughness to 0.
If you are modeling a clear glass, you do not need to set a roughness value. As you lower this value, your specular reflections now appear glossier, and your render will also be faster as a result.
-
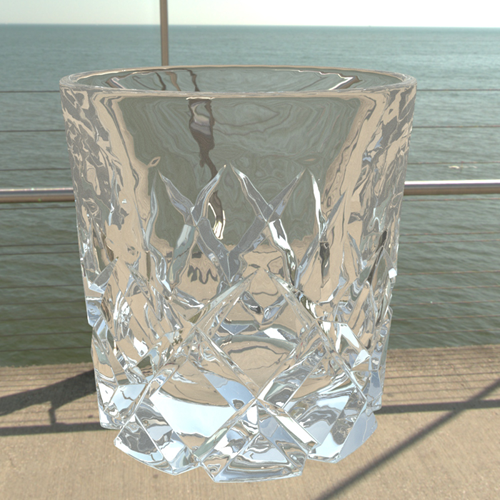
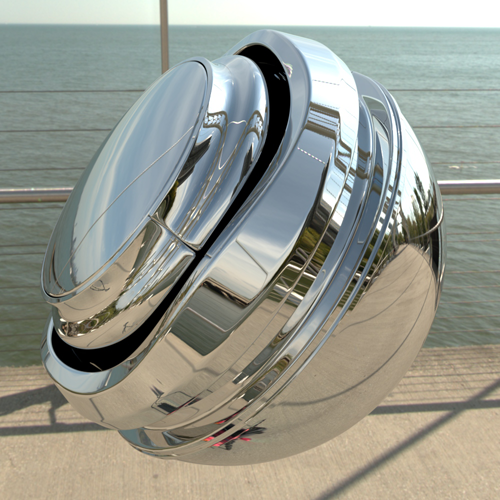
To make the glass transparent, adjust the Transmission > Weight. This allows light to scatter through a surface, and is ideal for modeling glass or water.
Set this to a high value, for example 0.95, for glass.
-
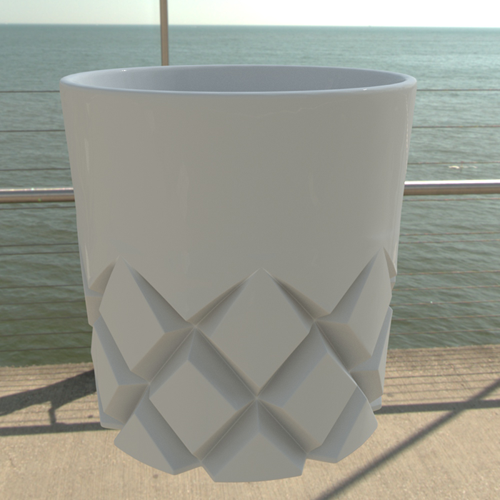
Lower the Base > Weight value so that your combined Base > Weight and Transmission > Weight values equal to 1. In other words, set Base > Weight to 0.05 because Transmission > Weight is set to 0.95.
The Standard Surface shader is energy conserving by default: all of its layers are balanced so that the amount of light leaving the surface does not exceed the amount of incoming light. By setting your layer weights to 1, you ensure that your material is energy conserving and that it will react predictably in different lighting.
-
Increase Specular > Weight to capture the specular contribution from direct light sources. The higher the weight, the brighter the specular highlight.
Specular weight is set to 1 in the following image.
-
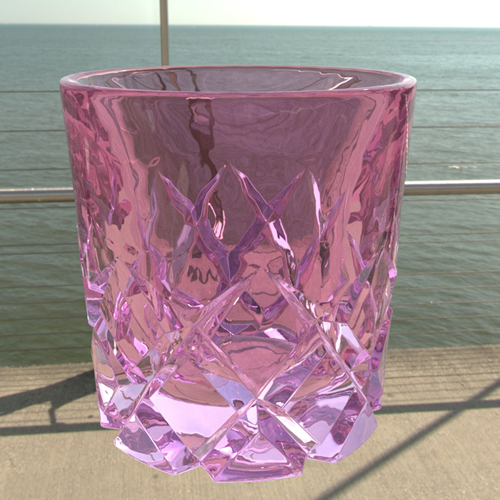
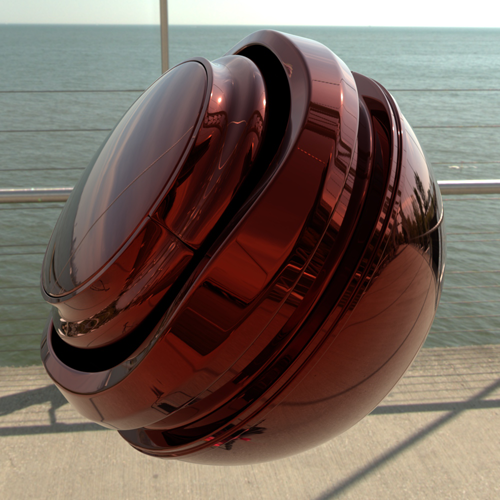
To add variety to your glass, adjust attributes such as the Transmission > Color to tint your glass.
-
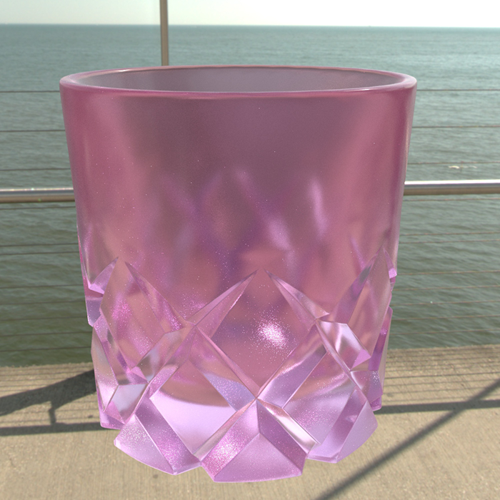
To create frosted glass instead of clear glass, increase the Specular > Roughness.
A roughness value of 0 gives a perfectly sharp mirror reflection, while higher values create reflections that are closer to a diffuse reflection. In this example, a value of 0.177 is used.
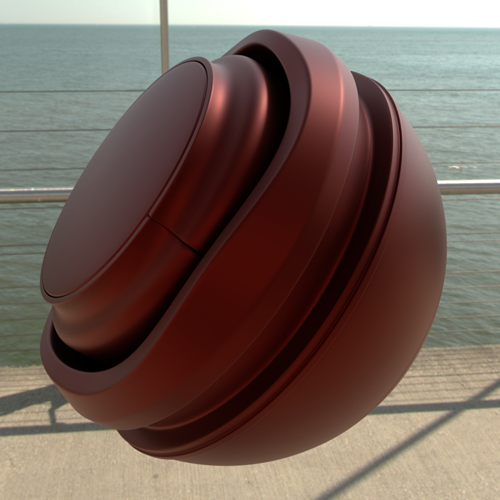
Create a metal
In this scene, an Arnold Skydome light is mapped to an .hdr image to provide image-based environment lighting. For more information about the Skydome light, see Ai Skydome Light.
The key attributes that you need to adjust are in the Base, Specular, and Coat section of the Standard Surface Attribute Editor.
-
Select your model, then right click and select Assign Favorite Material > Standard Surface. A standardSurface2 shader is now assigned to your shaderball model.
-
In the Standard Surface Attribute Editor, lower the Specular > Roughness to 0 to create a chrome material.
The lower the Roughness value, the sharper the reflection. A value of 0 produces a perfectly sharp mirror reflection.
-
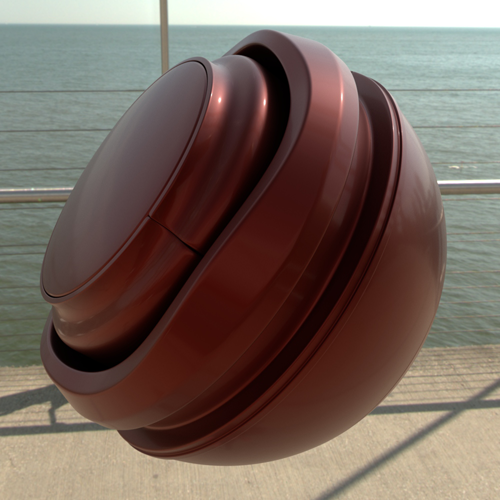
Set Specular > Weight to 0.8 to capture the specular contribution from direct light sources. A higher value produces a brighter specular highlight.
-
Set Base > Metalness to 1 to turn your surface into a metal.
-
Set Base > Color to tint your metal.
-
If you are modeling car paint, you can create a matte finish instead of a glossy one by adding Specular > Roughness.
In this example, Roughness is set to 0.45.
-
You can then add a reflective, clear-coat layer to your metal by adjusting Coat > Weight.
This is must useful for adding a clear-coat layer to car paint, or a laminated, protective, or oily thin-film to your surface.
In this example, coat is set to 0.3.
-
To blur this thin film, adjust Coat > Roughness.
In this example, roughness is set to 0.25.
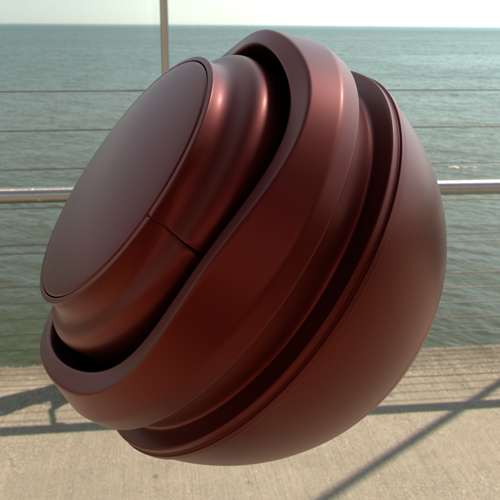 Note: Specular > Roughness only affects the directional and environment light contribution to the metalness of the object; it does not affect the coat layer. You must adjust the roughness of your metal and the roughness of your coat separately.
Tips and tricks for using the Skydome light
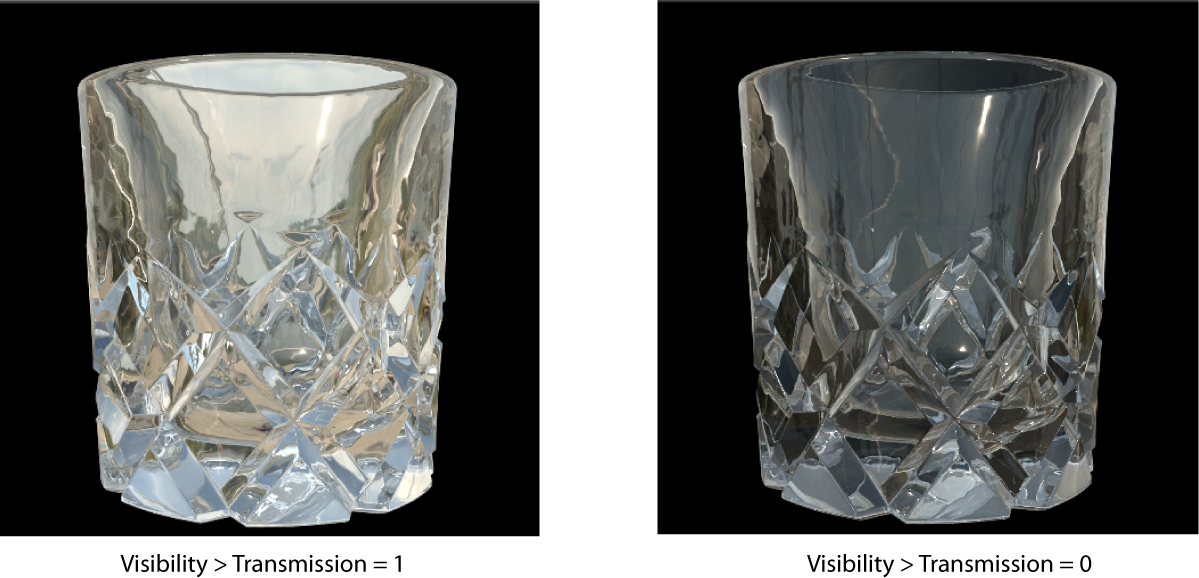
By default, the .hdr image used for environment lighting is included in the background. To exclude it from your final render, select the aiSkyDomeLightShape Attribute Editor, then set Visibility > Camera to 0.
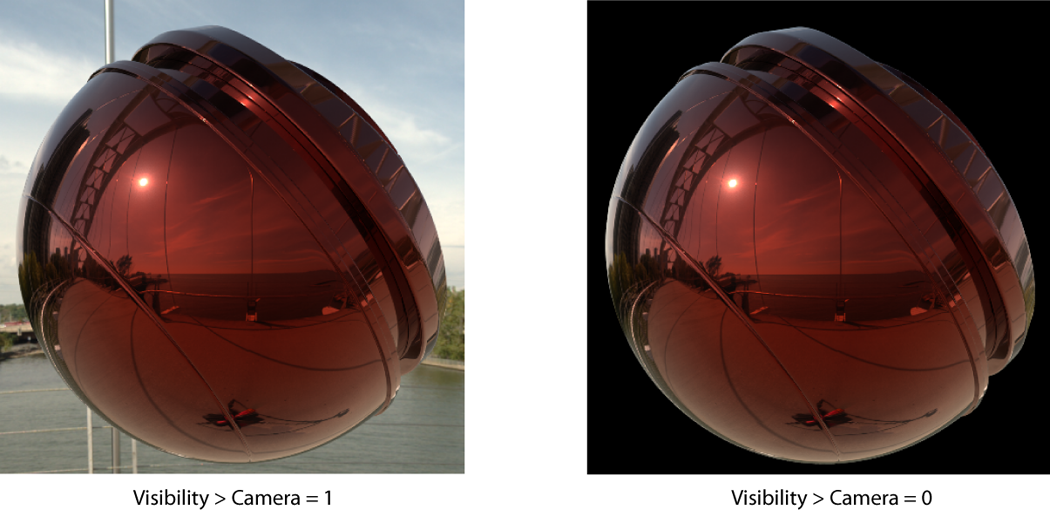
In addition, the reflections and refractions produced by the environment lighting are also baked into your render by default. You may want to exclude these reflections and refractions if you plan to composite your render into a neutral background. To do this, select the aiSkyDomeLightShape Attribute Editor, then set Visibility > Transmission to 0.