The Material Viewer allows for easy visualization of sub-networks and unconnected networks, and therefore optimizes your compositing and shader development workflows.
The Material Viewer displays any shading network, including materials, textures, and utilities, based on the context of what is graphed in the Hypershade work area. A red border highlights the node that is currently rendered in the Material Viewer.
As you adjust your shading network, the Material Viewer updates in real-time.
Choose between rendering using the Maya Hardware 2.0 renderer or any other registered plug-in renderer such as Arnold for Maya.
You can use the MPxRenderer class to implement a 3rd party renderer for rendering in the Material Viewer. See the C++ API Reference in the Maya Developer Help for more information.
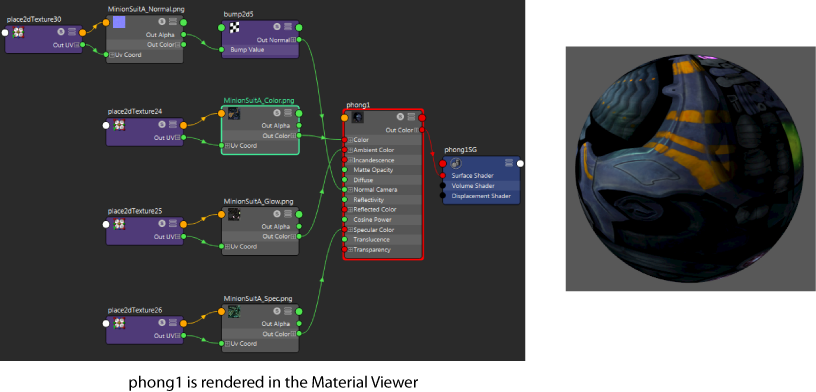
Render your shader network
In this example, you can select any node in the graph to see the downstream result of the network (phong1) in the Material Viewer. The node that is rendered in the Material Viewer is denoted by a red border.
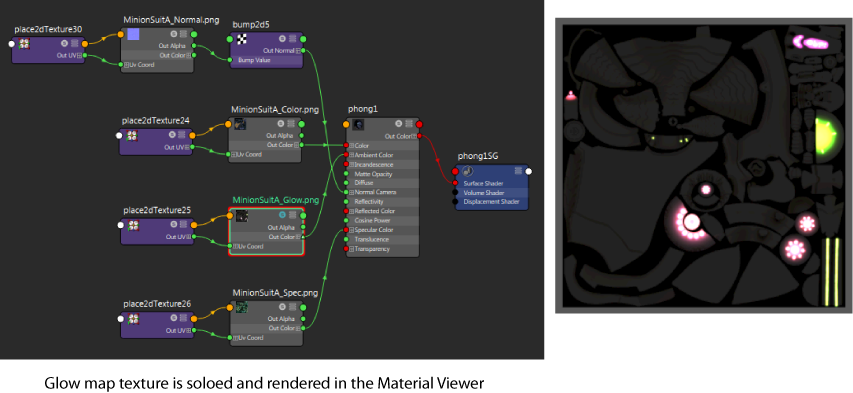
Render a texture in your network
To view a particular texture, click the S icon on the file node to solo the node. For more information about soloing, see About soloing. You can also select your textures in the Textures tab of the Browser and render them in the Material Viewer. When rendering textures, the Material Viewer swatch appears in flat view.
Render a network without a material node
You can render a network with or without a material node. This lets you build texture networks without assigning each network to a material.
In this example, checker1 is rendered in the Material Viewer. To see the grass reference texture in the Material Viewer, solo the file node.
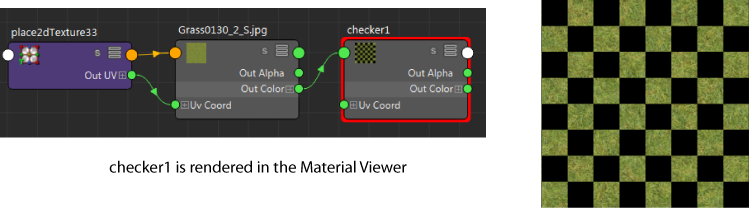
Textures courtesy of www.cgtextures.com.
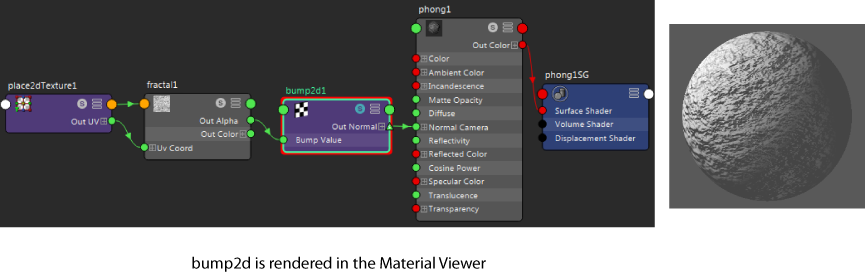
Render a bump map
You can render a bump map in the Material Viewer, and it appears as a 3d geometry swatch to allow you to better examine the bumps under the influence of lighting.
Identifying the node that is rendered in the Material Viewer
The Hypershade work area enables you to graph multiple shading networks simultaneously, each graphed in a different tab. You can identify the node that is being rendered by its red border. If a node is soloed, it always displays with a red border and is rendered in the Material Viewer. If no nodes are soloed, the node that is rendered in the Material Viewer is outlined in red. In most cases, this is the downstream result of the shading network that you last selected.
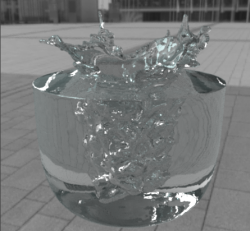
Material swatch options
Choose also from among several swatch shapes, for example: Sphere, Cloth, Teapot, Glass Splash, and so forth.
Adding environment lighting
You can also render your material with a preset or custom environment background. Choose from a list of preset environments or add your own. See Add image based lighting with a preset or custom environment in the Material Viewer for more information.
Move and rotate the camera
You can move and rotate the camera in the Material Viewer. In 3D view, you can tumble, track and dolly like you can in the viewport, while in 2D flat view (for example, when a texture is soloed), you can pan and zoom.
Your 3D camera position is saved when you switch from 3D view to 2D view (such as by soloing a texture), and then back to 3D view. On the other hand, 2D view camera positions are not saved. Camera settings are also reset when the Material Viewer is closed and re-opened.
Click
 in the
Material Viewer toolbar to reset the camera to its original position.
in the
Material Viewer toolbar to reset the camera to its original position.
Color management in the Hypershade
Global color management settings (Color Management preferences in the Preferences window) apply to the Material Viewer swatch, as well as swatches in the Browser and in the work area.
In addition, you can adjust the exposure and gamma of the Material Viewer using the controls provided, as well as select the view transform that converts colors from the working color space for display. See Render View toolbar for more information about the color management controls.
Pause the Material Viewer
Click
 in the
Material Viewer toolbar to pause updates. If the
Material Viewer is set to use the hardware renderer, all editors that use the Viewport 2.0 renderer are also paused, for example, the viewport, and the
UV Editor. Paused editors appear with a red border and the text
Paused to indicate their paused state. If an image of the last cached render exists, the
Material Viewer displays this image in lieu of the text
Paused.
in the
Material Viewer toolbar to pause updates. If the
Material Viewer is set to use the hardware renderer, all editors that use the Viewport 2.0 renderer are also paused, for example, the viewport, and the
UV Editor. Paused editors appear with a red border and the text
Paused to indicate their paused state. If an image of the last cached render exists, the
Material Viewer displays this image in lieu of the text
Paused.
This allows you to make changes in your scene without having to wait for the Material Viewer to update. This can be especially useful when you have a complex scene.
Click
again to lift the pause, and the
Material Viewer is updated with all the changes made while paused.
See Pause Viewport 2.0 and the Material Viewer in the Hypershade.
Suspension of the Material Viewer
If you have two renders occurring concurrently; for example, the
Render View and the
Material Viewer, starting an IPR render will suspend the
Material Viewer, and a red border appears around the
Material Viewer to indicate its suspended state. To lift the suspension, stop the IPR render, and the
Material Viewer is active again. However, you must manually trigger a re-render; for example, by changing an attribute value or the camera angle. This behavior is slightly different from clicking
, where a re-render always occurs when pause is lifted.