By default, when you first create a node in the Hypershade, its most commonly used attributes are displayed (hotkey 4 mode in the Node Editor).
For more information about node view modes, see Node Editor view modes.
You can search for a specific attribute (or filter out attributes) in a node by clicking
 in the work area toolbar to display the search field for the node.
To connect attributes using connection lines
- Click the source and then the destination ports to connect them.
Alternatively, you can left or middle-mouse drag to create connection lines between your output and input attributes. To release a connection line, left click on any empty area of the graph, or press Esc.
As you mouse over the available inputs, all inputs that can receive the connection are highlighted. This indicates that it is possible to make a connection with this input.
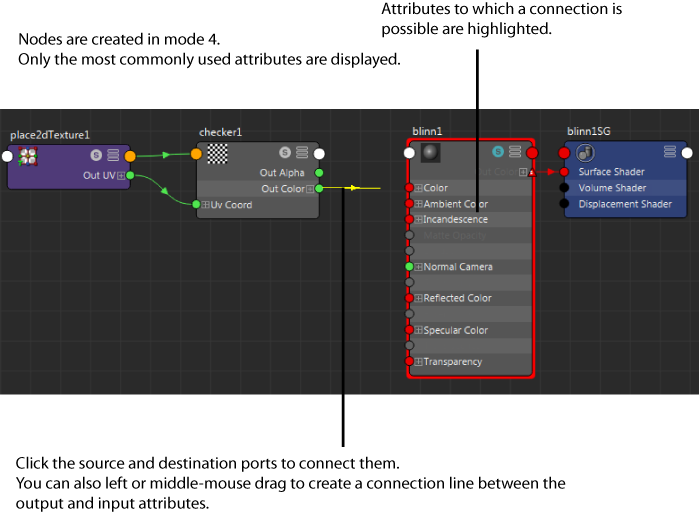
All inputs that cannot receive a connection are greyed out. This indicates that a connection is not possible.
If you mouse over a compound attribute, the Hypershade automatically expands to expose its children to which you can make a connection.
In addition, it also snaps to the ports to which you can make a connection. This allows you to easily identify the attributes that you can connect to.
When connecting compound attributes (for example, a parent attribute such as Color, with Color R, G, B child attributes), if you try to make a connection to a parent attribute (Color) when the child attribute (for example, Color R) is already connected, the connection to the child attribute becomes disconnected.
You can drag on a connection line to break and recreate a connection.
You can also connect your nodes in their collapsed view mode as you would in the Node Editor (simple view mode, hotkey 1). See To connect attributes without expanding the nodes for more information.