- To separate one shell into multiple shells corresponding to different parts of a texture.
- To allow UV texture coordinates to freely unfold with as little distortion / overlapping as possible during an Unfold or Optimize process.
- To join small shells typically created during an Automatic Mapping process.
| To... | Do this | Example |
|---|---|---|
|
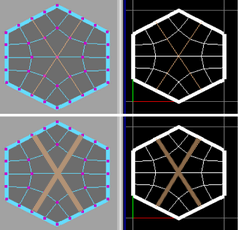
Separate (cut) a UV shell along the selected edges. |
|
 |
|
Separate (cut) UV edges interactively |
To separate UV edges in the UV Editor
To separate UV edges in the Viewport
|
  |
|
Let Maya separate (cut) edges (or select edges for seams) for you |
|
|
|
Attach (sew) UV shells along the selected edges. |
|
 |
|
Attach (sew) UV edges interactively |
To sew UV edges in the UV Editor
To sew UV edges in the Viewport
Note: When moving between the
Viewport and
UV Editor, the
3D Cut and Sew UV Tool automatically changes to the
Cut Tool.
|
  |
|
Attach (sew) UV shells along the selected edges and move the shells together. |
|
 |
|
Merge the selected UVs. |
Merge UVs only merges the UVs that share the same vertex. You can specify an option for the maximum distance Maya will move UVs to merge them. |
|
|
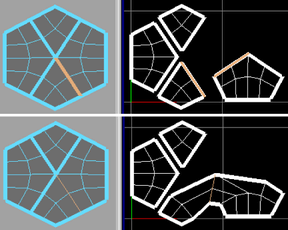
Automatically attach and move small shells. |
After performing a Move and Sew operation, you can select the node (polyMapSewMove) and edit it in the Attribute Editor or Channel Box to adjust the Number Faces. |
Notes
- A single edge cannot be cut unless it touches a border.
- Use the in the UV Editor to select a UV piece after cutting.
- When using the Cut Tool or Sew tool in the UV Editor, Maya will respect each UVs current pinning status (i.e. pinned UVs will stay put when cut and only be sewed if they can do so without moving).