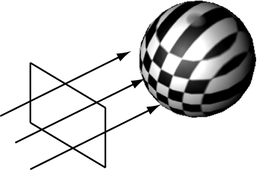
Planar mapping projects UVs onto a mesh through a plane. This projection is best for objects that are relatively flat, or at least are completely visible from one camera angle.
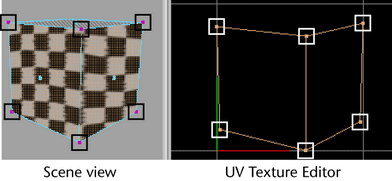
Planar mapping typically gives overlapping UV shells. The UV shells may be perfectly superimposed and look like a single UV shell. You should use after mapping to separate overlapping UVs.
To map based on a planar projection
- Select the faces you want to project UVs onto.
- Select
UV > Planar >
 (if you need to set options), or in the
UV Editor's
UV Toolkit go to
.
Set the following options as required:
(if you need to set options), or in the
UV Editor's
UV Toolkit go to
.
Set the following options as required:- Click Best Plane to position the manipulator based on the faces you selected.
- Click Bounding Box to position the manipulator based on the bounding box of the mesh.
- Choose the axis from which UVs will be projected.
- Click Project.
- Use the projection manipulator to control how the plane distributes UVs.
- Use the
UV Editor to view and edit the resulting UVs.
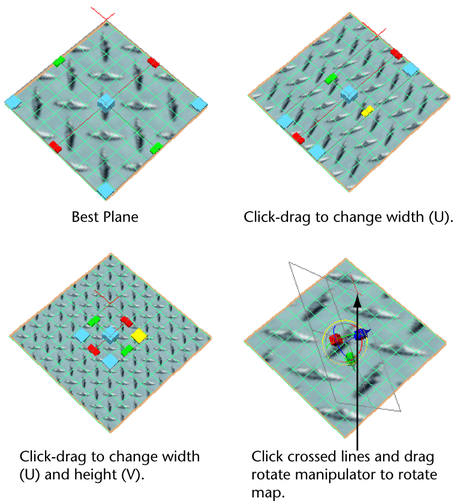
You can also rotate the manipulator by clicking the red crossed lines, which reveals the Show Manipulator tool. Click the light blue circle around the Show Manipulator handle to activate the rotate handles.
Mapping to alternative planes
The Best Plane Texturing Tool assigns UVs to the faces you select based on a plane computed from vertices you specify, rather than a default axis plane.
You can select the faces you want to map before you choose the Best Plane Texturing tool, or you can choose the tool and then click each face you want to map.
To map based on the best fit plane of the selection
- Select the faces you want to map UVs onto.
- Select UV > Best Plane Texturing Tool (if you need to set options), or in the UV Editor's UV Toolkit go to .
- If faces are not selected yet, click faces to add them to the selection. You cannot marquee-select the faces—you must select the faces one by one, or select the faces before using the operation.
- Press Enter.
- Select one or more vertices (right-click on the mesh and choose Vertex to switch to selecting vertices) to define the plane of projection.
- Press Enter.
- Use the
UV Editor to view and edit the resulting UVs.
To project from a plane defined by the view
- Select the faces you want to project UVs onto.
- Tumble the perspective view, or track an orthographic view to look at the faces.
- Select
(if you need to set options), or in the
UV Editor's
UV Toolkit go to
.
Notes
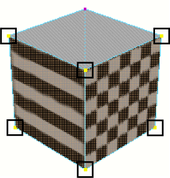
- Planar mapping can create shared, overlapping UVs that can look like texture borders. Turn on texture border display (in ) to clearly show texture borders.
- Shared, overlapping UVs can create seam problems if you paint over them with
3D Paint or
Paint Fur Attributes Tools.
To avoid these problems, manually separate the UVs with UV > Layout >
. Set
Separate shells to
Folds and the
Shell layout option to
Along U or
Into Square.
- Projection mapping only works properly on a single object at a time. If you need to apply a projection to multiple polygonal objects in a single step, combine the objects into one, apply the projection, and then separate the parts back out. Otherwise, perform a projection on each object separately.
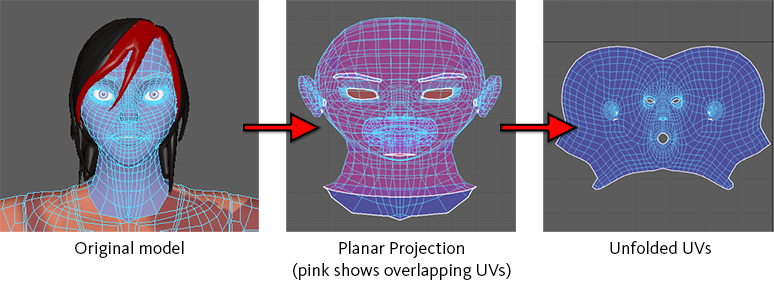
- When a model’s form is very organic, and you require a complete UV representation of that model for texture mapping, a planar projection can produce UVs that overlap and appear distorted. You will probably need to
unfold the UVs to make them usable.