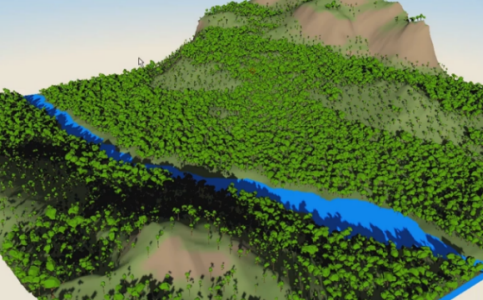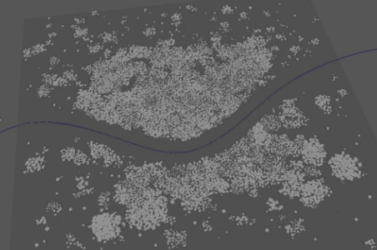
Surrounds each point with additional points arranged in natural, non-colliding clusters.
World Node
- Cluster Mode
-
Determines how the additional points are arranged around each base point. Options include:
- Ball: Arranges points into a filled sphere.
- Disc: Arranges points into a 2D filled circle.
- Circle: Arranges points into a 2D empty circle.
- Fibonacci Spiral: Arranges points into a 2D spiral.
- Fibonacci Sphere: Arranges points into an empty sphere.
- Map Based: Arranges points based on an input map. Point distribution is biased towards the lighter areas of the map.
- Terrestrial Ecosystem: Arranges points by simulating them as if they were plants that age and propagate seeds over time.
- Previous Points Mode
-
Determines how the additional points interact with each base point. Options include:
- Keep: Displays base points but ignores them for intersection calculations (causes clusters to intersect with base objects).
- Keep and Avoid: Hides base points but still includes them in intersection calculations (causes clusters to avoid intersecting with base objects).
- Kill and Avoid: Remove base points after including them in intersection calculations (causes clusters to avoid the former position of base objects).
- Kill: Remove base points so they don't interfere with intersection calculations. (causes clusters to overlap with the former position of base objects).
Cluster
- Points Per Cluster
-
Sets the number of additional points to arrange around each base point.
- Random Points Per Cluster
-
Adds a random number of additional points per cluster up to the specified amount.
- Scale Mode
-
Scales objects in clusters. Options include:
- Normal: Scale is controlled by the Radius and Radius Variance.
- Scale Map: Use a map to dictate the size of points when Cluster Mode is set to Map Based.
- Expand to Nearest: Points will scale up until they intersect with another mesh.
- Inherit: Scale is inherited from the MASH point that the cluster belongs to.
- Radius
-
Adjusts the base size of objects.
- Radius Variance
-
Adds additional randomized variance to each object.
- Minimum Separation
-
Spaces out points in the cluster.
- Collision Iterations
-
Determines the quality of the object collisions. A higher value results in more accurate collisions.
- Cluster Radius
-
Determines the radius of points around the base point when Cluster Mode is set to Circle, Fibonacci Spiral, or Fibonacci Sphere.
- ID mode
-
Determines how IDs are assigned to the clusters. Options include:
- Fixed: Each cluster point is assigned the same ID specified by Fixed Id.
- Stepped: Each cluster is assigned an incrementally higher ID.
- Random: Each point is assigned a random ID.
- Cluster Random: Each cluster is assigned a random ID (with all points in the same cluster being assigned the same ID).
- Minimum Id, Maximum Id
-
Determines the object ID range (Minimum Id to Maximum Id) to allow in the simulation.
- Fixed Id
-
Determines the ID number used when ID mode is set to Fixed.
Map Settings
Specifies the parameters of a Map Based Cluster Mode.
- Scale Map
-
Specifies the map used when Scale Mode is set to Scale map. Lighter areas are scaled larger.
- Placement Map
-
Specifies the map used for a Map Based cluster. Points have a greater chance to spawn in light areas.
- Map Projection Axis
-
Determines the axis along which the Placement Map is projected.
- Input Mesh
-
Specifying an Input Mesh causes cluster points to adhere to it. You can middle-drag a mesh into this field or right-click to connect the selected mesh. If a mesh is already connected, you can also right-click to remove or show it in the Outliner.
Terrestrial Ecosystem
Specifies the parameters of a Terrestrial Ecosystem-based Cluster Mode. When simulated, the starting points are treated as seeds, which age into plants, which sew new seeds, etc.
- Ecosystem Age
-
Determines the number of years to simulate the aging/seed dropping process.
- Maximum Elements
-
Determines the maximum number of seeds allowed in the ecosystem at one time.
- Seed Multiplier
-
Multiplier for the number of seeds that each object can sew.
- Genotype Editor
-
Opens the Genotype Creator, which allows you to modify the attributes of each seed type in the Attribute Editor.
Ground Mesh
Specifies the parameters of the ground mesh on which the simulation takes place.
- Input Mesh
-
Specifying an Input Mesh causes cluster points to adhere to it. You can middle-drag a mesh into this field or right-click to connect the selected mesh. If a mesh is already connected, you can also right-click to remove or show it in the Outliner.
- Ignore Slope
-
Enable this to use non-planes (e.g. torus') as an Input Mesh.
- Calculate Shade
-
Determines whether the effect of light/shade should be considered in the simulation.
- Shade Variance
-
Increase this value to give shade calculations a more natural feel.
- Pole Bias
-
Determines the impact of the planetary pole on the simulation. A value of 0 pertains to the equator, while a value of 1 pertains to a pole.
- Pole Direction
-
Determines the direction toward a planetary pole.
Maps
- Use Genotype Map
-
Allows you to assign starting seed positions to the landscape using a 2D map. Genotypes of a specific ID color (as assigned in the Genotype Creator) will begin in areas of the same color on the map.
- Genotype Map
-
Specifies the map used to assign IDs.
- R: Temperature, G: Soil Quality, B: Moisture
-
Determines whether or not to include the respective factors into the simulation (represented in the ID map by the colors Red, Green, and Blue).
- Conditions Map
-
Specifies the map used to assign Temperature, Soil, and Moisture.
- Output Age as Time
-
Outputs plant ages into the time channel, allowing you to assign animation frames depending on the plant age. Useful for time-lapse animations.
- Time Range
-
Determines the time range used when Output Age as Time is enabled.
- Round Time
-
Rounds the value output by Output Age as Time to the nearest whole number.
- Sparsity
-
Determines the amount of space around each point.
- Random Rotations
-
Randomly rotates each point up to the values specified in each axis.
Avoidance

- Avoidance Radius
-
Specifies the area around the avoidance objects for points to avoid.Note: If points still spawn within the Avoidance Radius, you will need to widen the left side of the Avoidance Ramp.
- Avoidance Ramp
-
Determines the falloff strength and shape of the Avoidance Radius. The graph represents the likeliness of a point spawning from the edge of the Avoidance Radius (left side) to the avoidance object itself (right side).
- Objects to avoid
-
Lists the objects currently being avoided by cluster points. You can middle-drag objects into this field to add them, or right-click to connect the selected object. You can also right-click existing objects to remove or show them in the Outliner.
Strength
- Strength
- Fades the node's effect for all the points at the same time.
- Random Strength
- Smoothly fades the node's effect on all the points in a random order.
- Step Strength
- Turns the node's effect off one point at a time.
- Strength Map
- Determines the input file (2D texture, animated texture, etc) that controls the shape of this node's effect.
- Map Projection Axis
- Determines the axis along which the Strength Map is projected.
- Map Helper
- Displays the object being used to interactively place the
Strength Map in the scene. You can right-click the field to create a new helper object (a plane) if none exists. You can also middle-drag a mesh into this field or right-click to connect a selected mesh. If a mesh is already connected, you can also right-click to break its connection or show it in the Outliner.
Note: For the best results, assign the same texture to both the Strength Map and the Map Helper (this automatically happens when creating a new helper object).