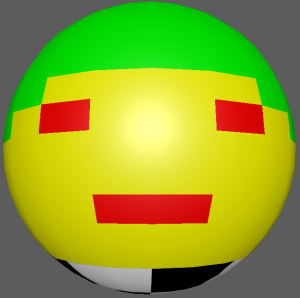
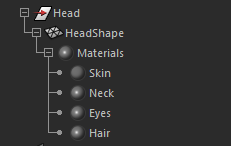
In this example is a head model, and its hair, skin, neck and eyes/mouth are all assigned to different materials.

The following workflow demonstrates how to create the following overrides:
- color override on the model's hair
- color override on the model's eyes and mouth
- color override on the model's neck to connect it to a checker texture
- replace the skin shader with a different shader using a shader override
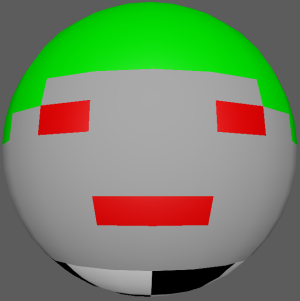
The end result should appear as follows:
Enable Display > Assigned Materials in the Outliner to display the materials assigned to each object in the scene.
This example assumes basic understanding of layers, collections, overrides and shader overrides. For more information, see Create overrides for a collection in your render layer, Override the material applied to the objects in a collection, and Connect a network to an attribute using a value override.
Override the color of the model's hair and eyes/mouth
- Create a layer and name it MyModel.
Click
 to make the layer visible.
- Right-click the layer and select Create Collection, and name the collection ModelHead.
- With the ModelHead collection selected, select Head from the
Outliner and click
Add in the
Property Editor to add it to the collection.
The head model is now added to the layer.
Note: By default, only its transform node is added to this collection.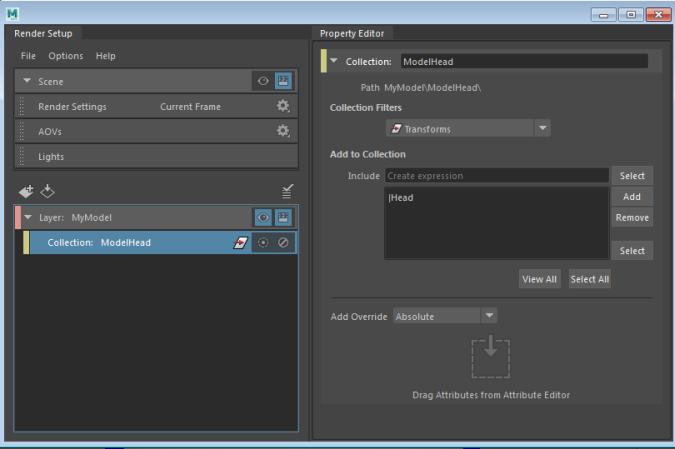
- In the
Outliner, select any shader, for example, Skin. In the Skin shader
Attribute Editor, middle-mouse drag and drop the
Color attribute to the ModelHead collection
Property Editor to create an override.
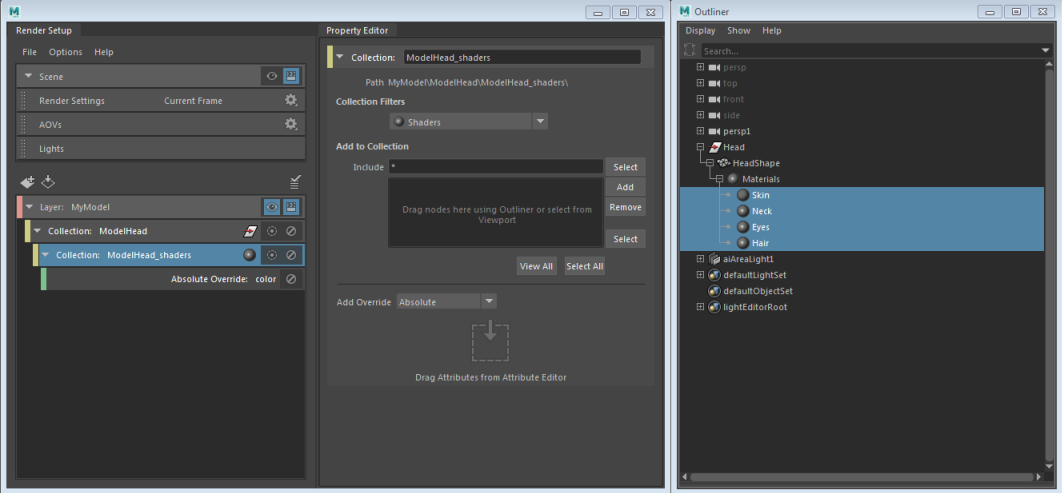
A ModelHead_shaders sub-collection is created, along with a corresponding color override. Select this collection to see that the Collection Filters is set to Shaders in the Property Editor.
Click Select All in the Property Editor to see that all of the Skin, Hair, Neck, and Eyes shaders are included in this collection. This collection contains all the shaders assigned to the head model.
- Click
Add in the
Property Editor, then remove Skin, Neck and Eyes, leaving behind only Hair. Remove the * from the expression field.
This collection now contains only the Hair shader. Rename it to Hair.
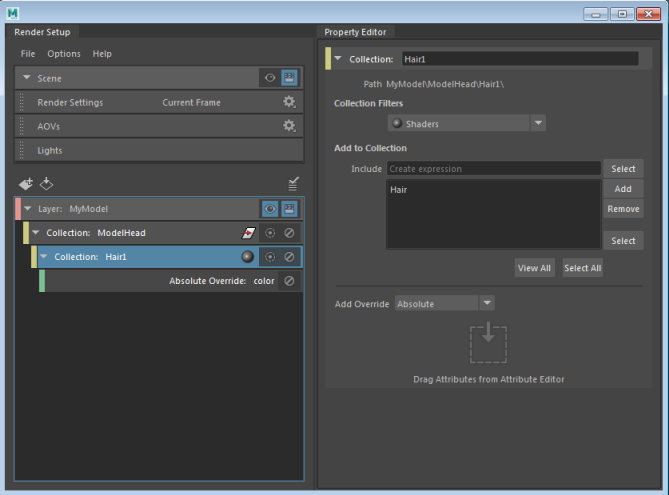
- Select the color override and change the color to green. The hair of the model turns to green in the viewport.

- With the MyModel layer still set as visible, select the ModelHead collection again, then select the Skin shader. In the Skin shader
Attribute Editor, right-click the
Color attribute and select
Create Absolute Override for the Visible Layer.
A ModelHead_shaders sub-collection is created, along with a corresponding color override. As before, all of the Skin, Hair, Neck, and Eyes shaders are included in this collection.
- With the ModelHead_shaders sub-collection selected, click
Select All in the
Property Editor, then
Add, and then remove Skin, Neck and Hair, leaving behind only Eyes. Remove the * from the expression field.
This collection now contains only the Eyes shader, which is applied to both the Eyes and Mouth. Rename it to Eyes_Mouth.
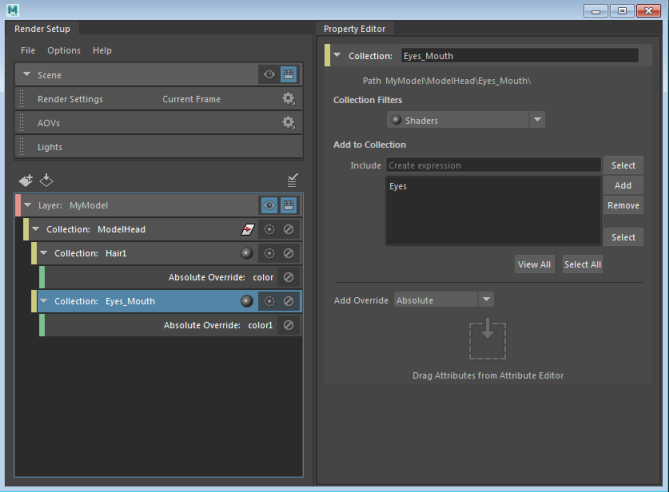
- Select the color override and change the color to red. The eyes and mouth of the model turns to red in the viewport.

Connect a checker texture to the color attribute of the model's neck shader
- With the MyModel layer still set as visible, select the ModelHead collection again, then select any of the shaders; for example, Neck. In the Neck shader
Attribute Editor, right-click the
Color attribute and select
Create Absolute Override for the Visible Layer.
A ModelHead_shaders sub-collection is created, along with a corresponding color override. As before, all of the Skin, Hair, Neck, and Eyes shaders are included in this collection.
- With the ModelHead_shaders sub-collection selected, click
Select All in the
Property Editor, then
Add, then remove Skin, Eyes and Hair, leaving behind only Neck. Remove the * from the expression field.
Rename this collection to Neck.

- Select the color override, and click the
 button to connect the
Color attribute to a texture such as Checker.
The neck of the model appears with a checkered texture in the viewport.
Replace the model's skin shader with a different shader using a shader override
- Select the ModelHead collection and right-click and select
Create Shader Override.
A collection named ModelHead_shadingEngines is created, along with a corresponding shader override. Select this collection to see that the Collection Filters is set to Shading engines. This collection contains all the shading engines applied to the head model.
Rename this collection to Skin.
- In the
Outliner, select SkinSG and click
Add in the
Property Editor to add it to the collection. Remove the * from the expression field.
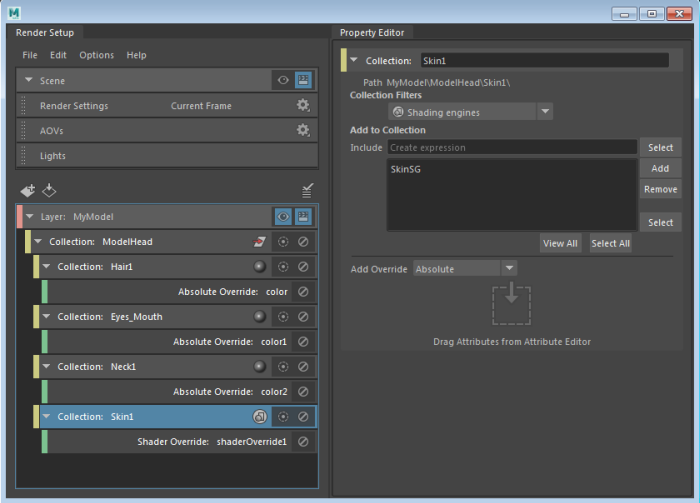
- Select the shader override and click the
 icon to connect the SkinSG shading engine to a different shader, such as blinn.
Adjust the color on the blinn shader and see the skin on the model update in the viewport.
