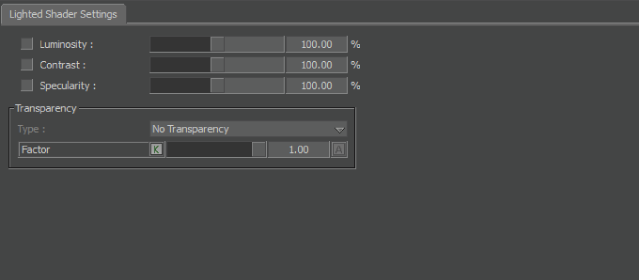
Use the Lighted shader settings to control how your object reacts to lighting in the scene.
The Lighted shader contains three color controls: Contrast, Luminosity, and Specular Factor. To use one of these controls, activate the Use option beside the control. The corresponding color control bar is activated.

Lighted shader settings
Luminosity option
Activate the Luminosity option and use the Luminosity slider to change the brightness of the object when reflecting light. This increases overall brightness, including contrast.
Contrast option
Activate the Contrast option and use the Contrast slider to change the contrast of the object when it reflects light.
Specularity option
Activate the Specularity option and use the Specularity slider to change an object’s level of shininess when it reflects light by increasing or decreasing the size of the specular highlight.
The specular highlight is the reflection of the light source, and usually appears as a bright circular area.
Transparency Type menu
The Transparency Type menu lets you select a method of calculating transparency, and set a percentage to boost or reduce the object’s texture or material transparency. For a description of the transparency types you can select, see Shader transparency types.
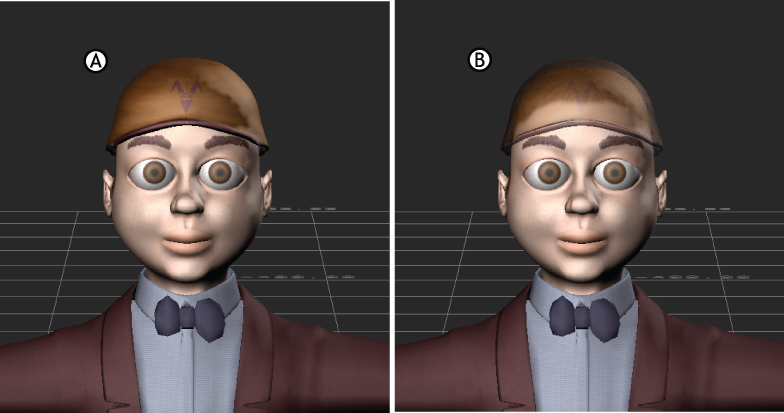
The following figures show the vest of a model with no shader and with a transparent Lighted shader.

A. Cap with no transparency shader B. Cap with Lighted shader Accurate Transparency set to 0.43.
Transparency Factor slider
The Transparency Factor slider lets you manipulate or animate the Transparency value for the Lighted shader. The default setting is 1.00.
A material’s Transparency settings can also interact with the Lighted shader’s Transparency values and affect the result. See Advanced material settings.