You can move a clip in time and in space. Moving a clip along a track in the Story window alters the time at which its animation plays. Moving a clip in the Viewer window alters where and in which direction its assets move.
To move a clip:
- Select a clip or many clips.
- Drag the clip(s) left and right on the track.
To move more than one clip at once, you can Ctrl-click each one to select them, then drag them. You can slash (/)-drag one clip to make all the clips to the right retain their distance from each other on the track.
Tip: To move multiple clips, try grouping them first so that you can move them along the timeline as a group. See Group Story clips.
To move a clip using its Clip In timecode:
- Select a clip.
- Double-click the clip.
- Enter a new value in the Clip In timecode, and press Enter.

A. Change the value of a Clip In timecode to move the clip.
Note: Do not change the Clip Out timecode of a clip unless you want to trim the clip.
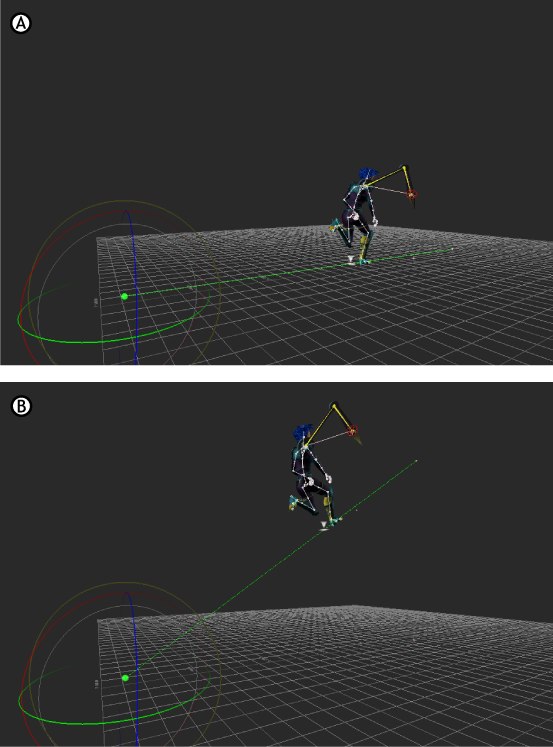
To change a clip’s trajectory in the Viewer window:
- Select a clip in the Story window.
- Translate and rotate it the Viewer window by manipulating its ghosts.
Translating and rotating a clip’s ghost changes where the animation plays and in what direction. The ghost you select is the pivot point of the clip when you rotate it.

Moving a clip in the Viewer window A. The start of a clip’s clip vector ghost is selected. B. The clip vector is rotated around the selection.

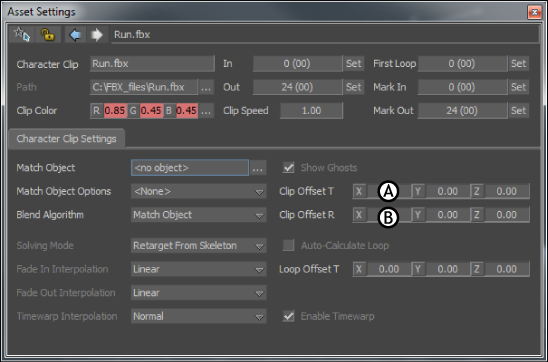
Asset Settings window A. Clip Offset T settings B. Clip Offset R settings