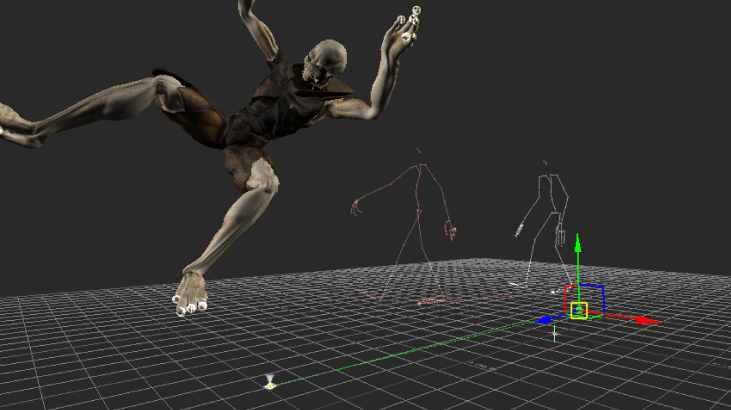
Ghosts are wireframe skeletons displayed in the Viewer window. When you play the animation, the ghosts enable you to see the animation of selected Story clips and tracks. You can use the ghosts of clips and tracks to change the location and orientation of animation.
Ghosts represents a track’s or clip’s content and change depending on what is selected. For example, when a character is selected in the Character field of a Character track, the character’s ghost resembles the character’s skeleton. When a cube is selected in a Track Content field, the cube’s model ghost is a circle.

Ghosts displayed in the Viewer window
Types of ghosts

Viewer window showing ghosts A. Model ghost B. Clip ghost C. Travelling ghost
There are three types of ghosts in the Story window: track, clip, and traveling ghosts (also knows as Travel nodes).
Track ghost
A track ghost is a white wireframe ghost that shows the result of a track. The Track ghost resembles a white skeleton on top of a model, as shown in the following figure.

Viewer window showing a Track ghost
A track’s ghost shows a composite of the result of the clips on that track or subtrack. (Click the Show/Hide Ghost button on that track to hide the ghost.) Track ghosts let you see the difference between the clip and the changes created by its sub-clips.
Clip ghost
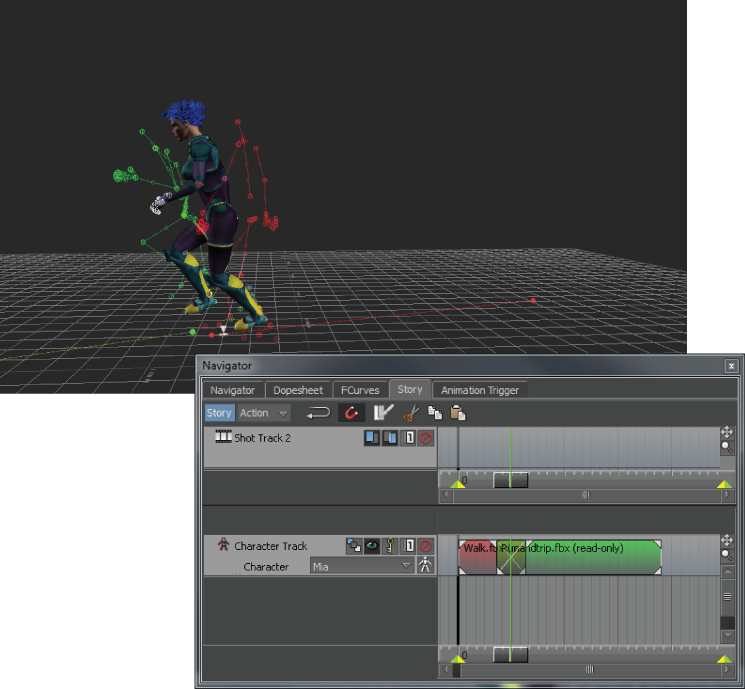
Clip ghosts are different-colored wireframe ghosts that show the length, location, and direction of a clip. Clip ghosts show the progress of the clips on a track. Notice how the color of the ghost in the following figure corresponds with the clip color.

Viewer and Story windows showing clip ghosts when blending clips
Clip ghosts also display a vector ghost, which displays as a dotted line in the Viewer window. It represents the length, location, and direction of a clip. You can select and manipulate clip vector ghosts in the Viewer window. See Selecting Story ghosts.
Travelling ghosts
A Travelling ghost, also known as a Travelling node, is the ghost of the track content or part of the track content. The default travelling node differs depending on the type of track content. For example, a character’s default travelling node is its hips, but a cube’s default travelling node is the entire cube. Travelling ghost display as a gray triangle that follows the track contents along the clip trajectories in the Viewer window.

Viewer window showing Travelling ghost
By default, the travelling node displays on the floor (XZ plane), underneath the part of the track content that defines the travelling node. You can modify a track’s travelling node and where it displays using settings in the Asset Settings window.
Travelling nodes can also be assigned to Story clips. Average and Project on XZ plane options let you project the ghost clip manipulator as an average of the travelling node, or on the XZ plane. You can access these options from the Properties pane of the Resources window. See Assign travelling nodes to Story clips.