Create and manage setups for each machining operation. Specify a workplane common for all toolpaths in a setup, and specify the stock geometry.
To create a setup
Click Setup tab > Create panel > Setup. The new setup is automatically activated.
To activate a setup
Choose a setup from the list on the Setup tab > Active panel.
To duplicate a setup
Click Setup tab > Create panel > Duplicate.
To delete a setup
- Activate the setup you want to delete.
- Click Setup tab > Active panel > Delete, and choose:
- Delete Setup to delete the setup and all the toolpaths associated with it.
- Delete Setup and release Toolpaths to delete the setup and return any associated toolpaths to the Toolpaths node of the Explorer.
To specify the workplane of a setup
The workplane associated with a setup is used for the setup's stock, and is automatically applied to toolpaths newly created in the setup. When a setup is activated, the setup's workplane is activated.
- Activate the setup.
- Click Setup tab > Edit panel > Settings.
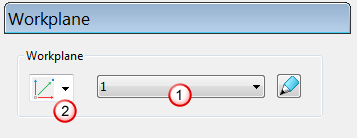
- On the Setup dialog, select Workplane from the list view to display the Workplane page.
- On the
Workplane page, choose a workplane from the list
 .
.

- If your project has no workplanes, choose an option from the workplane creation list
 to create a workplane of the selected type.
- If you want to edit the selected workplane, click
 to display the
Workplane Editor tab.
To specify the stock of a setup
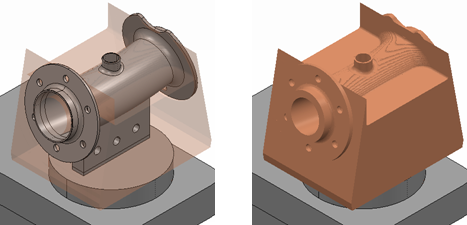
Stock represents the size, shape, and orientation of the raw material from which parts are machined. Specify the spatial attributes of the material to define the stock for each machining operation.

- Activate the setup.
- Click Setup tab > Edit panel > Settings.
- On the
Setup dialog, choose
Stock from the list view.
Tip: Specifying the stock is the same as specifying the block.
- On the Stock page, choose a foundation for the geometry of the stock from the Defined by list.
- Choose a Coordinate System to specify the spatial origin of the stock, and the orientation of its axes.
- Enter
Limits to specify the extents of the stock.
Note: These options vary depending on your choice from the Defined by list.Tip: You can automatically calculate the extents of the stock. Specify a Tolerance, Expansion, and Type of entity, then click Calculate.
- Click Close.
To select the machine tool and model location
The ability to select the machine tool and model location can be added for each setup.
- Activate the setup.
- Click Setup tab > Edit panel > Settings.
- On the Setup dialog, choose Machine Tool from the list view.
- In the Choose Machine Tool list, select the machine tool that you will use to machine the part. PowerMill saves the selection and uses the specified machine tool when simulating the machine tool.
- In the Choose Model Location list, select the workplane that positions the model in the correct position on the machine tool. This is useful for simulation purposes.
- Click Close.
To edit toolpath connections
- Activate the setup.
- Click Setup tab > Edit panel > Settings.
- On the Setup dialog, choose Connections from the list view.
- Click Edit Setup Connection to open the Setup Connections dialog where you can specify the connection settings for the toolpaths in the setup.
- In the Setup Connections dialog, click Apply, then close the dialog.
- Click Close.
To edit the thickness for a setup
Edit the thickness rules for models in a setup. When a setup is activated, the setup's thickness rules are copied into the global thickness defaults. When changes are made to the global thickness defaults, they are copied back into the active setup.
- Activate the setup.
- Click Setup tab > Edit panel > Settings.
- On the Setup dialog, choose Default Thickness from the list view.
- Click
Default Thickness
 to open the
Thickness Preferences dialog where you can set the default thickness rules for the model.
- In the Thickness Preferences dialog, click Apply, then close the dialog.
- In the Setup dialog, click Close.