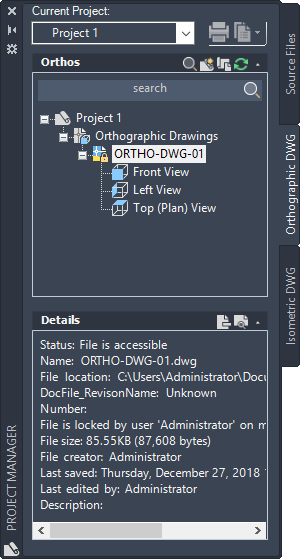
Displays orthographic drawings that have been created for a project.

Orthos Panel
Sets the overall organization for the orthographic drawings in the project.
You can add, remove, and reorder drawings and folders. You can also select drawings or folders to include their data in reports.
- Orthos Panel Toolbar
-
Provides buttons that open, add, link, and copy drawings.
-
 New Ortho DWG. Displays the New DWG dialog box, where you can create a new drawing based on the default template and add it to the project tree.
 - Copy Ortho DWG to Project.
 Opens the Select Drawing dialog box, where you can select one or more files to copy to the project.
-
- Project Tree Nodes
-
Each node in the project tree is designated by a specific icon.
-
 Project Node. Represents the top-level organizational unit in the project tree hierarchy.
 -
 Orthographic Folder Node. Represents the default folder that cannot be removed. You can add nested folders within this folder.
 -
 Drawing Node. Represents a drawing in the project.
 -
 Locked Drawing Node. Represents a drawing that is currently being edited.
 -
 Missing or changed Drawing Node. Represents a referenced drawing that has been moved or changed. To find the drawing, right-click the Missing Drawing node and click Drawing Properties. To update the drawing, right-click the node and click Validate Views.
 -

 Ortho View Node. The shaded area shows the projected view. If you make changes to the referenced model, you can right click the node to validate the view, causing this area to turn red. To update the drawing, right-click the node and click Update View.
-
For details, see the following topics: