Symbols represent how components display graphically in a P&ID drawing. If you have custom valves or pumps, for example, you can create specific graphical representations for them and add them to the tool palette.
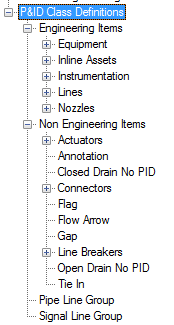
- In the Project Setup tree view, expand P&ID Class Definitions.
- Continue to expand the list until you locate and click the component or line whose symbol you want to add. Or, if you have several symbols to add you can click any item on the tree that displays an active Add Symbols button in the right pane (clicking Inline Assets, for example, enables the Add Symbols button).
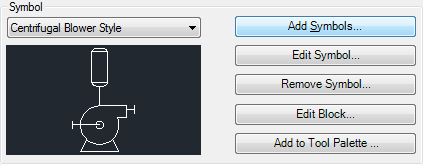
- On the Class Settings pane, under Symbol, click Add Symbols.
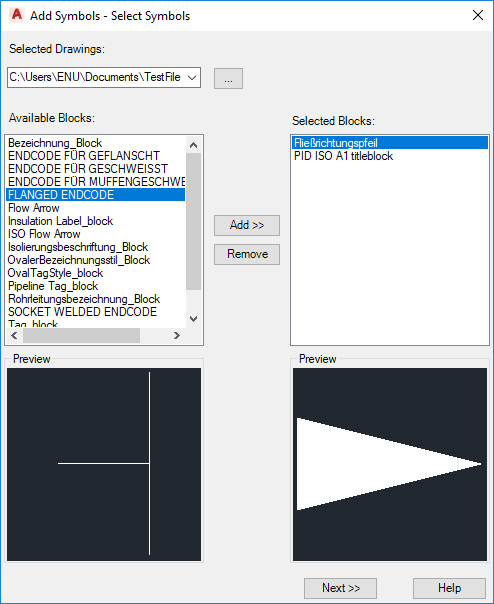
- In the Add Symbols - Select Symbols dialog box, click the [...] button.
- Navigate to and select one or more drawing files that contain the blocks you want. Click Open.
- In the Add Symbols - Select Symbols dialog box, do the following:
- Use the Selected Drawings drop-down list to select each file in turn. A list of the blocks in each file display in the Available Blocks box.
- Select the block or blocks you want. Click Add to move each block from the Available box to the Selected box.
- When your selected list is complete, click Next.
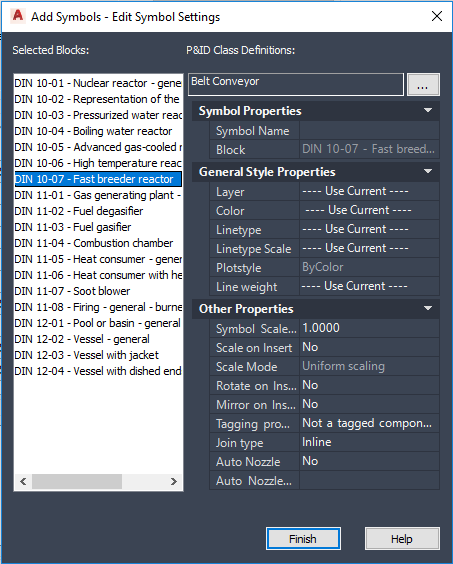
- In the Add Symbols - Edit Symbol Settings dialog box, you assign each block to a component and name it. As you work through the list, the ones that have been assigned become gray. Do the following:
- Select a block to be assigned to a class definition.
- Click the [...] button. In the Select P&ID Class dialog box, locate and select the class definition. Click OK.
- Under P&ID Class Definitions, in the Symbol Name box, enter a name.
- Change other properties as needed.
- Repeat these steps until each block has been assigned and its settings edited. Click Finish.
Note: If you fail to provide a class definition or symbol name for one or more new symbols, a dialog prompts you to either provide the missing information or continue without adding the symbols in question.
- In the Project Setup dialog box, click OK.