When you use mass floors to divide a mass, the software creates a visible mass floor at each specified level that intersects the mass, except for any level that coincides with a top face of the mass.
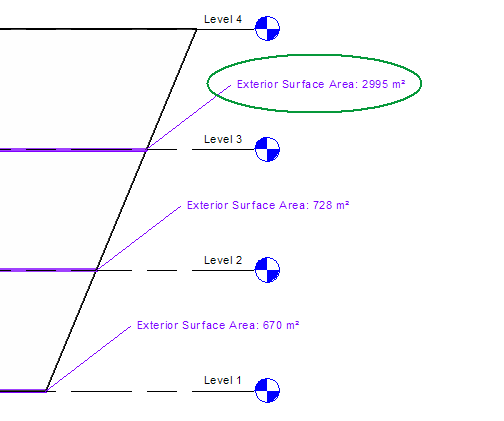
For example, suppose you create a mass that starts at level 1 and ends at level 4. In the Mass Floors dialog, you select levels 1, 2, 3, and 4. As a result, Revit creates mass floors at levels 1, 2, and 3. The software does not create a mass floor at level 4 because level 4 coincides with the top of the mass. It does not have exterior surface area (vertical surfaces extending upward from its perimeter) or volume (from level 4 upward). Instead, the exterior surface area for level 3 includes the vertical surfaces (walls) that enclose level 3 and also the top horizontal surface (roof) that occurs at level 4. As a result, the exterior surface area for the top floor of a mass may be disproportionately larger than lower floors.