Walls can be created in AutoCAD Architecture, imported to Revit, and used as a reference to manually retrace or recreate the structural walls.
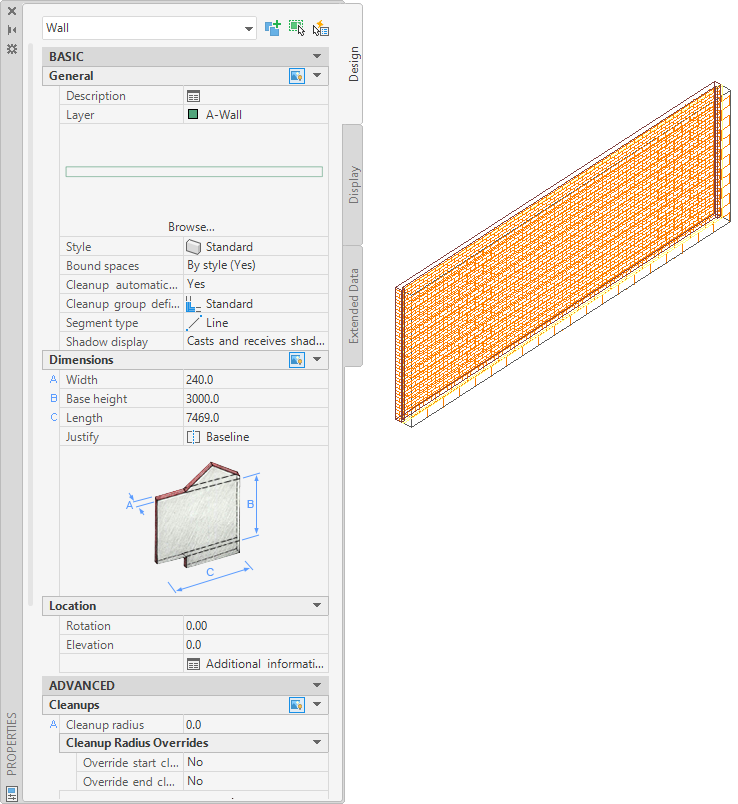
Wall in AutoCAD Architecture
The following properties of an AutoCAD Architecture wall are maintained when it is imported to Revit:
- Component Description: list of wall components, their materials and size
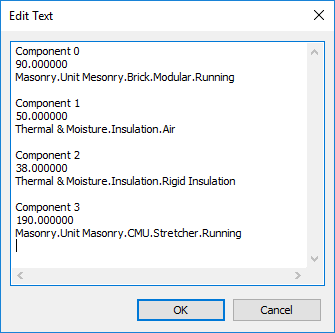
List of AutoCAD Architecture wall components, materials, and sizes in Revit
- Wall length
- Wall width
- Wall height
- AutoCAD Architecture style name
- Type name (Wall)
The following properties are added to the imported wall:
- Base level
- Base offset
- Instance scale (defined on import)
- Instance name (name of the imported DWG file)
To import walls from AutoCAD Architecture
- Create or open the Revit project into which you want to import the AutoCAD Architecture walls.
- In the Project Browser, select the view in which you want the imported walls to display.
- Import the
AutoCAD Architecture drawing into
Revit.
When you import an DWG or DXF file into Revit, you can import all layers, all visible layers, or selected layers. After they are imported, layers can be selectively deleted from Revit at any time.
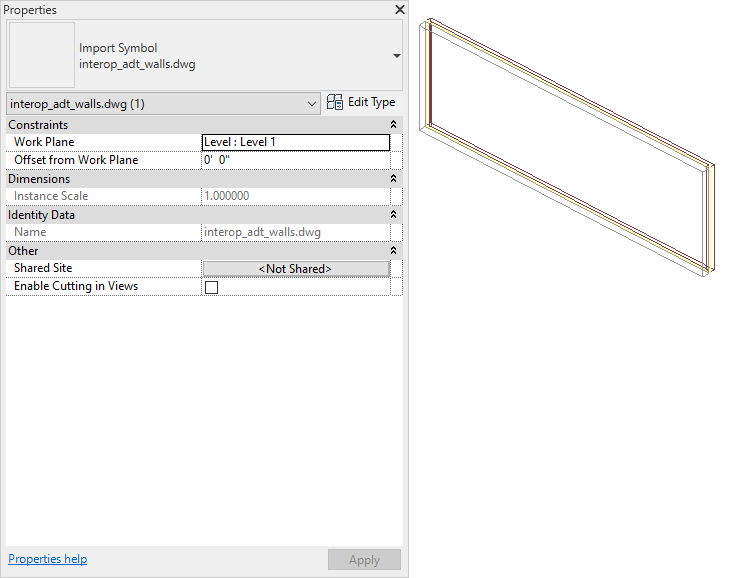
The imported drawing displays as a single import symbol.
- For more information about the imported objects, select the Import symbol, click Modify | <File Name> tab
 Import Instance panel
 (Query), and select wall blocks to query.
A query displays the object type, block name (identical to imported drawing name), layer, and style name, as applicable.
To exit Query mode, press Esc.
Note: The imported drawing can be exploded or partially exploded. To work with imported structural objects, perform a partial explode. - Click Modify | <File Name> tabImport Instance panelExplode drop-down
 (Partial Explode).
A partial explode on an imported drawing allows you to display the individual object’s properties.
Partially exploded AutoCAD Architecture wall in Revit
- To create a
Revit structural wall, click Structure tabStructure panelWall drop-down
 (Structural Wall).
- Click Modify | Place Structural Wall tabDraw panel
 (Pick Lines).
Note: The Pick Faces option is primarily designed for use with the Revit massing tool.
(Pick Lines).
Note: The Pick Faces option is primarily designed for use with the Revit massing tool. - Move the cursor over the imported wall, and click once to place the structural wall.
- If necessary, adjust the position of the new wall to match the imported wall more exactly.
- If the drawing will not be exported back to
AutoCAD Architecture and you have no further need for the imported geometry, delete it using one of the following methods:
- Select the Import symbol of the imported wall, and press Delete.
- Click Modify | <File Name> tabImport Instance panel
 (Delete Layers), and delete all wall layers.
- If the drawing was linked into
Revit, click Manage tabManage Projects panel
 (Manage Links), and unload the linked drawing from
Revit.
Note: You can reload the file later, if necessary.
(Manage Links), and unload the linked drawing from
Revit.
Note: You can reload the file later, if necessary.