Grids are constructions that are used to anchor structural columns, beams, and braces. Grids can be created in AutoCAD Architecture, imported to Revit, and converted to Revit grids.
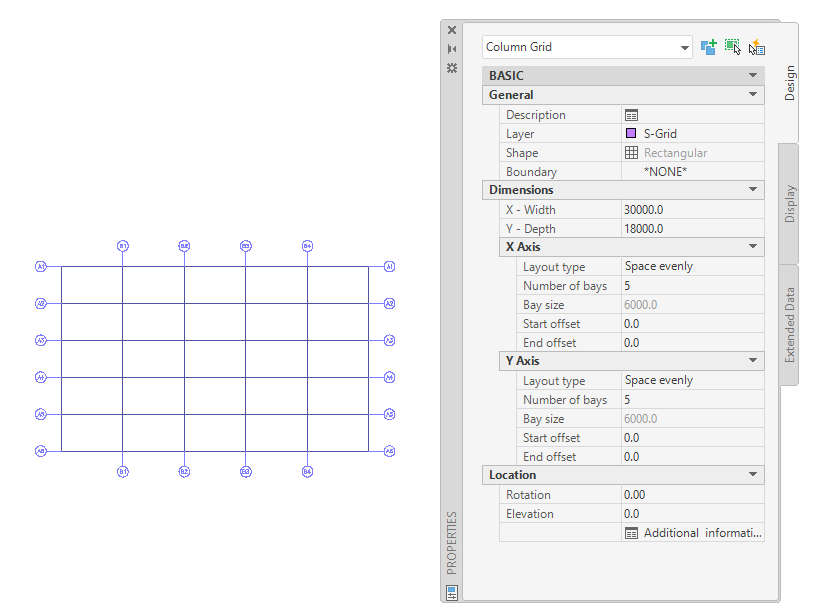
Column grid in AutoCAD Architecture
The following properties of an AutoCAD Architecture grid are maintained when it is imported to Revit:
- Grid lines
- Grid bubbles
- Grid type (Column Grid)
- Grid bubble type (Multi-View Bock Reference)
- Grid bubble layer
- Grid line layer
The following properties are added to the imported grid:
- Base level
- Base offset
- Instance scale (defined on import)
- Instance name (name of the imported DWG file)
To import a grid from AutoCAD Architecture
- Create or open the Revit project into which you want to import the AutoCAD Architecture drawing.
- In the Project Browser, select the view in which you want the imported grid to display.
- Import the
AutoCAD Architecture drawing into
Revit.
When you import a DWG/DXF file into Revit, you can import all layers, all visible layers, or selected layers. After they are imported, layers can be selectively deleted from Revit at any time.
The imported drawing displays as a single import symbol.
- For more information about the imported objects, select the Import symbol, click Modify | <File Name> tab
 Import Instance panel
 (Query), and select grid lines or grid bubbles to query.
A query displays the object type, block name (identical to the imported drawing name), layer, and style name, if applicable.
To exit Query mode, press Esc.
Note: The imported drawing can be exploded or partially exploded. To access the imported read-only AutoCAD Architecture objects, perform a partial explode. - Click Modify | <File Name> tabImport Instance panelExplode drop-down
 (Partial Explode).
A partial explode on an imported grid allows you to select the grid independently from the grid bubbles.
- To create a
Revit grid, click Structure tabDatum panel
 (Grid).
- Click Modify | Place Grid tabDraw panel
 (Pick Lines).
- Move the cursor over the imported grid until one grid line is highlighted.
- Do one of the following:
- To create a single Revit grid line, select the imported grid line. Repeat for each line in the grid, and then press Esc to end the grid tool.
- To create a Revit grid in one step, select an imported grid line, press Tab to select all of the imported grids together, and click to place the grids.
Note: If the AutoCAD Architecture grid that you are tracing contains grid bubbles, the resulting Revit grid will duplicate these bubbles. The text and numbers contained in the bubbles will be used as the names of the associated grid lines.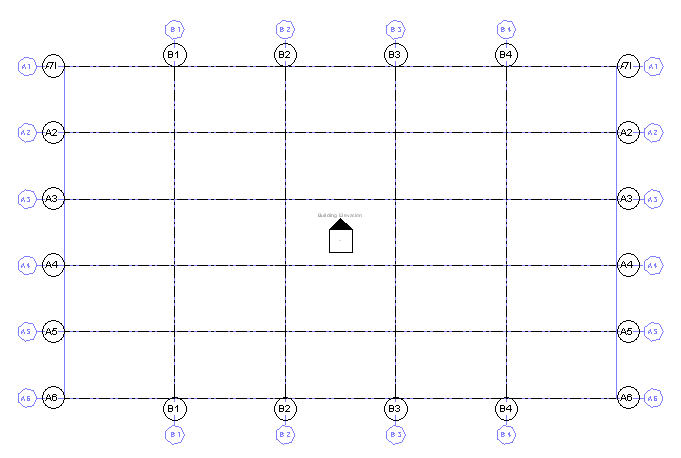
Revit grid created from AutoCAD Architecture grid
- If the drawing will not be exported back to
AutoCAD Architecture and you have no further need for the imported geometry, delete it using one of the following methods:
- Select the import symbol of the imported grid, and press
Delete.
This option works best if you have not partially exploded the imported grid. If the imported grid has been exploded, select the import symbols for the grid and grid bubbles independently.
- Click Modify | <File Name> tabImport Instance panel
 (Delete Layers), and delete all or selected layers of the imported drawing.
- If the drawing was linked into
Revit, click Manage tabManage Project panel
 (Manage Links), and unload the linked drawing from
Revit.
Note: You can reload the file later, if necessary.
(Manage Links), and unload the linked drawing from
Revit.
Note: You can reload the file later, if necessary.
- Select the import symbol of the imported grid, and press
Delete.