If you want the sheets in a sheet list to display in a particular order, you can create a custom Sheet Order parameter and add it to the sheet list properties.
The following procedure assumes that you have created a sheet list and added multiple sheets to the project.
- Open the sheet list.
- In the Project Browser, under Schedules/Quantities, click the sheet list name.
- On the Properties palette, for Fields, click Edit.
- Add a custom field named Sheet Order, as follows:
- On the Fields tab of the Sheet List Properties dialog, click Add Parameter.
- In the Parameter Properties dialog, under Parameter Type, select Project parameter.
- Under Parameter Data, for Name, enter Sheet Order.
- Click OK.
On the Sheet List Properties dialog, the Sheet Order field displays in the list of scheduled fields.
- Use the Sheet Order field to sort the sheet list, as follows:
- Click the Sorting/Grouping tab.
- For Sort by, select Sheet Order. Make sure that Ascending is selected.
- Click OK.
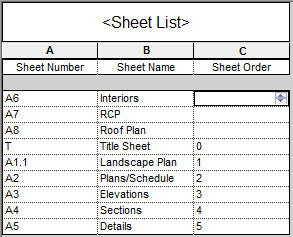
The sheet list displays a column titled Sheet Order. In a later step, you will hide this column so it does not display in the sheet list. First, however, you must assign a sheet order to each sheet in the list.
- For each sheet in the list, click in the Sheet Order column, and enter a number to indicate its order in the sheet sequence.
As you enter sheet order numbers, Revit re-sorts the list to place the rows in order.
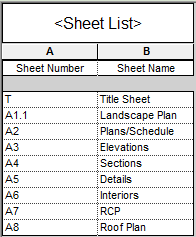
- To hide the Sheet Order field, right-click the column in the sheet list, and click Hide Column(s).
Revit hides the Sheet Order column in the sheet list.
 Note: To redisplay the Sheet Order column, right-click in the sheet list, and click Unhide All Columns.
You can place the sheet list on a sheet and format it as desired.