Code Group Design
Learn how to design groups of members.
Continue working in your project or open the project Frame_3D_Groups.rtd.
Note: The Tutorial files are located in C:\ProgramData\Autodesk\Examples\Tutorials.Click
 at the bottom left corner of the program as shown below.
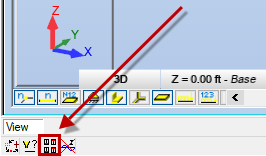
Alternatively, click View > Display.
The Display dialog opens.
Select Members, then select Sections - legend by colors, and then click OK.

Each of the sections displays a different color as shown below.

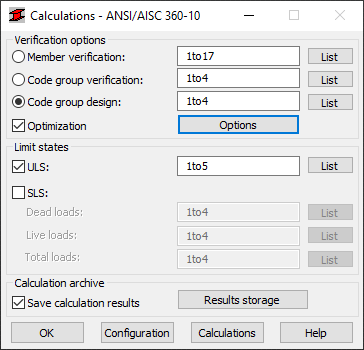
In the Calculations dialog, select the Code group design option, and then click List on the same line.
The Code Group Selection dialog opens.
Click All.
All the defined groups are added to the Code group list and will be considered during the design process.
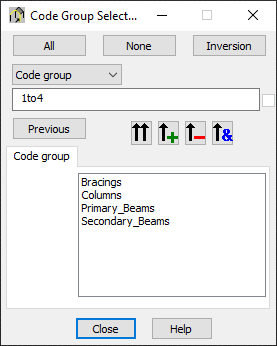
Close the Code Group Selection dialog.
In the Calculations dialog, select Optimization, and then click Options.
The Optimization Options dialog opens.
Select Weight, and then click OK.
During the calculations, the program will try to find the lightest section in the group of sections that meet the code defined criteria.
In the Calculations dialog, click Calculations.
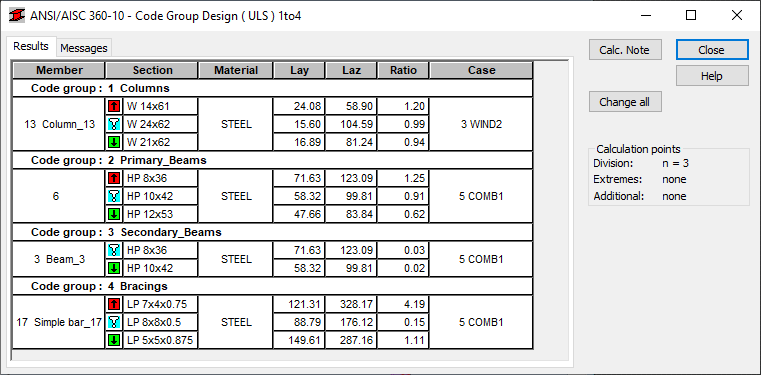
The Code Group Design dialog opens, displaying the most significant information about the sections.
 Note: In the Results tab, the blue icon (
 ) indicates the optimum section, while the red and green arrows (
 and (
and ( ) indicate sections which do not meet the code requirements, or sections which meet the requirements with excessive reserves.
Click Change all.
A message appears indicating that changes will be made in the database containing structure data, and that the result status will be "not available".
Click Yes to accept these changes.
The sections in the structure are automatically replaced with the optimized sections.
Click Close, and then, click Cancel in the Calculation Result Archiving dialog.
The calculation result can be saved in the calculation result archive. In this tutorial we will save the calculation result at the end of the design process.
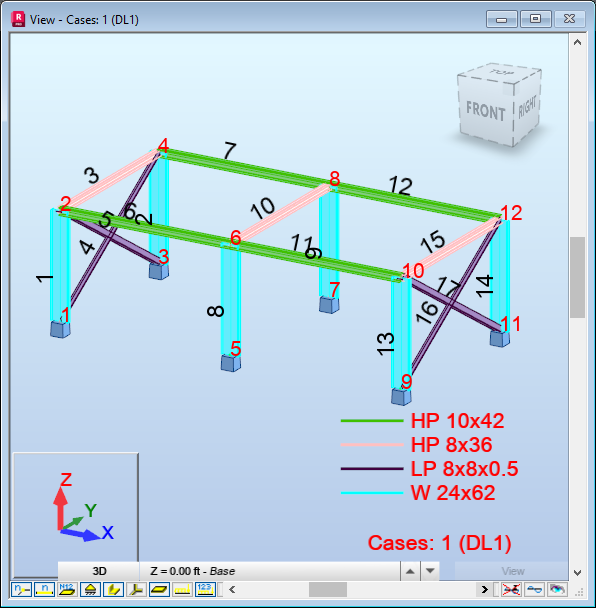
New sections are displayed in the View window:
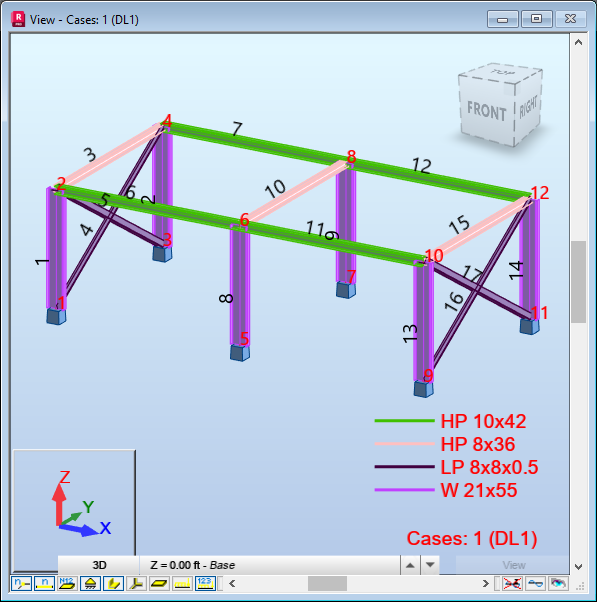 Note: The Section sizes were changed for all members groups:
- Primary_Beams from: from HP 12x63 to HP 10x42,
- Secondary_Beams: from HP 10x42 to HP 8x36,
- Bracings: from LP 2x2x0.1875 to LP 8x8x0.5,
- Columns: from W 12x96 to W 21x55.
Now that the sections have been optimized, you need to run the main calculations again. To do this, click Analysis >
 (Calculations).
In the Calculations dialog, click Calculations to start the design process with the updated sections.
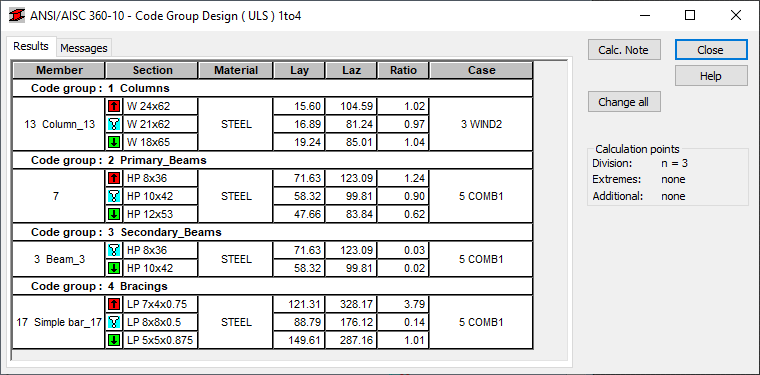
Results of the Code Group Design are shown below.
 Note: During the design process, the program found new lighter section for the Columns.
Click Change all, and then click Yes to accept the changes.
Click Close, and then in the Calculation Result Archiving dialog click Cancel.
The updated sections are displayed in the View window:
 Note: The section size for the Columns group was updated from W 21x55 to W 24x62.
The Columns sections have been optimized, you need to run the main calculations again. To do this, click Analysis >
(Calculations).In the Calculations dialog, click Calculations to start the design process with the updated columns sections.
The Results of the Code group design are shown below.
 Note: During the design process, the program found lighter sections for the Columns.
Click Change all, and then click Yes to accept the changes.
Click Close, and then in the Calculation Result Archiving dialog box click Cancel.
The New sections are displayed in the View window:
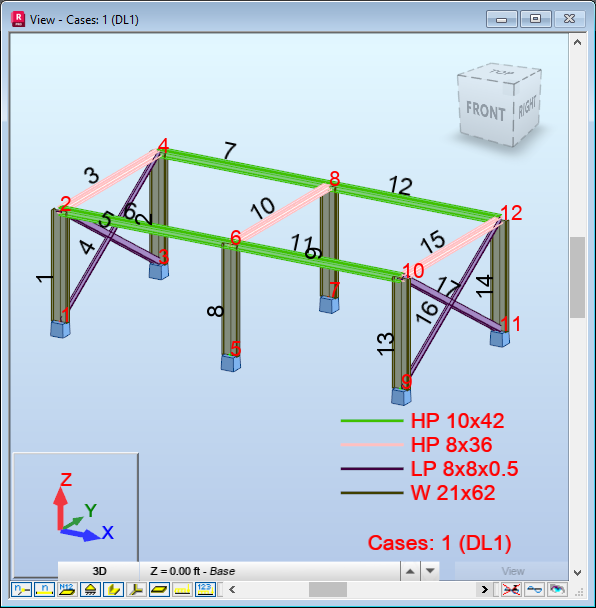 Note: The section size for the column group was updated from W 24x62 to W 21x62.
The Columns sections have been optimized, you need to run the main calculations again. To do this, click Analysis >
(Calculations).In the Calculations dialog, click Calculations to start the design process with the updated columns sections.
The Results of the Code Group Design are the same as before, so we can stop the design process.
Click Close, and then in the Calculation Result Archiving dialog click Save.
The final calculation result is saved in the calculation result archive.
Click
at the bottom left corner of the program as shown below.Alternatively, click View > Display.
The Display dialog opens.
Select Members, and then deselect Sections - legend by colors.
Click OK.
Save the project as Frame_3D_Design.rtd.