Define Member Groups
Learn how to define groups of members.
Continue working in your project or open the project Frame_3D_New_Member.rtd.
Note: The Tutorial files are located in C:\ProgramData\Autodesk\Examples\Tutorials.In the Definitions dialog, go to the Groups tab, and then click New.
Place the cursor in the Member list box, then go to the drawing area, and hold the Ctrl key to select all the columns.
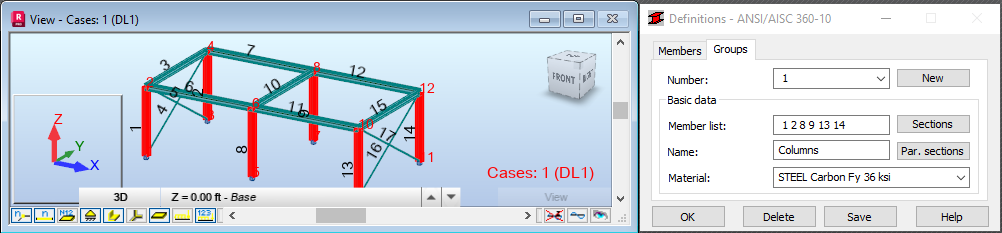
Alternatively, enter the column numbers 1 2 8 9 13 14 in the Member list box.
Type Columns in the Name box, and then click Save.
The defined group of columns is shown below.
In the Definitions dialog, click New to create a new group.
Place the cursor in the Member list box, then go to the drawing area, and hold the Ctrl key to select beams with numbers 6, 7, 11 and 12.
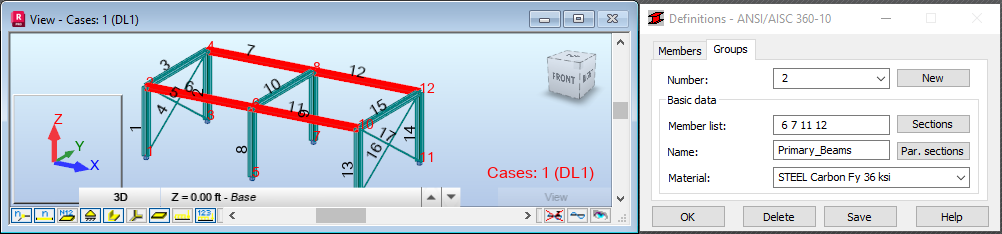
Alternatively, enter the beam numbers 6 7 11 12 in the Member list box.
Type Primary_Beams in the Name box, and then click Save.
The newly defined group of beams is shown below.
In the Definitions dialog, click New to create a new group.
Place the cursor in the Member list box, then go to the drawing area, and hold the Ctrl key to select beams with numbers 3, 10, and 15.
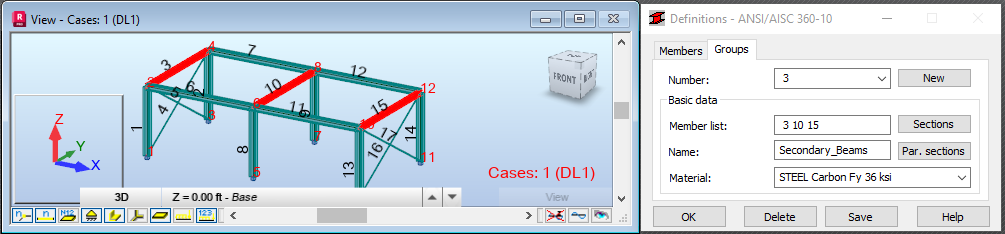
Alternatively, enter the beam numbers 3 10 15 in the Member list box.
Type Secondary_Beams in the Name box, and then click Save.
The newly defined group of beams is shown below.
In the Definitions dialog, click New to create a new group.
Place the cursor in the Member list box, then go to the drawing area, and hold the Ctrl key to select bracings with numbers 4, 5, 16 and 17.
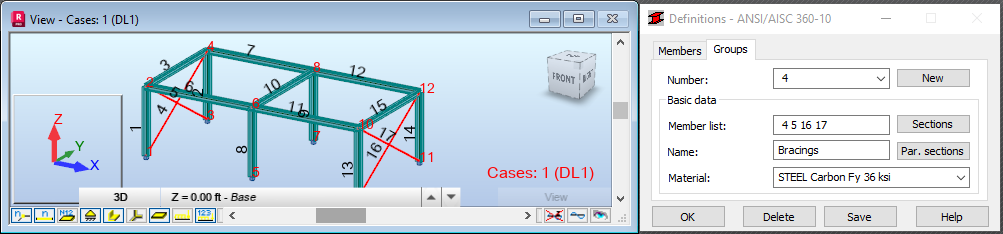
Alternatively, enter the beam numbers "4 5 16 17" in the Member list box.
Type Bracings in the Name box, and then click Save.
The newly defined group of bracing is shown below.
Save the project as Frame_3D_Groups.rtd.