Summary Values
Summary Values are evaluated on Summary entities (Parts, Planes, and Points) from the Design Study. They are used to compare important results quantities to evaluate the performance of design alternatives. Results are presented in a simple data table and plotted with bar graphs. This allows easy comparison across multiple scenarios against known design constraints or targets.
Example
An example showing how Summary Values are helpful involves a design study aimed at selecting the optimal heat sink design in a high-power electronics module. The heat sink is placed on a chip that has a 60°C failure temperature. Several design alternatives are analyzed, and the chip is selected as a Summary Part.
The resultant temperature on the chip in each Scenario is tabulated in a Critical Value table, and 60°C is specified as a Reference Value. By examining the tabulated data and the resultant bar graph, it is clear which designs cause the chip temperature to exceed the limit, as well as which one produces the lowest temperature.
Step 1: Create Summary Entities
Summary Values are calculated on Summary Entities created in the Results task:
Summary Planes are planar cutting surfaces positioned at critical locations in the model. Data assessed on a summary plane is presented in the Critical Values table. Use these to assess and compare flow rate, pressure drop, and bulk temperatures through specific passages or openings.
Summary Parts are selected parts from the model. A typical use is to compare the temperature on a part to assess if a known limit has been exceeded.
Summary Points are specific locations selected within the model. All of the available scalar quantities are available in the Critical Values table. Use these to assess and compare results values at specific locations in the model.
Step 2: Create Summary Value Table in the Output Bar
Each summary entity is listed in the appropriate branch of the Decision Center (Summary Parts, Summary Planes, or Summary Points, respectively)
Right click on an entity branch, and select Update summary values to propagate the data across all scenarios. This updates all Summary Values.
If this step is not performed, the table does not contain any data. If the warning symbol is displayed on a branch, the results in the model do not match the results in the table. To resolve this, click Update summary values.
The Summary Values tab of the Output bar lists the results for each summary entity.
If a summary entity is moved or a new one added, the data in the table does not match the summary entity, and the warning symbol will appear on the branch:
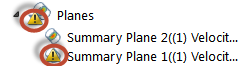
Right click on the entity and select Update summary values.
Step 3: Customize the Output Table
To customize the data presentation in the Critical Values Table:
- To add or remove a result value, click Display Quantities (from the right side of the window). Select or deselect the quantities you want to view.
- Change the units of a result by selecting an entry from the Units column
- Set a critical value (or a value important to your design) in the Reference column. Examples include the maximum allowable temperature or the minimum flow rate. This is very useful when plotting the data to assess which scenarios are within the allowed design constraints.
Step 4: Plot and Compare the Results
Use plots to compare results visually, and to evaluate performance relative to a target Reference value. To plot results data:
- Click on the results quantity name you wish to plot. To plot multiple rows, hold the ctrl key while you select result quantities.
- Click Plot Selected Rows to generate the bar graph. Each result quantity is plotted on a separate tab.
To plot all active quantities, click Plot all values.
When a Reference value is specified, it is drawn as a horizontal line across the plot. For each scenario, the difference between the Summary value and the Reference value is plotted.
On the Plot dialog, to change the range of the Y-axis, click the Scale button, and input new minimum and maximum values.
To save the plot to an image file, click the Save button.