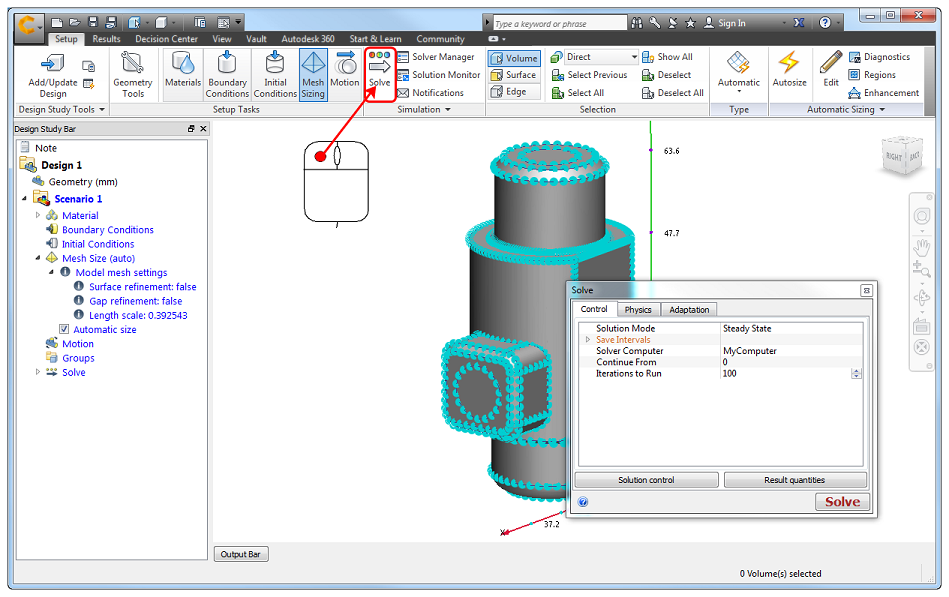
Solving the Simulation
This topic describes the basic workflow for running a CFD simulation. The Solve quick edit dialog provides tools to define the physical model, specify how often results are saved, and to run the simulation.
There are several ways to open the Solve dialog:
Method 1: Right click off the model, and select Solve

Method 2: Click Setup (tab) > Simulation (panel) > Solve

Method 3: In the Design Study bar, right click on Solve, and click Edit...

An additional way is to click Results (tab) > Iteration/Step (panel) > Solve.
To define how the simulation runs:
The Solve quick edit dialog contains three tabs. You can use these tabs to define the physics and how the simulation runs.
Use the Physics tab to enable physical models such as flow and heat transfer.
Use the Control tab to specify analysis parameters such as steady state or transient and to set the number of iterations.
Use the Adaptation tab to progressively improve the mesh by running the simulation multiple times. At the end of each run, Adaptation modifies the mesh based on the results, and uses the new mesh for the next cycle. The result is a mesh that is optimized for the particular simulation. The mesh is finer for high gradient regions, and coarser elsewhere.
To start the simulation:
Click the Solve button on the Solve quick edit dialog.
To run an inactive scenario:
You can run a scenario from the Design Study bar without first opening it (which loads it into the memory of the computer). For large models, this can save a lot of time.
- Right click on the scenario in the Design Study bar, and click Solve...
To Run Multiple Scenarios (Solver Manager)
The Solve quick edit dialog is ideal for launching individual scenarios. You can use the Solver Manager, however, to launch multiple scenarios. To open the Solver Manager:
- Click Setup (tab) > Simulation (panel) > Solver Manager.
- Alternatively, right-click off the model, and click Solver Manager.